GCP traces
Google Cloud Platform provides built-in monitoring and observability tools that allow users to collect and analyze metrics and traces from their GCP resources. Send Google Cloud traces seamlessly to Coralogix. Search, analyze, and visualize your data, gaining insights into application behavior, identifying errors, and troubleshooting problems.
Find documentation on sending us your Google Cloud metrics here.
Overview
This tutorial details how to send your Google Cloud traces for ingestion by Coralogix. It requires that you configure GCP to send all your traces to a BigQuery sink, then create a service account giving Coralogix access to the BigQuery table holding the trace records. The table will be scanned periodically, with traces imported to Coralogix.
Prerequisites
- Google Cloud SDK installed and a service account configured to facilitate automated intermediation.
Create a GCP Traces Integration
Set Up a BigQuery Traces Sink
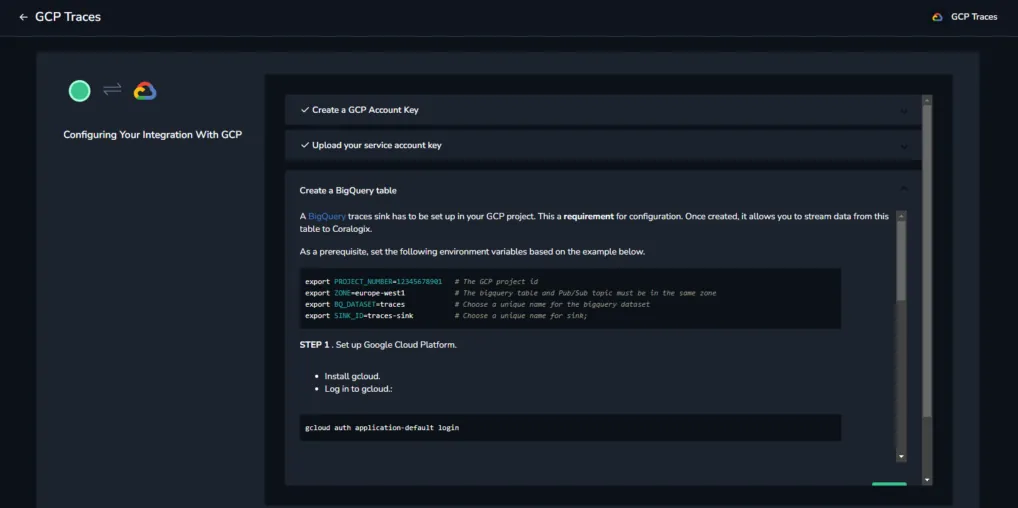
A BigQuery traces sink has to be set up in your GCP project. This a requirement for configuration. Once created, it allows you to stream data from this table to Coralogix.
As a prerequisite, set the following environment variables based on the example below.
export PROJECT_NUMBER=12345678901   # The GCP project id
export ZONE=europe-west1            # The bigquery table and Pub/Sub topic must be in the same zone
export BQ_DATASET=traces            # Choose a unique name for the bigquery dataset
export SINK_ID=traces-sink          # Choose a unique name for sink
STEP 1. Set up Google Cloud Platform.
-
Install gcloud.
-
Log in to gcloud:
gcloud auth application-default login
- Enable the necessary APIs:
gcloud services enable dataflow compute_component logging storage_component storage_api bigquery pubsub datastore.googleapis.com cloudresourcemanager.googleapis.com
STEP 2. Create the destination dataset.
bq --location=$ZONE mk \
--dataset \
--description="Traces" \
$PROJECT_ID:$BQ_DATASET
Notes:
-
The vse command may be modified to conform to your dataset settings.
-
GCP will write traces in a table named
cloud_tracein the dataset created in this step. -
Save the name of your dataset as the Dataset ID, and the name of your table as the Table ID for use in this integration.
STEP 3. Create the sink.
gcloud alpha trace sinks create $SINK_ID bigquery.googleapis.com/projects/$PROJECT_NUMBER/datasets/$BQ_DATASET
A successful setup will produce an output similar to this:
# You can give permission to the service account by running the following command.
gcloud projects add-iam-policy-binding bigquery-project \
--member <serviceAccount:export-0000001cbe991a08-3434@gcp-sa-cloud-trace.iam.gserviceaccount.com> \
--role roles/bigquery.dataEditor
STEP 4. Copy the command printed in the terminal in the previous step and replace bigquery-project with your project id.
STEP 5. Verify the sink was created successfully with the following command:
gcloud alpha trace sinks list
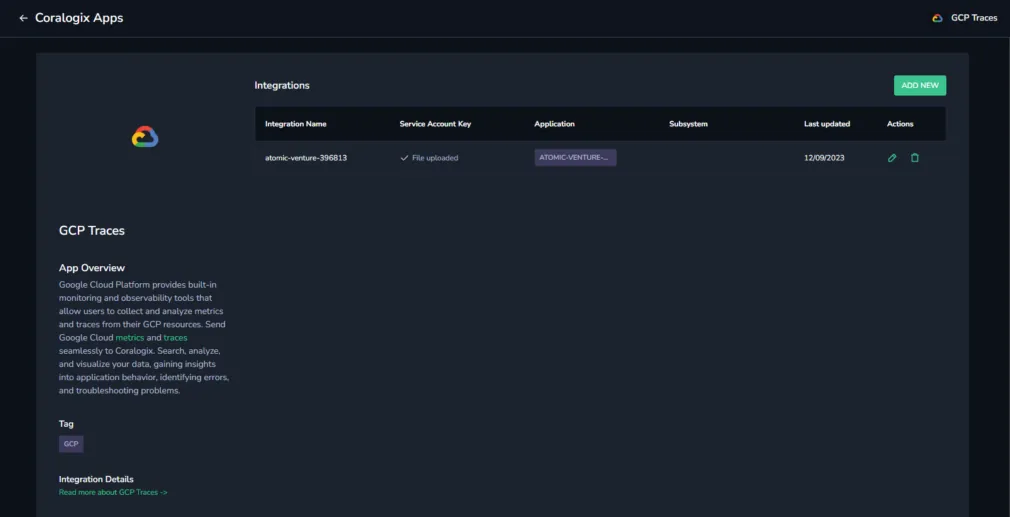
Create an Integration
To start collecting traces for a GCP project, an integration must be created. The configuration requires the BigQuery dataset name (Dataset ID) and table name (Table ID) created in the previous section.
STEP 1. Access Data Flow > Integrations.
STEP 2. From the Integrations section, select GCP Traces.
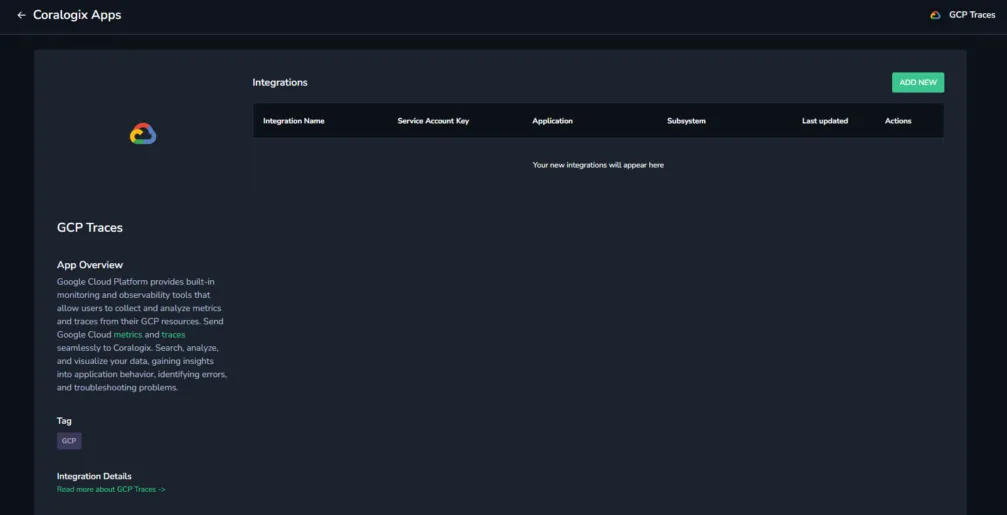
STEP 3. Click + ADD NEW.
STEP 4. Pick the ACCOUNT KEY/IMPERSONATION authentication flow and click NEXT (available for version 0.1.0 and later).
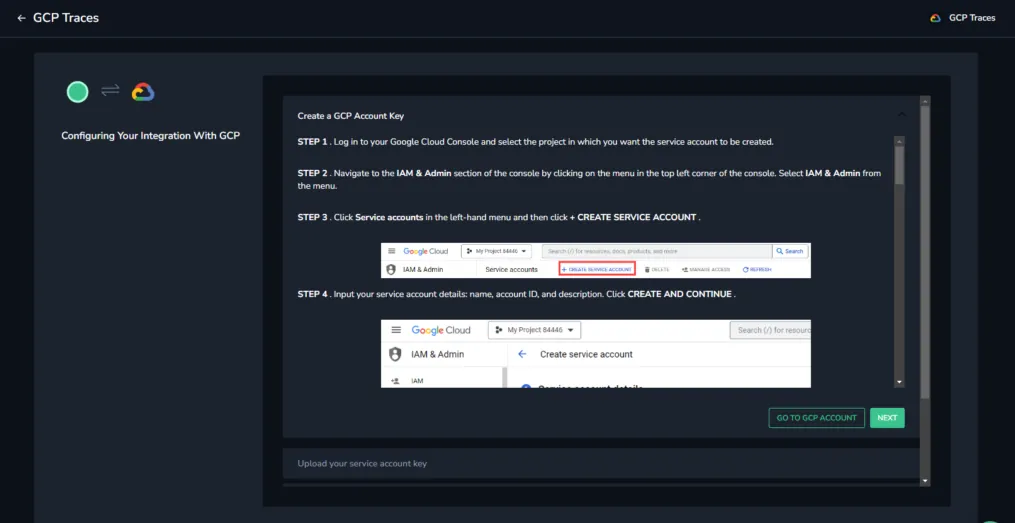
STEP 5. (For key-based authentication only) Click SELECT FILE and select the key file that you created in the previous section. A confirmation that the file was uploaded successfully will appear. Click NEXT.
STEP 6. Create the BigQuery table according to the instructions in the integration.
STEP 7. Click NEXT.
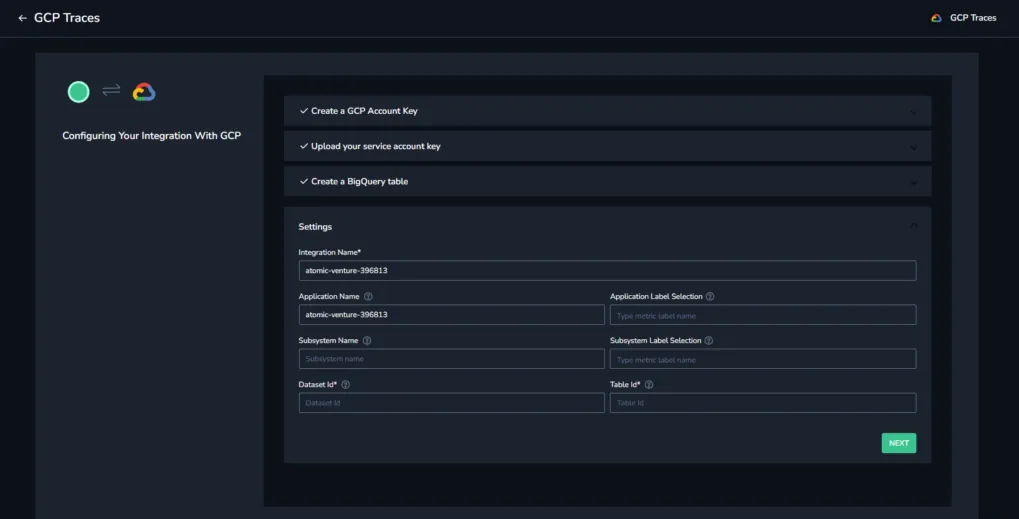
STEP 8. Select the application and subsystem settings.
-
Integration Name. The Project ID. This is auto-populated using the service account key.
-
Application Name. The default application name. This is auto-populated using the service account key.
-
Application / Subsystem Label Selection. Select labels that will be used to create the application name. The first label in
application_name_labelsmatching a resource attribute name or a trace label will be used as application name. If no match is found andapplication_nameis not empty, that value will be used. Otherwise, application name will be left empty. The same logic applies to Subsystem Label Selection. -
Subsystem Name. The default subsystem name.
-
Dataset ID. The name of the destination dataset created during your BigQuery traces sink setup.
-
Table ID. The name of the table created in the dataset during your BigQuery traces sink setup. The default is
cloud_trace. -
GCP Project ID: ID of a GCP project that you perform the setup for (for impersonation-based authentication only).
-
GCP Billing Project Id: A caller-specified project for quota and billing purposes. The caller must have
serviceusage.services.usepermission on the project. -
Service Account Email: Email of the service account you configured at the beginning (for impersonation-based authentication only).
Step 9. (For impersonation-based authentication only)
-
Click NEXT
-
Copy email of Coralogix principal
-
Click GO TO GCP ACCOUNT
-
Select the service account you created earlier. Navigate to the PERMISSIONS tab, click GRANT ACCESS and paste the copied email into the NEW PRINCIPAL field. Assign the
Service Account Token Creatorrole and click SAVE. -
Navigate back to the Coralogix portal.
It may take a few minutes for the GCP IAM role change to take effect.
Step 10. Click COMPLETE.