AWS CloudFormation logs
Send your logs to Coralogix using AWS CloudFormation, granting you observability into your CloudFormation events.
The following tutorial demonstrates how to configure an AWS CloudFormation template using a Lambda function to send your telemetry data to Coralogix.
Prerequisites
Sign up for a Coralogix account. Set up your account on the Coralogix domain corresponding to the region within which you would like your data stored.
Access your Coralogix Send Your Data - API Key.
Create an active AWS account with permissions to manage Lambda functions. Log in to your account as administrator.
Save the script for the AWS CloudFormation template on your desktop or in an S3 bucket.
Configuration
Create a Stack
Navigate to CloudFormation Page and click Create Stack (with new resources).
Note
AWS CloudFormation may create IAM resources.
Under the Stack option tab, select Template is ready. Upload a .yaml file from your S3 bucket or desktop, as in the example below.
Resources:
    LambdaFunction:
        Type: 'AWS::Lambda::Function'
        Properties:
        FunctionName: AwsLambdaExample
        Handler: index.handler
        Runtime: nodejs20.x
        Role: !GetAtt LambdaFunctionRole.Arn
        MemorySize: 1024
        Code:
            ZipFile: |
            exports.handler = async (event) => {
                return "Hello World!";
            };
    LambdaFunctionRole:
        Type: 'AWS::IAM::Role'
        Properties:
        AssumeRolePolicyDocument:
            Version: '2012-10-17'
            Statement:
            - Effect: Allow
                Principal:
                Service:
                    - lambda.amazonaws.com
                Action:
                - sts:AssumeRole
        Path: "/"
        Policies:
            - PolicyName: AppendToLogsPolicy
            PolicyDocument:
                Version: '2012-10-17'
                Statement:
                - Effect: Allow
                    Action:
                    - logs:CreateLogGroup
                    - logs:CreateLogStream
                    - logs:PutLogEvents
                    Resource: "*"
Click Next and define your stack name.
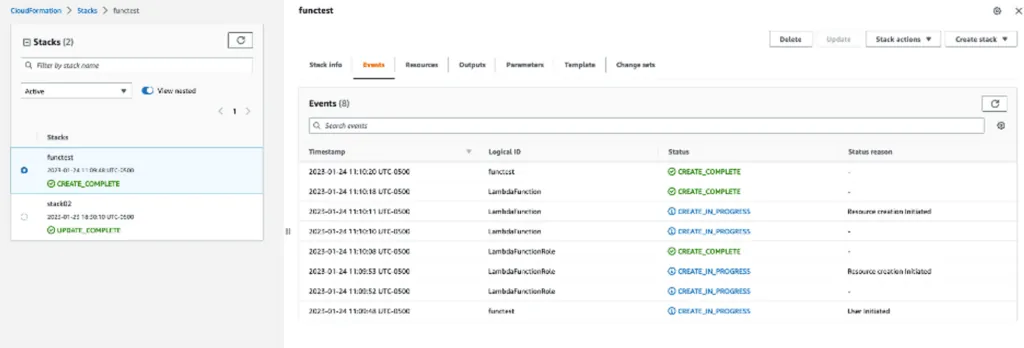
No other changes are required. Click Next and submit the stack.
API Destination
Navigate to Amazon EventBridge and click Create API destination in the API Destination section.
Define the name.
Choose the https://ingress./aws/event-bridge endpoint that corresponds to your Coralogix domain using the domain selector at the top of the page.
HTTP Method: POST
Invocation rate limit per second – 300 sec
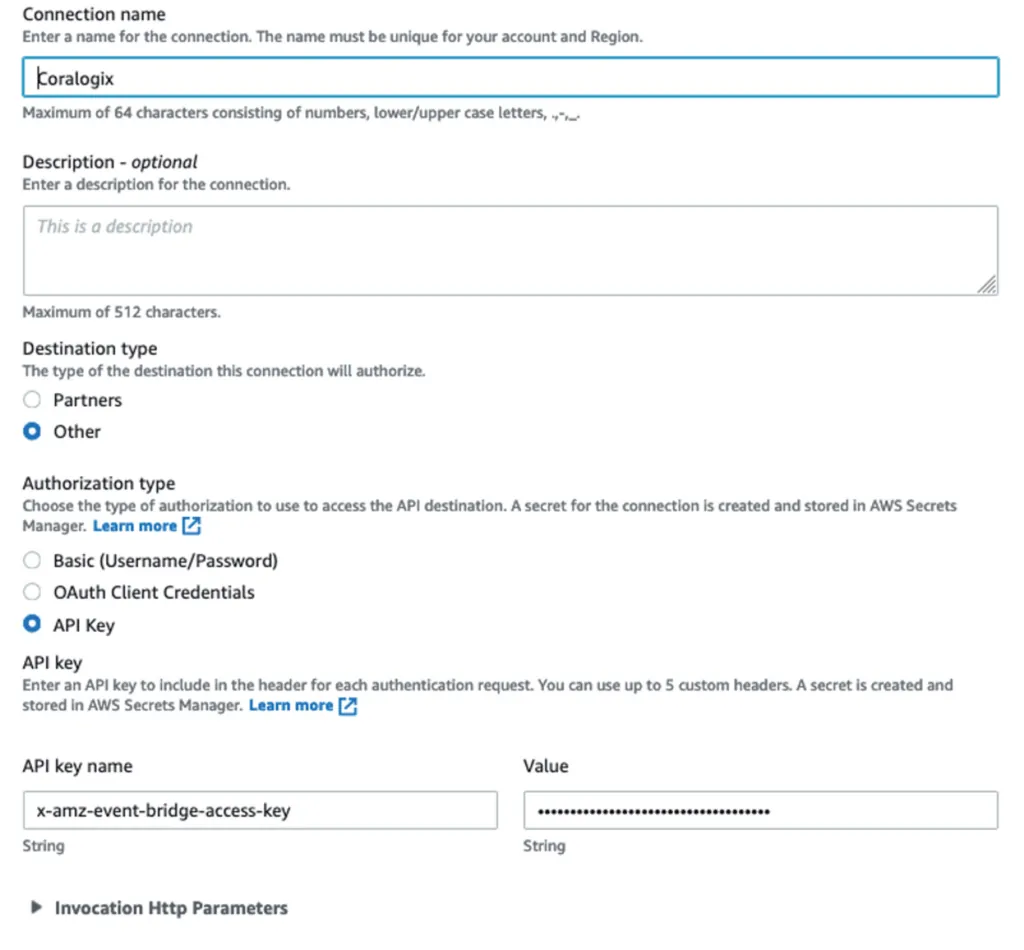
Select API Key as your Authorization type.
Name your API key x-amz-event-bridge-access-key.
The value of your API key will be your Coralogix Send Your Data - API Key.
Create a Rule in Amazon EventBridge
Name your Rule CoralogixRule. Leave all other settings as is. Click Next.
Select All Events.
Note
This may affect customer AWS billing.
Click Next.
In the Target, select EventBridge API destination and input the destination previously configured.
Click Next to the create the rule.
Validation
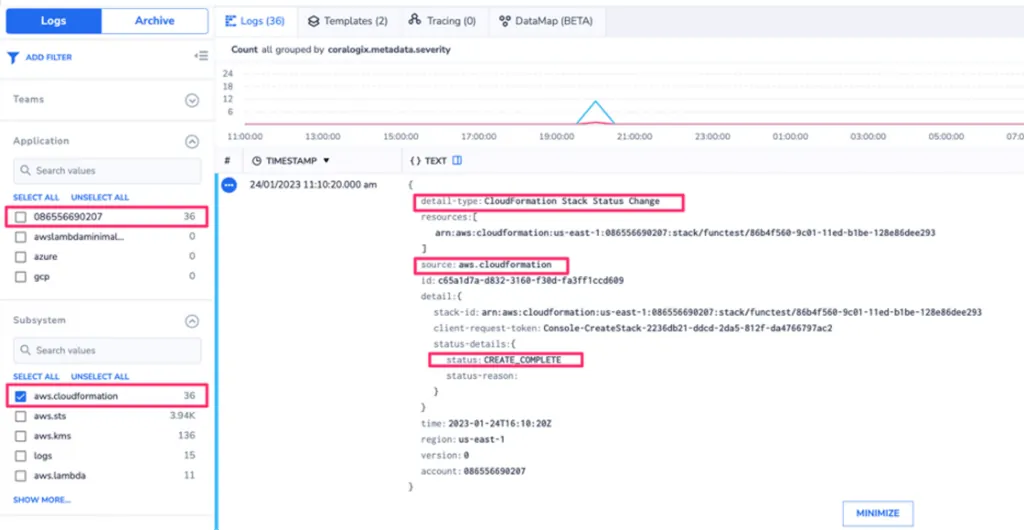
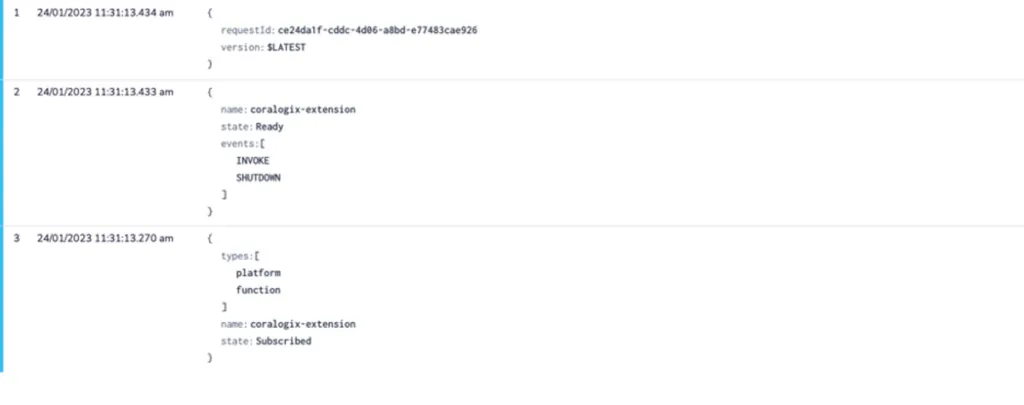
View your logs, together with the Lambda execution, in your Coralogix dashboard.
Additional resources
| Coralogix Endpoints | Coralogix Endpoints |
Support
Need help?
Our world-class customer success team is available 24/7 to walk you through your setup and answer any questions that may come up.
Feel free to reach out to us via our in-app chat or by sending us an email at [email protected].