We highly recommend using the AWS native Cross-Region Connectivity for PrivateLink, which provides a significantly easier way to connect across regions without complex VPC peering configurations.
VPC peering for PrivateLink (legacy)
Use this guide only when native cross-region PrivateLink cannot be used.
This approach is considered legacy and introduces additional operational complexity compared to AWS’s native cross-region connectivity.
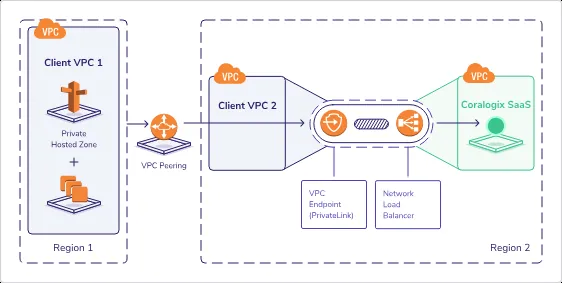
Coralogix PrivateLink requires an Interface VPC endpoint to be created in the AWS region that matches your Coralogix domain. This VPC is referred to as the same-region VPC.
When your monitored workloads (for example, AWS Lambda functions) run in a different AWS region, PrivateLink traffic cannot be routed directly. In this case, VPC peering can be used as a workaround to forward traffic from a cross-region VPC to the same-region VPC that hosts the PrivateLink endpoint.
This tutorial provides step-by-step guidance on configuring your cross-region VPC setup. The configuration ensures that any traffic directed to the PrivateLink domain name follows a route through the VPC peering connection in the same region.
Prerequisites
Before proceeding, ensure the following:
- A same-region VPC is already configured with a Coralogix PrivateLink endpoint. Follow the same-region PrivateLink configuration guide.
- Your Lambda function or workload is deployed in a cross-region VPC.
VPC Peering configuration
Step 1: Configure the DNS record
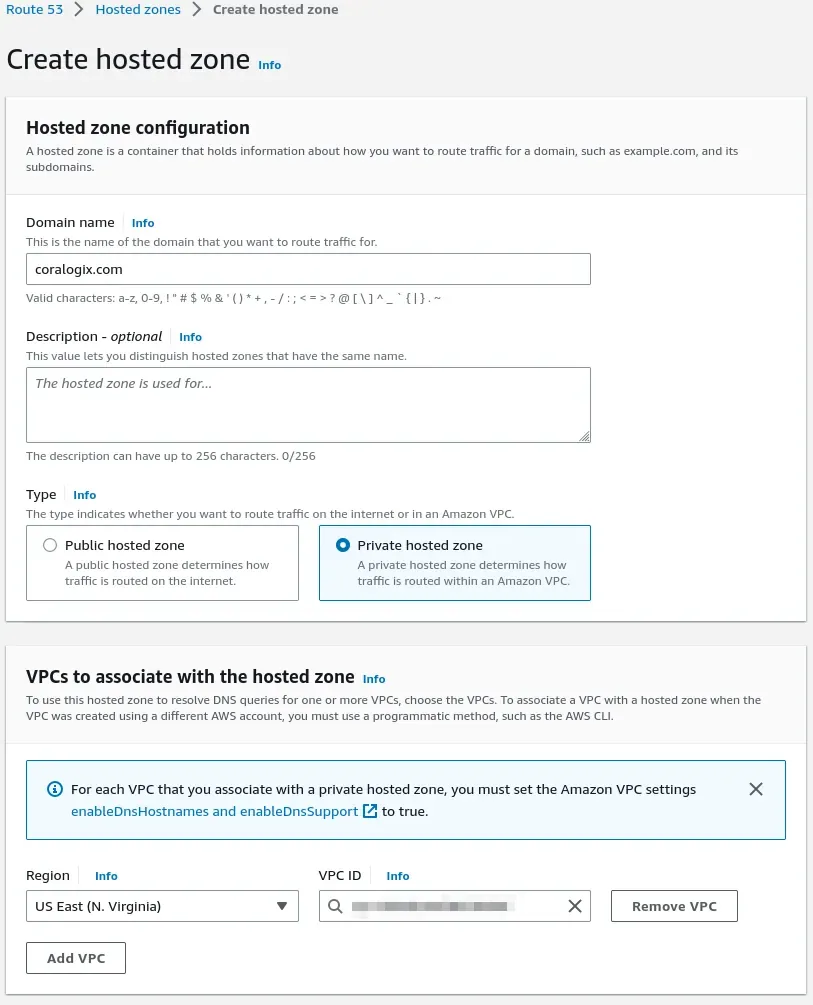
- Navigate to Route 53, then Hosted zones, then Create hosted zone.
- Associate the hosted zone with the cross-region VPC where your Lambda or workload runs.
- Click Created hosted zone.
DNS propagation may take time.
Step 2: Create an alias record for the PrivateLink VPC endpoint
- In the private hosted zone, create an A record.
- Set the record name to
ingress.private. - Configure the record as an alias to a VPC endpoint.
- Select the regional VPC endpoint in the same-region VPC (do not select AZ-specific endpoints).
- Save the record.
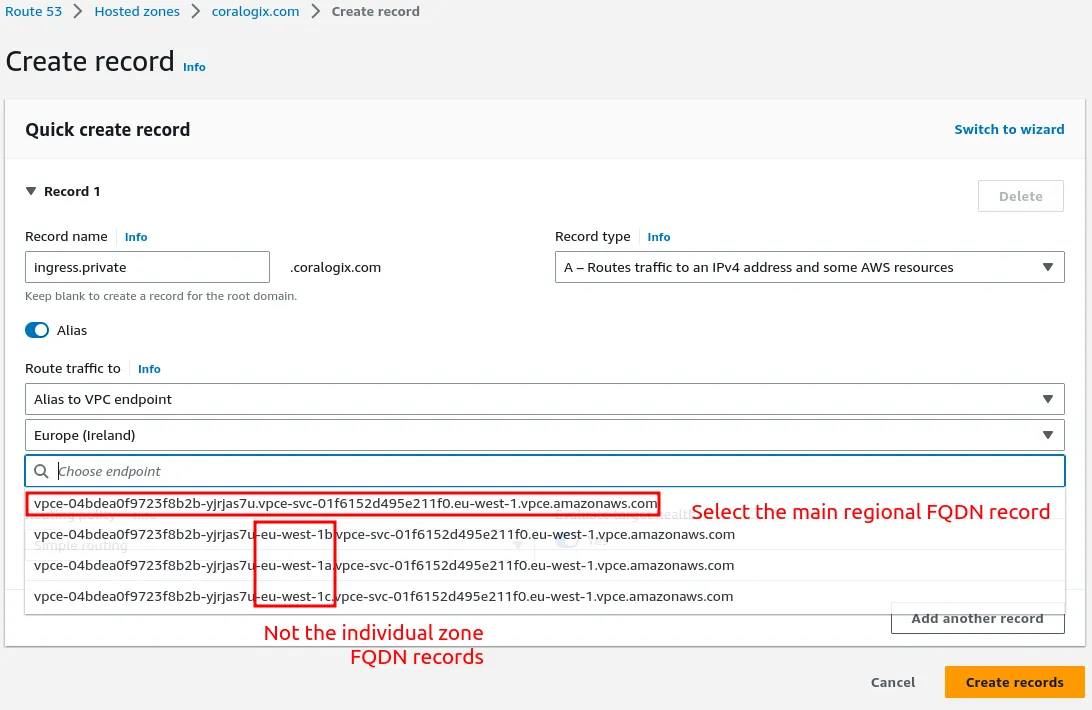
The Route 53 rules may take some time to propagate.
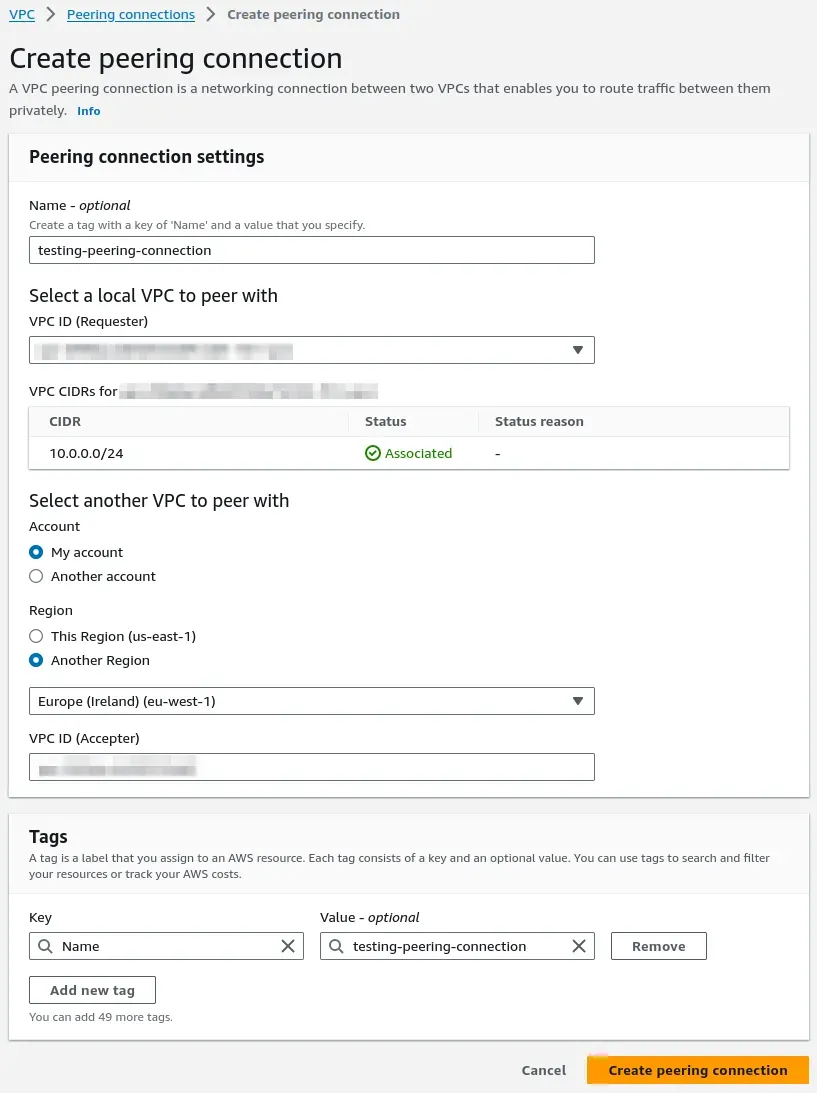
Step 3: Create the VPC peering connection
- Open the VPC console in the region of the cross-region VPC.
- Select Peering connections.
- Choose Create peering connection.
Step 4: Configure the VPC ID (Requester)
- In the local VPC to peer with section, select the region of your same-region VPC.
- Manually enter the VPC ID (Accepter) of the same-region VPC.
- Select Create peering connection.
Step 5: Find and accept the VPC peering request in the target region
- Switch to the target region.
- In Peering Connections, locate and accept the pending peering request.
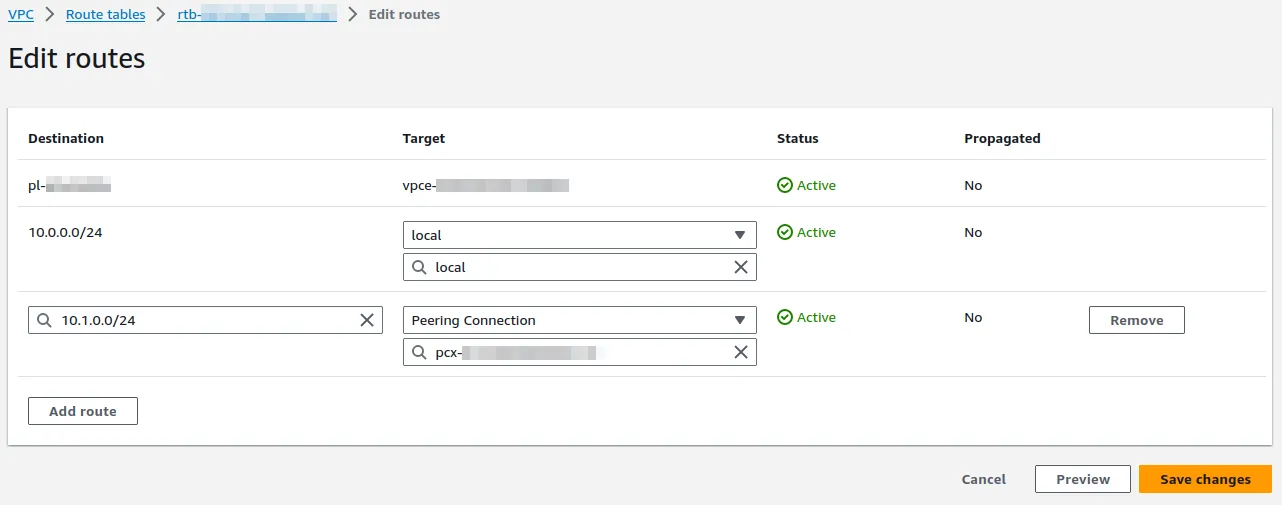
Step 6: Update route tables (cross-region VPC)
- Adjust the routing tables of the cross-region VPC subnets.
- Validate that the routing table(s) in use by the subnets include routes to the same-region VPC CIDR range. The Target will be the peering connection you just created.
- Click Save changes.
Step 7: Update routing tables (same-region VPC)
Repeat the routing configuration for the same-region VPC:
- Add routes back to the cross-region VPC CIDR range
- Use the same VPC peering connection as the target
This ensures return traffic is routed correctly.
- An Internet Gateway or NAT Gateway may be useful for testing and troubleshooting.
- DNS and routing changes may take time to fully propagate.
Next steps
After VPC peering and routing are complete, align the VPC configuration with your Lambda function. Instructions can be found here.