Cloudflare
Cloudflare Enterprise customers have access to Logpush service, which allows you to forward logs to cloud service providers like AWS. This tutorial demonstrates how to send your logs to Coralogix.
Send logs directly
Prerequisites
Coralogix Send-Your-Data API key
Cloudflare ZoneID / AccountID - Find the relevant id in the cloudflare dashboard under ‘Websites’ ->
<your_site>-> ‘API (scroll down)’.
Configuration
To start sending data directly to Coralogix, select the type of logs (data-sets) and fields that will be sent here.
To create the logpush job, call the API using the terminal. Input your Coralogix domain to create your endpoint URL: https://ingress./cloudflare/v1/logs.
curl -s https://api.cloudflare.com/client/v4/zones/xxxxxxxxxxxxxxxxxx/logpush/jobs -X POST -d '
{
  "name": "coralogix",
  "output_options": {
      "field_names": ["BotDetectionIDs", "BotDetectionTags", "BotScore", "BotScoreSrc", "BotTags", "CacheCacheStatus", "CacheReserveUsed", "CacheResponseBytes", "CacheTieredFill", "ClientASN", "ClientCountry", "ClientDeviceType", "ClientIP", "ClientIPClass", "ClientMTLSAuthCertFingerprint", "ClientMTLSAuthStatus", "ClientRegionCode", "ClientRequestBytes", "ClientRequestHost", "ClientRequestMethod", "ClientRequestPath", "ClientRequestProtocol", "ClientRequestReferer", "ClientRequestScheme", "ClientRequestSource", "ClientRequestURI", "ClientRequestUserAgent", "ClientSSLCipher", "ClientSSLProtocol", "ClientSrcPort", "ClientTCPRTTMs", "ClientXRequestedWith", "ContentScanObjResults", "ContentScanObjSizes", "ContentScanObjTypes", "Cookies", "EdgeCFConnectingO2O", "EdgeColoCode", "EdgeColoID", "EdgeEndTimestamp", "EdgePathingOp", "EdgePathingSrc", "EdgePathingStatus", "EdgeRequestHost", "EdgeResponseBodyBytes", "EdgeResponseBytes", "EdgeResponseCompressionRatio", "EdgeResponseContentType", "EdgeResponseStatus", "EdgeServerIP", "EdgeStartTimestamp", "EdgeTimeToFirstByteMs", "JA3Hash", "JA4", "JA4Signals", "LeakedCredentialCheckResult", "OriginDNSResponseTimeMs", "OriginIP", "OriginRequestHeaderSendDurationMs", "OriginResponseDurationMs", "OriginResponseHTTPExpires", "OriginResponseHTTPLastModified", "OriginResponseHeaderReceiveDurationMs", "OriginResponseStatus", "OriginSSLProtocol", "OriginTCPHandshakeDurationMs", "OriginTLSHandshakeDurationMs", "ParentRayID", "RayID", "RequestHeaders", "ResponseHeaders", "SecurityAction", "SecurityActions", "SecurityRuleDescription", "SecurityRuleID", "SecurityRuleIDs", "SecuritySources", "SmartRouteColoID", "UpperTierColoID", "WAFAttackScore", "WAFRCEAttackScore", "WAFSQLiAttackScore", "WAFXSSAttackScore", "WorkerCPUTime", "WorkerStatus", "WorkerSubrequest", "WorkerSubrequestCount", "WorkerWallTimeUs", "ZoneName"],
      "timestamp_format": "UnixNano"
  },
  "destination_conf": "https://ingress./cloudflare/v1/logs?header_Authorization=Bearer%20<send_your_data_key>&header_timestamp-format=UnixNano&header_dataset=HTTPRequests",
  "max_upload_bytes": 5000000,
  "max_upload_records": 1000,
  "dataset": "http_requests",
  "enabled": true
}' \
--header "X-Auth-Email: <cloudflare_email>" \
--header "X-Auth-Key: <cloudflare_key>" \
--header "Content-Type: application/json"
Notes:
The
"max_upload_bytes": 5000000configuration is important here, as any requests over 5MiB would be rejected by the Coralogix API with413response code.Replace
<zone_id>with your site zone id,<send_your_data_key>with your coralogix Send-Your-Data API key and 'X-Auth-Email' 'X-Auth-Key' with your Cloudflare credentials.To change the sent dataset, change the 'dataset' field and `header_dataset` inside the 'destination_conf' field using the table below.
To change the sent fields, change the 'output_options' field, each dataset has different fields.
Each dataset has a different 'timestamp' key, providing it in the 'output_options' field is required, also using the unixnano format for the timestamp is also required. Find out more about log fields here.
To configure Account-scoped datasets use 'https://api.cloudflare.com/client/v4/accounts/
<account_id>/logpush/jobs'.By default, the integration will set
application_nameasCloudflare, andsubsystem_nameas the data set name. To overwrite these parameters, add the following:header_CX-Application-Name- application name overrideheader_CX-Subsystem-Name- subsystem name override
| Dataset name | Header name | 'Timestamp' key | Scope |
|---|---|---|---|
| dns_logs | DNSLogs | Timestamp | Zone |
| firewall_events | FirewallEvents | Datetime | Zone |
| http_requests | HTTPRequests | EdgeStartTimestamp | Zone |
| nel_reports | NELReports | Timestamp | Zone |
| spectrum_events | SpectrumEvents | Timestamp | Zone |
| page_shield_events | PageShieldEvents | Timestamp | Zone |
| audit_logs | AuditLogs | When | Account |
| audit_logs_v2 | AuditLogsV2 | ActionTimestamp | Account |
| gateway_dns | GatewayDNS | Datetime | Account |
| gateway_http | GatewayHTTP | Datetime | Account |
| gateway_network | GatewayNetwork | Datetime | Account |
| network_analytics_logs | NetworkAnalyticsLogs | Datetime | Account |
| access_requests | AccessRequests | CreatedAt | Account |
| casb_findings | CASBFindings | DetectedTimestamp | Account |
| dns_firewall_logs | DNSFirewallLogs | Timestamp | Account |
| magic_ids_detections | MagicIDSDetections | Timestamp | Account |
| workers_trace_events | WorkersTraceEvents | EventTimestampMs | Account |
| sinkhole_http_logs | SinkholeHTTPLogs | Timestamp | Account |
After creating the logpush, view it in the terminal.
curl -s https://api.cloudflare.com/client/v4/zones/<zone_id>/logpush/jobs -X GET \
-H "X-Auth-Email: <cloudflare_email>" \
-H "X-Auth-Key: <cloudflare_key>"
Or in the dashboard itself under ‘Websites’ -> <your_site> -> ‘Analytics’ -> ‘Logs’.
Send logs via S3 bucket
Prerequisites
AWS S3 bucket - Follow the tutorial to send logs from the S3 bucket to Coralogix: https://coralogix.com/integrations/data-collection-s3/
Configuration
To enable the Clouflare Logpush service:
Log in to the Cloudflare dashboard
Ensure the Enterprise domain you want to use with Logpush is selected
Select the Analytics app in the top menu
Select the Logs section in the secondary menu

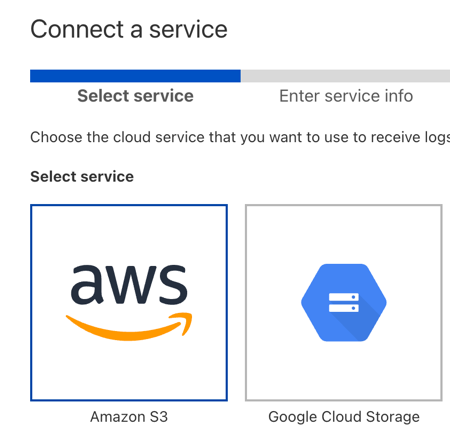
Select Connect a service. A modal window opens where you will need to complete several steps.

Under Select service, pick your Amazon S3 and click Next.
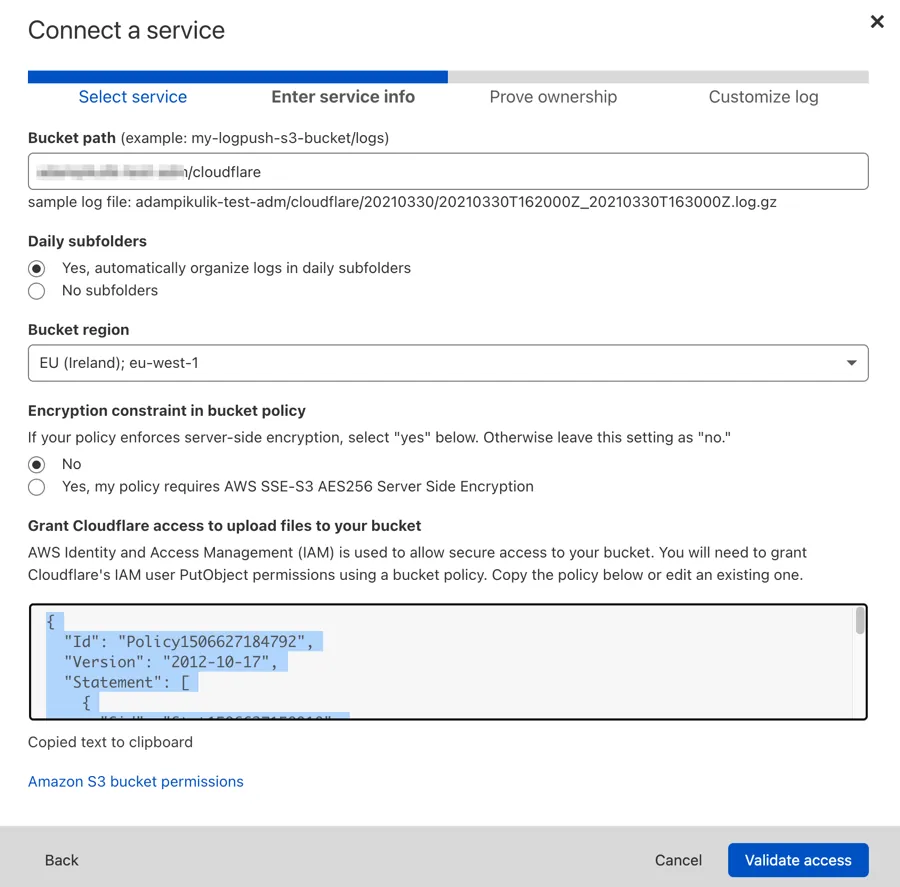
Enter or select the following:
Bucket path
Daily subfolders
Bucket region

Copy the policy from the field below "Grant Cloudflare access to upload files to your bucket"
In new window go to S3 >
> Permissions > Bucket Policy Click on the Edit button at the Bucket Policy.
Paste the copied policy and save changes.
In the Cloudflare dashboard, click Validate access.
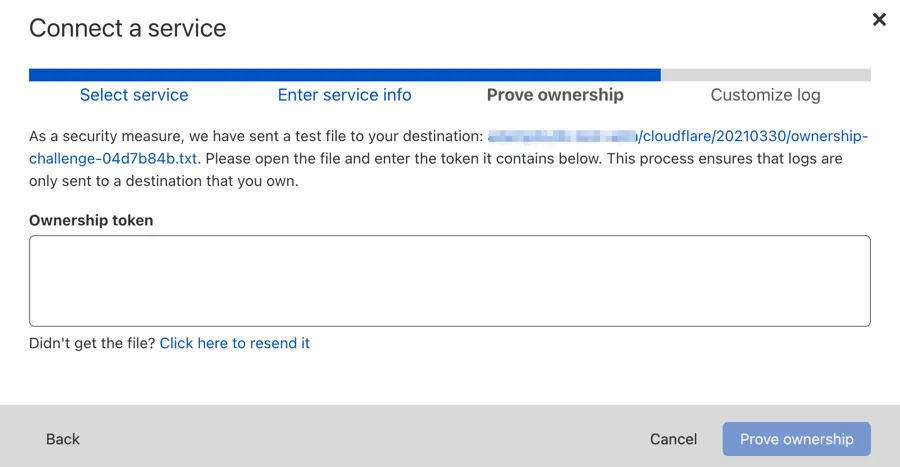
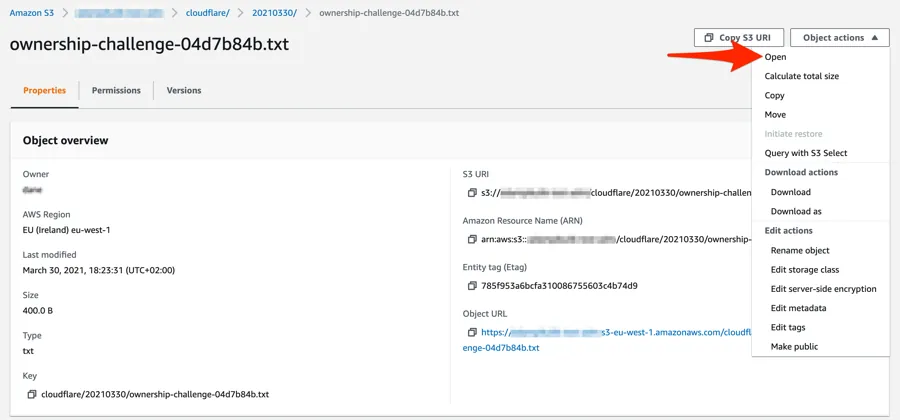
Follow the on-screen instructions to enter the Ownership token (included in a file Cloudflare sends to your Amazon S3 bucket).

Open a file with token on your Amazon S3 bucket and paste the token into Ownership token field:
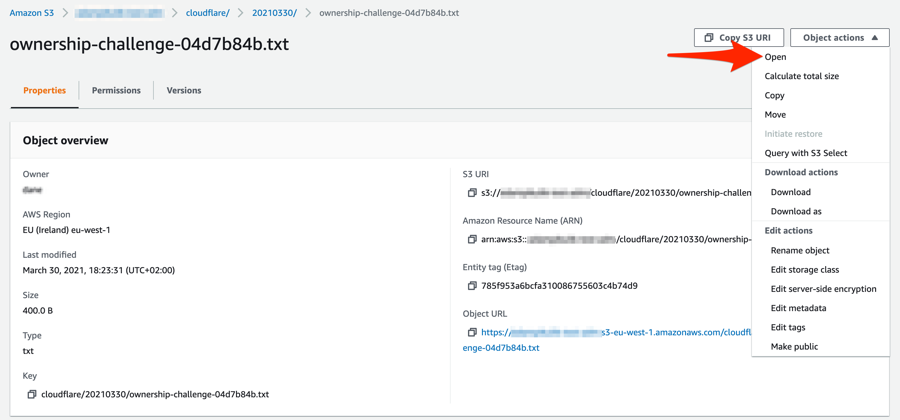
Click the "Prove ownership" button.
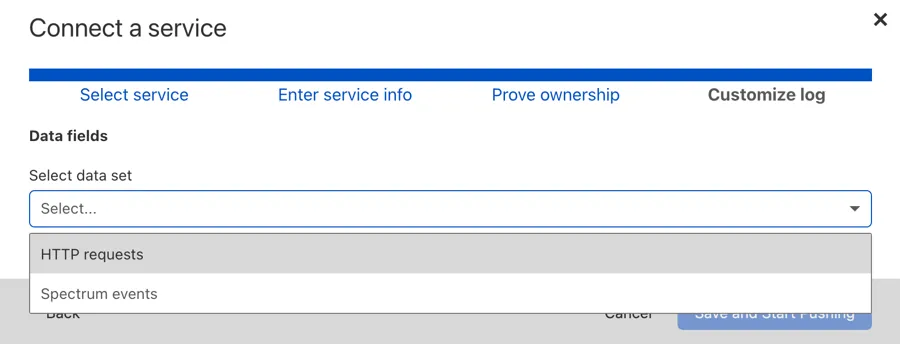
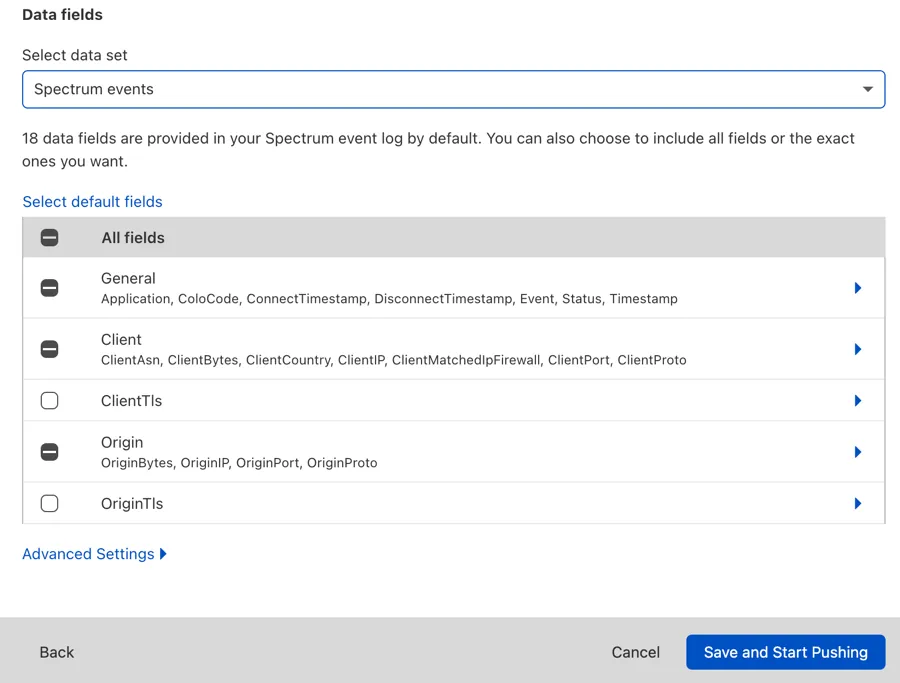
Next in the Customize log screen, select the data set in which you're interested (currently HTTP requests or Spectrum events).

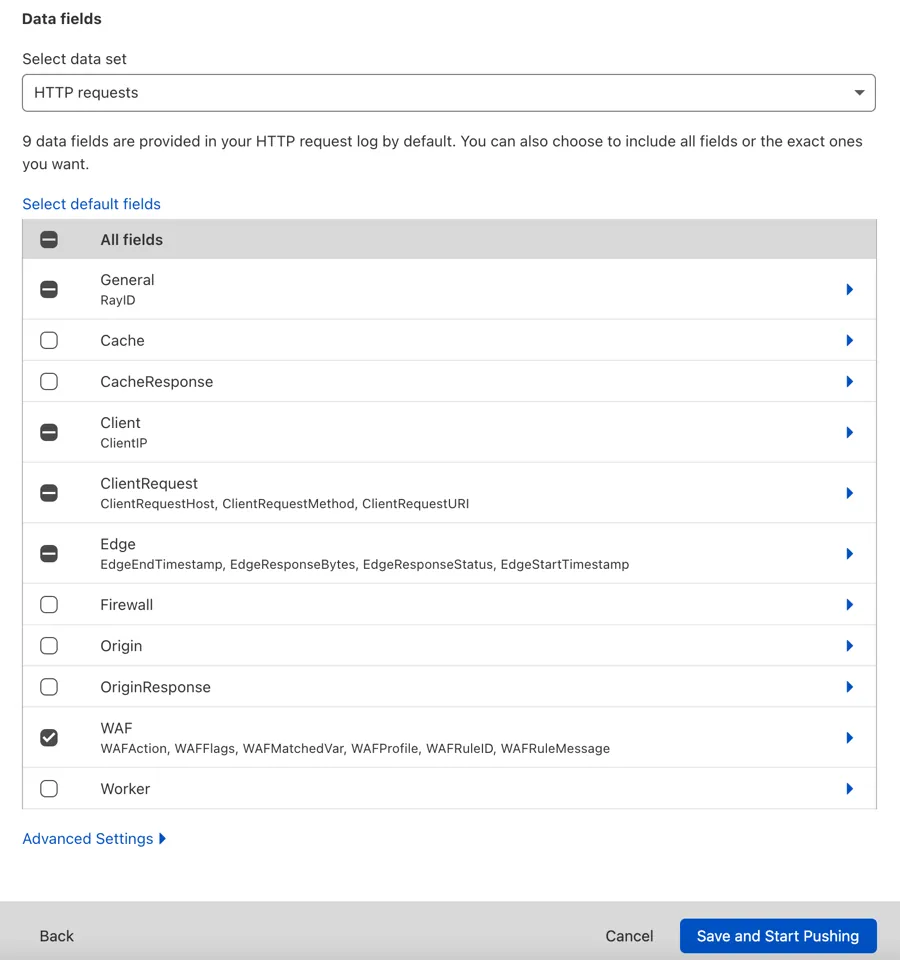
You can keep the default fields to include in your log or make changes. You can add or remove fields at a later time by modifying your settings in Logs > Logpush (select the wrench icon).


To finish enabling Logpush, click Save and Start Pushing


Once connected, Cloudflare lists the provider you just configured under Logs > Logpush. This is where you can make changes or remove the provider.
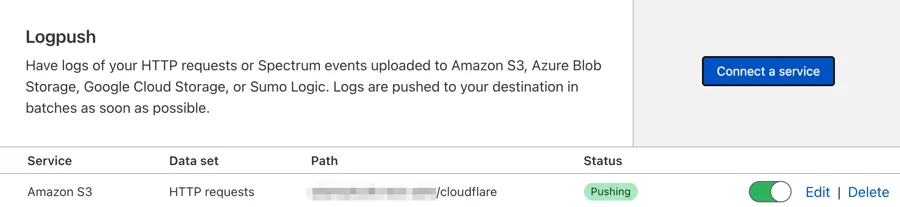
If all steps were executed properly, you should see files in your S3 bucket and also in Coralogix.
Support
Need help?
Our world-class customer success team is available 24/7 to walk you through your setup and answer any questions that may come up.
Feel free to reach out to us via our in-app chat or by sending us an email at [email protected].