GCP - getting started
Overview
Coralogix offers a number of basic integrations with Google Cloud Platform. However, a prerequisite for each is that you first Configure a Service Account. Once you have created a Service Account and its corresponding API key, access your integration-specific instructions in the table below:
| GCP Logs | Google Workspace Users |
|---|---|
| GCP Traces | Google Alert Center |
| GCP Metrics |
Configure a Service Account
This should be done before any GCP integration with Coralogix. Please make sure that you have Super admin permissions. Also, you should have an existing project within Google Cloud. Your new service account will be created there.
Coralogix supports authentication using a service account key or by principal impersonation.
Configuration overview
On the Google Cloud side, basic Service Account configuration is done in two steps:
Step 1. First, create a new Service Account to authenticate with Coralogix.
Step 2. Set up authentication based on your chosen method:
For key-based authentication, generate an API key for Coralogix.
For impersonation, grant the
Service Account Token Creatorrole to the Coralogix principal associated with that integration during the integration setup.
Configuration steps
Step 1. Create a Service Account
1. Sign in to the Google Cloud Console and choose the project where you want to create the service account.
2. Go to IAM & Admin in the menu and scroll down to Service Accounts.
3. On the Service accounts list, click + CREATE SERVICE ACCOUNT.
4. Input your service account details: name, account ID, and description. Click CREATE AND CONTINUE.
5. Based on the type of integration you are setting up, you may need to assign specific roles to the service account.
GCP Logs: To collect logs, select the
Pub/Sub Subscriberrole.GCP Traces: To collect traces, select
BigQuery Job UserandBigQuery Data Viewer.GCP Metrics: To collect metrics, select
Compute Viewer,Monitoring Viewer, andCloud Asset Viewer.Google Workspace Users: You don’t need to assign roles for this service account.
Google Alerts Center: You don’t need to assign roles for this service account.
At the end, click CONTINUE and DONE in the step below. Your service account is now ready for use.
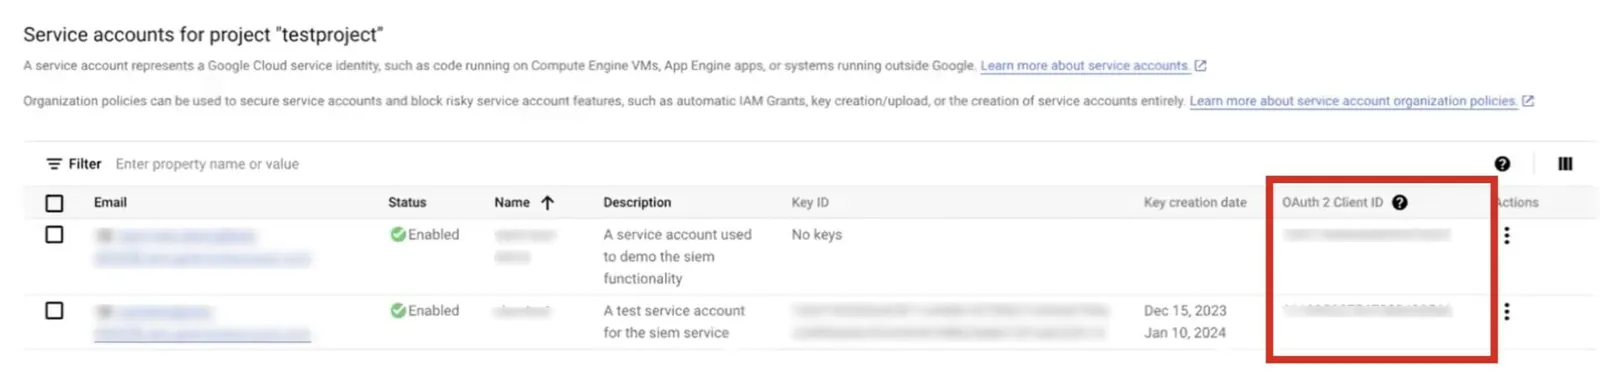
6. Find the new service account on the list. Note down the OAuth 2 Client ID. You will need it to finish this tutorial.
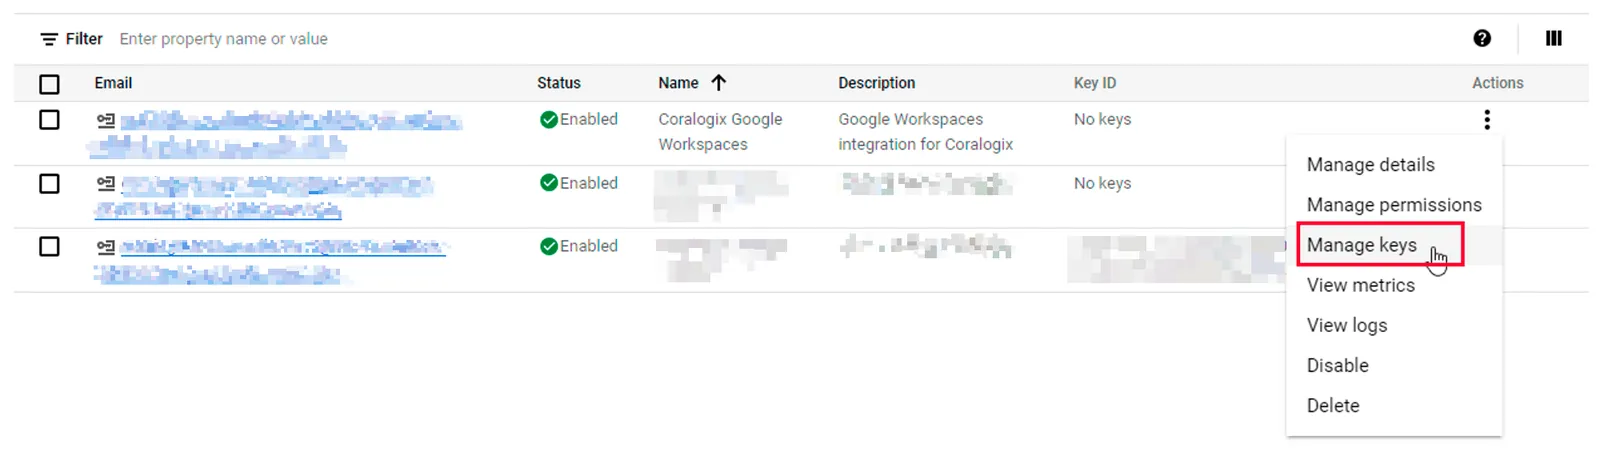
Step 2. Create a Private Key (for key-based authentication only)
1. Click the three dots in the rightmost Actions column and choose Manage keys.
2. Click Add Key and choose the JSON Key type. Download it and store locally. You will need to upload it to your Coralogix integration.
Impersonation Authentication: Customer ID Whitelisting
This section applies to organizations that have domain restricted sharing enabled.
Important Security Notice:
Coralogix does not share its GCP organization or customer ID for whitelisting due to security risks. Sharing this ID could expose our internal IAM mechanism and is not a recommended practice.
Recommended Approach for Customers
- Please use fine-grained IAM policies (e.g.,
iam.managed.allowedPolicyMembers) to whitelist only the required service accounts or principals for impersonation-based authentication. - If your organization policy only supports org/customer ID whitelisting, we cannot support this integration due to security risks. We recommend discussing alternative authentication flows, such as domain-based whitelisting, or direct service account whitelisting.
Why Organization/Customer ID Whitelisting (iam.allowedPolicyMemberDomains) Is Not Supported
Security Risks
- Sharing our GCP organization or customer ID exposes our internal IAM structure and could allow broad access to all principals in our organization, increasing risk of privilege escalation or misconfiguration.
- Our security department has determined that sharing this ID is not a safe practice and is not permitted for Coralogix integrations.
Why We Recommend Against This Approach
- The
iam.allowedPolicyMemberDomainsconstraint is coarse-grained: it allows any principal from the whitelisted organization/customer, not just the required service accounts. - This method does not provide the necessary control or auditability for secure integrations.
Secure Alternatives (Recommended)
Use the iam.managed.allowedPolicyMembers constraint to specify only the required service accounts:
resource: //cloudresourcemanager.googleapis.com/organizations/YOUR_ORG_ID
constraint: constraints/iam.managed.allowedPolicyMembers
allowed_values:
    - serviceAccount:[email protected]
Next Steps
Now that you have created a Service Account and an API key, consult our integration-specific tutorials. For these, you will need to use the Coralogix platform.
Support
Need help?
Our world-class customer success team is available 24/7 to walk you through your setup and answer any questions that may come up.
Feel free to reach out to us via our in-app chat or by sending us an email to [email protected].