JumpCloud SCIM identity management
Manage the lifecycle of your Coralogix users and groups from the JumpCloud Admin Portal. JumpCloud's custom SCIM identity management integration provisions, updates, and deprovisions users in Coralogix in real time, syncs user data, and keeps group membership (and the access it grants) in step with your directory.
What you need
- Admin access to your JumpCloud portal, with the Coralogix SSO application already configured.
- Admin access to your Coralogix team, to read the provisioning token.
- The SCIM endpoint for your Coralogix domain. Use the domain selector at the top of this page to resolve it: https://api./scim
Collect the Coralogix provisioning token
JumpCloud authenticates to Coralogix with a bearer token issued by your team's SAML configuration.
In Coralogix, open your account settings and select Configure SAML.
At the bottom of the Coralogix Service Provider Details section, copy the Provisioning Token.
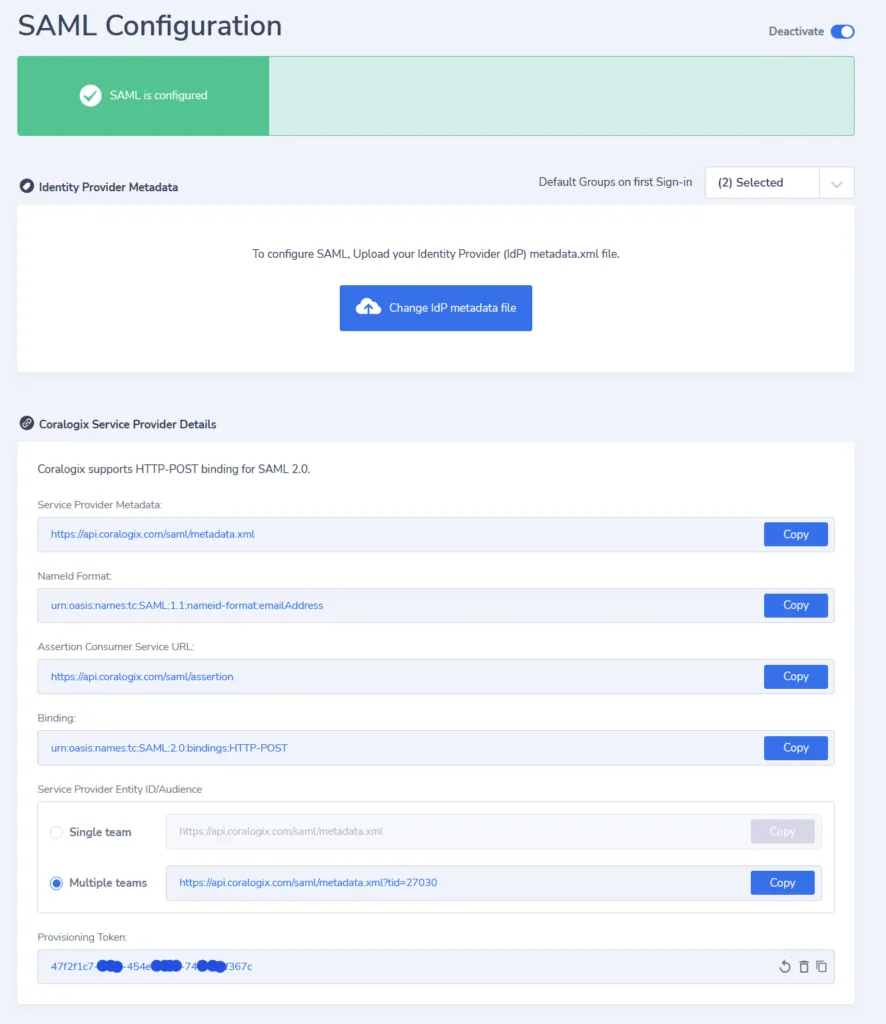
Shows where the provisioning token sits, below the service provider metadata and entity ID.
Configure the SCIM integration in JumpCloud
In the JumpCloud portal, select SSO, then the Coralogix SSO application, then the Identity Management tab.
Under API Type, select SCIM API, and under SCIM Version, select SCIM 2.0.
In Base URL, enter the SCIM endpoint for your Coralogix domain. In Token Key, enter the provisioning token you copied. In Test User Email, enter the address of a user who belongs to one of the groups your SSO manages.
Turn on Enable management of User Groups and Group Membership in this application.
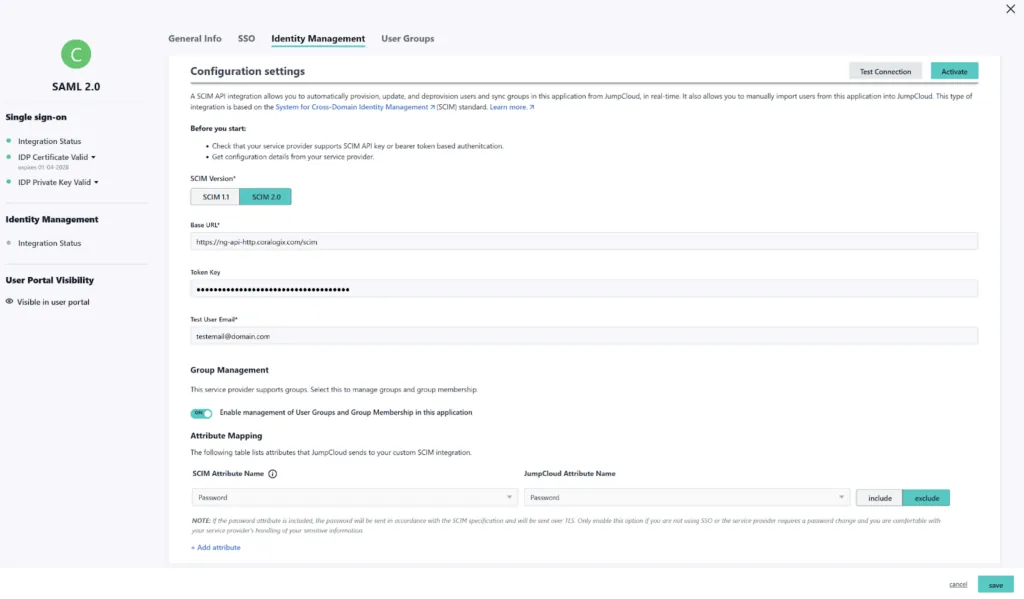
Shows the configuration settings panel with the Test Connection and Activate controls in the top-right corner.
Select Test Connection. A confirmation appears when JumpCloud reaches Coralogix successfully.

Shows the state that gates activation. Group management becomes available only after a successful test.
Select Activate, then save.
Assign groups to the Coralogix application
Only the groups you attach to the Coralogix SSO application are managed by SCIM.
In JumpCloud, select User Groups, select a group, then open its Applications tab.
Select the checkbox on the Coralogix row, then select save. Repeat for every group SCIM should manage.
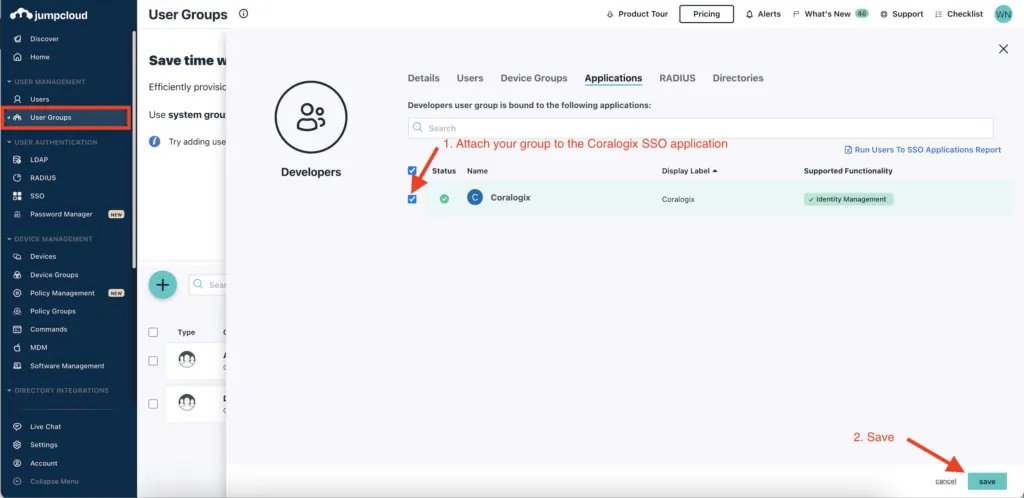
Shows a user group being bound to the Coralogix application so SCIM picks it up.