Scopes
Use Scopes to create and assign specific access levels, ensuring that data is only accessible to authorized users.
Overview
A scope represents a subset of the overall data within your environment, defined by a data type (referred to as a source) and scope expression. Users assigned to a particular scope are restricted to viewing data exclusively from that scope.
Data scopes prove valuable when diverse organizational groups require access to distinct data types - logs and spans - represented by user data fields or labels, including application and subsystem.
When a scope is first created, it is empty and includes no data types. Access to each data type is defined when the scope is created.
Users are assigned scopes through group membership. Each user may be a member of one or more groups. This allows admins to define scopes uniformly and, alongside our RBAC permission model, ensure granular control over user access and permissions.
Required permissions
Users with the following permissions may view and/or manage scopes.
| Resource | Action | Description | Explanation |
|---|---|---|---|
team-scopes | ReadConfig | View Team Scopes | View scopes for the groups in your team. |
team-scopes | Manage | Manage Team Scopes | Create, delete, and edit scopes for the groups in your team. |
The following system roles automatically include these permissions: Organization Administrator and Platform Administrator. Find out more about roles and permissions here.
Filter scopes using DPXL queries
As part of the Scopes setup, you will assign one or more data types to your scope using the DataPrime Expression language (DPXL).
A DPXL expression filter comprises a data scope, a logical operator, and an expression, used cumulatively to create a condition. Expressions constitute logical expressions that allow users to make various decisions regarding, for example, data routing or filtering specific sources. Use our DPXL tutorial to get started.
For example, suppose a Coralogix administrator wishes to grant data scope access only to logs where the application name starts with dev or the field region_id in the data is us-east-1. In that case, she would use the following DPXL expression:
Here is the breakdown:
$l.applicationnamerefers to the label application name.The
startsWithfunction checks if a string starts with the specified substring and returns True or False – in this case, if the application starts withdev.The
&&operator returns True if both operands are True and False otherwise.The
==operator evaluates if two values are equal and outputs True or False depending on the result. So ifregion_idisus-east-1, the output will be True.
Create a scope
From the Coralogix toolbar, click on the user icon in the top right-hand corner.
Click Settings.
In the left-hand menu, select Scopes.
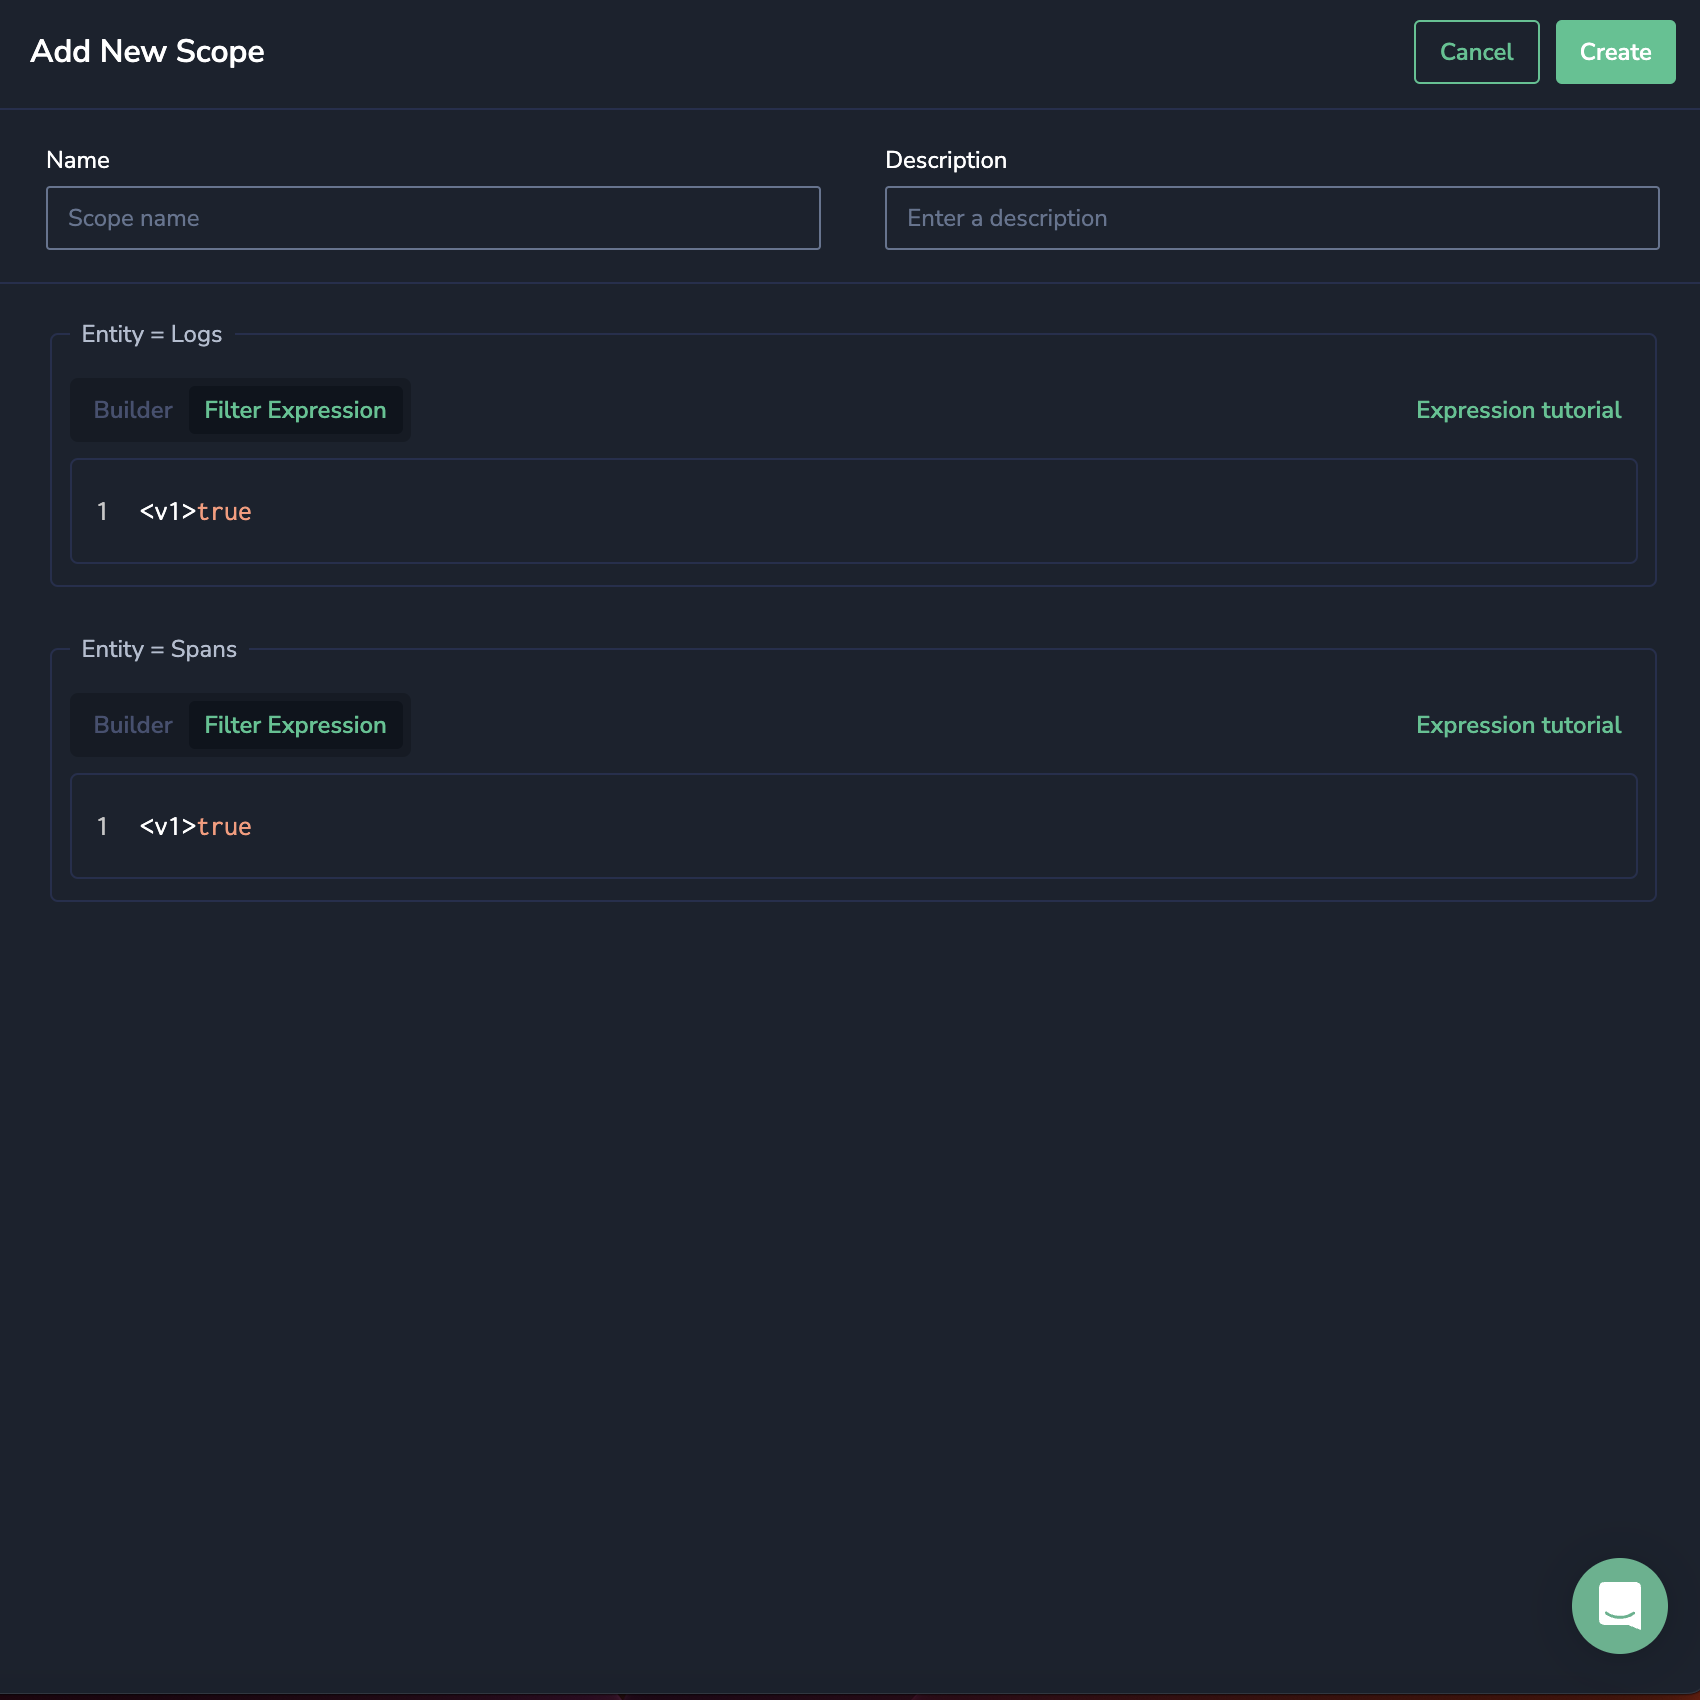
Using a DataPrime Expression language (DPXL) query, assign one or more data types, referred to as as a source, to your scope.
To add additional data types to your Scope, click + Add Source. Every data type appears only once.
Every expression provided for a source will take precedence over general settings. Sources that are not provided explicitly will default to the DPXL expression provided in the Other Sources section.
For data types not explicitly specified, choose whether to grant full access (Allow everything) or deny all access (Deny everything). You can customize access to other data types using a DPXL query. "Allow everything" and "Deny everything" are shorthand for setting the DPXL expression to TRUE or FALSE, respectively.
Click Create.
Assign a scope
Coralogix administrators with the cx_permission_action_id permission may assign scopes to team members via Groups. Each group is limited to a single scope. Users may be assigned to one or more groups.
When a user is assigned to multiple groups, the expression from each group is used and combined using OR. For example, if group1 has a scope subsystemName == ‘purchases’ and group2 has a scope subsystemName == 'signups' , and a user is attached to group1 and group2, then the final scope for the user will be (subsystemName == 'purchases') || (subsystemName == 'signups') .
This is done per source, meaning that the scope expression for each group is chosen based on the data type (e.g., logs/spans) and then combined to provide a final scope expression.
Belonging to multiple groups expands the user scope; it cannot narrow it down. This means that if a user belongs to a group where the expression for, say, "logs" is set to "allow everything," then belonging to additional groups with a more restricted logs scope would not limit the user’s access — he would still have access to all the logs.
Legacy scopes
Legacy scopes for existing groups will appear in the Scopes screen. These scopes are named after the group to which they are attached.
To replace a legacy scope for an existing group, select it in Groups. In the Select Scope drop-down menu, unselect the legacy scope and choose a different scope.
Support
Need help?
Our world-class customer success team is available 24/7 to walk you through your setup and answer any questions that may come up.
Feel free to contact us via our in-app chat or by emailing support@coralogix.com.

