Deprecation Notice: The legacy Coralogix Node.js Winston integration will be deprecated in favor of the OpenTelemetry SDK and will no longer be supported after June 30, 2026. See the end-of-life notice for migration details.
Node.js Winston
This guide shows how to send Winston logs from a Node.js application to Coralogix using the OpenTelemetry Node.js SDK with the Winston instrumentation, exporting logs over OTLP/gRPC.
For more background on Winston itself, see the Winston repository and the Coralogix blog post Complete Winston Logger Guide.
Package dependencies setup
Add the following packages to your project (versions are examples; prefer the latest compatible releases from the JavaScript package registry):
@opentelemetry/api@opentelemetry/sdk-node@opentelemetry/sdk-logs@opentelemetry/exporter-logs-otlp-grpc@opentelemetry/instrumentation-winston@opentelemetry/resources@opentelemetry/semantic-conventionswinston
Install them with the Node package manager:
npm install @opentelemetry/api @opentelemetry/sdk-node @opentelemetry/sdk-logs \
  @opentelemetry/exporter-logs-otlp-grpc @opentelemetry/instrumentation-winston \
  @opentelemetry/resources @opentelemetry/semantic-conventions winston
Here is a minimal package.json you can use as a starting point:
{
  "name": "nodejs-winston-otel-app",
  "version": "1.0.0",
  "main": "index.js",
  "type": "commonjs",
  "scripts": {
    "start": "node index.js"
  },
  "dependencies": {
    "@opentelemetry/api": "^1.9.1",
    "@opentelemetry/exporter-logs-otlp-grpc": "^0.214.0",
    "@opentelemetry/instrumentation-winston": "^0.58.0",
    "@opentelemetry/resources": "^2.6.1",
    "@opentelemetry/sdk-logs": "^0.214.0",
    "@opentelemetry/sdk-node": "^0.214.0",
    "@opentelemetry/semantic-conventions": "^1.40.0",
    "@opentelemetry/winston-transport": "^0.24.0",
    "winston": "^3.19.0"
  }
}
Select the https://ingress. endpoint that corresponds to your Coralogix domain using the domain selector at the top of the page.
Pin or update packages to the latest versions when you use this example for testing.
Application implementation
Start the OpenTelemetry NodeSDK with a log record processor and WinstonInstrumentation before you require("winston"), so the instrumentation can patch Winston. Map Coralogix application and subsystem names on the resource using cx.application.name and cx.subsystem.name.
The following example sends logs to a local OpenTelemetry Collector on OTLP gRPC port 4317 by default. Override the endpoint with OTEL_EXPORTER_OTLP_LOGS_ENDPOINT or OTEL_EXPORTER_OTLP_ENDPOINT.
"use strict";

const { trace } = require("@opentelemetry/api");
const { NodeSDK } = require("@opentelemetry/sdk-node");
const { BatchLogRecordProcessor } = require("@opentelemetry/sdk-logs");
const { OTLPLogExporter } = require("@opentelemetry/exporter-logs-otlp-grpc");
const { WinstonInstrumentation } = require("@opentelemetry/instrumentation-winston");
const { resourceFromAttributes } = require("@opentelemetry/resources");
const { ATTR_SERVICE_NAME } = require("@opentelemetry/semantic-conventions");

const sleep = (ms) => new Promise((resolve) => setTimeout(resolve, ms));

const endpoint =
  process.env.OTEL_EXPORTER_OTLP_LOGS_ENDPOINT ||
  process.env.OTEL_EXPORTER_OTLP_ENDPOINT ||
  "http://localhost:4317";

async function main() {
  const sdk = new NodeSDK({
    resource: resourceFromAttributes({
      [ATTR_SERVICE_NAME]: process.env.OTEL_SERVICE_NAME || "winston-otel-sample",
      "cx.application.name": process.env.CORALOGIX_APPLICATION || "winston-otel-app",
      "cx.subsystem.name": process.env.CORALOGIX_SUBSYSTEM || "worker",
    }),
    logRecordProcessors: [new BatchLogRecordProcessor(new OTLPLogExporter({ url: endpoint }))],
    instrumentations: [new WinstonInstrumentation()],
  });

  await sdk.start();

  // Keep winston require after SDK start so instrumentation patches it.
  const winston = require("winston");
  const logger = winston.createLogger({
    level: process.env.LOG_LEVEL || "info",
    format: winston.format.combine(winston.format.timestamp(), winston.format.json()),
    defaultMeta: {
      component: "winston-otel-example",
      environment: process.env.NODE_ENV || "local",
    },
    transports: [new winston.transports.Console()],
  });

  logger.info("hello winston with OpenTelemetry");

  const tracer = trace.getTracer("winston-otel-example");
  tracer.startActiveSpan("manual-span", (span) => {
    logger.warn("winston log with trace correlation");
    span.end();
  });

  // Give batch processor a moment before shutdown flush.
  await sleep(1500);
  try {
    await sdk.shutdown();
  } catch (err) {
    console.error("Shutdown completed with exporter error:", err.message || err);
  }
  console.log("Done: flush + shutdown completed");
}

main().catch((err) => {
  console.error("Application failed:", err);
  process.exit(1);
});
Notes
- The log exporter batches records. On shutdown, call
sdk.shutdown()so pending logs are exported.
If using TypeScript, set the esModuleInterop option to true in your tsconfig.json when you combine CommonJS packages with ESM-style imports.
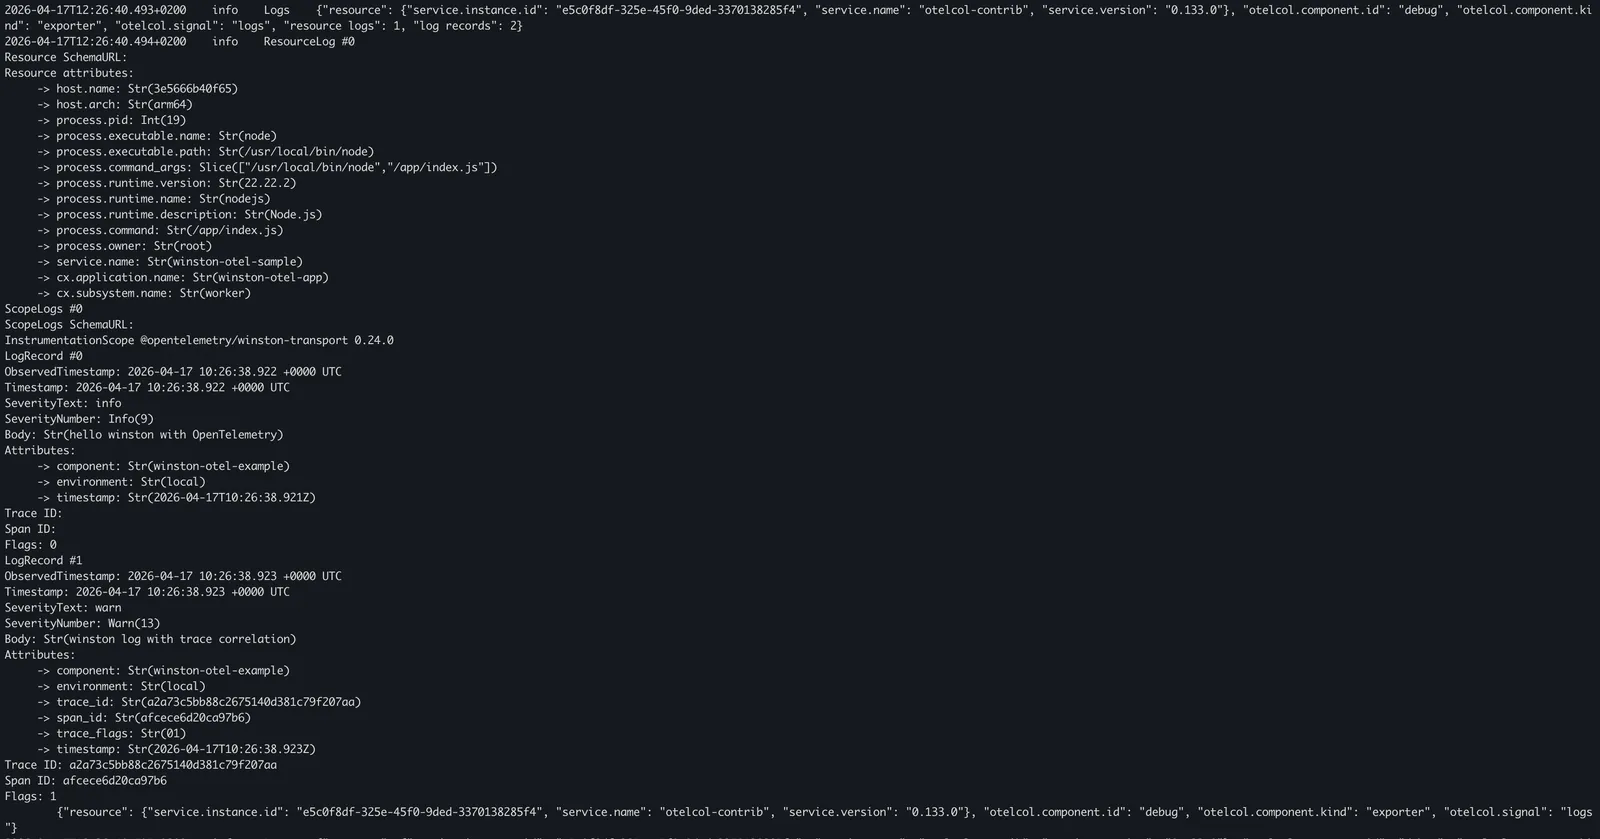
Logging output
With the OpenTelemetry SDK, you can send logs either to a local OpenTelemetry Collector or directly to Coralogix using an OTLP endpoint.
OpenTelemetry Collector
Point OTEL_EXPORTER_OTLP_ENDPOINT (or OTEL_EXPORTER_OTLP_LOGS_ENDPOINT) at your collector’s OTLP/gRPC address (often port 4317).
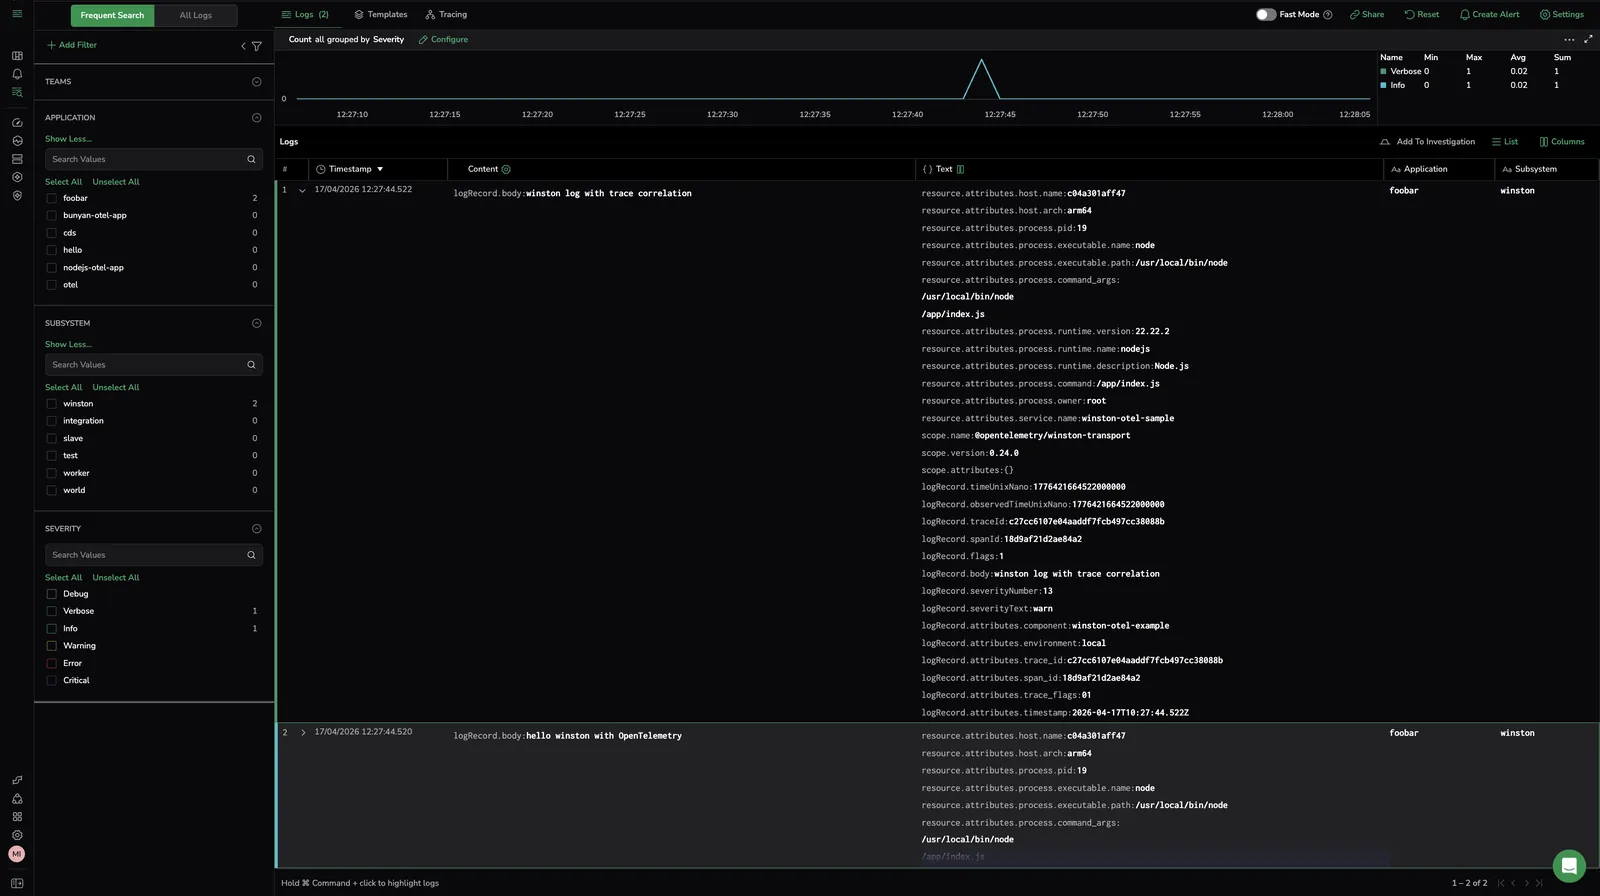
Coralogix OpenTelemetry endpoint
Configure the exporter to send to your Coralogix OTLP endpoint and authenticate with your Send-Your-Data API key.
OTEL_EXPORTER_OTLP_ENDPOINT=https://ingress.eu2.coralogix.com:443
OTEL_EXPORTER_OTLP_HEADERS="Authorization=Bearer send_your_data_key"
OTEL_RESOURCE_ATTRIBUTES="service.name=winston-otel-sample,cx.application.name=AppName,cx.subsystem.name=SubName"
Additional resources
| Blog | Complete Winston Logger Guide |
| OpenTelemetry JavaScript | OpenTelemetry JS docs |
| Coralogix Endpoints | Coralogix Endpoints |