Coralogix can be configured to automatically and dynamically archive logs to an S3 bucket. This saves Coralogix customers money, but of course, there are times when the data needs to be reindexed. This operation counts the reindexed logs against the daily quota. Many times customers would like to search and focus on the exact logs to be reindexed or even query the logs outside of Coralogix altogether.
Since the logs reside on an S3 bucket owned by the customer, there are many ways to do this with any tool or method that can access S3. This post will show how to use AWS Athena to query these logs.
Note: In order to perform the operations described in this post, you’ll need to have access to an AWS console with the correct permissions.
Finding Your Archive Folder
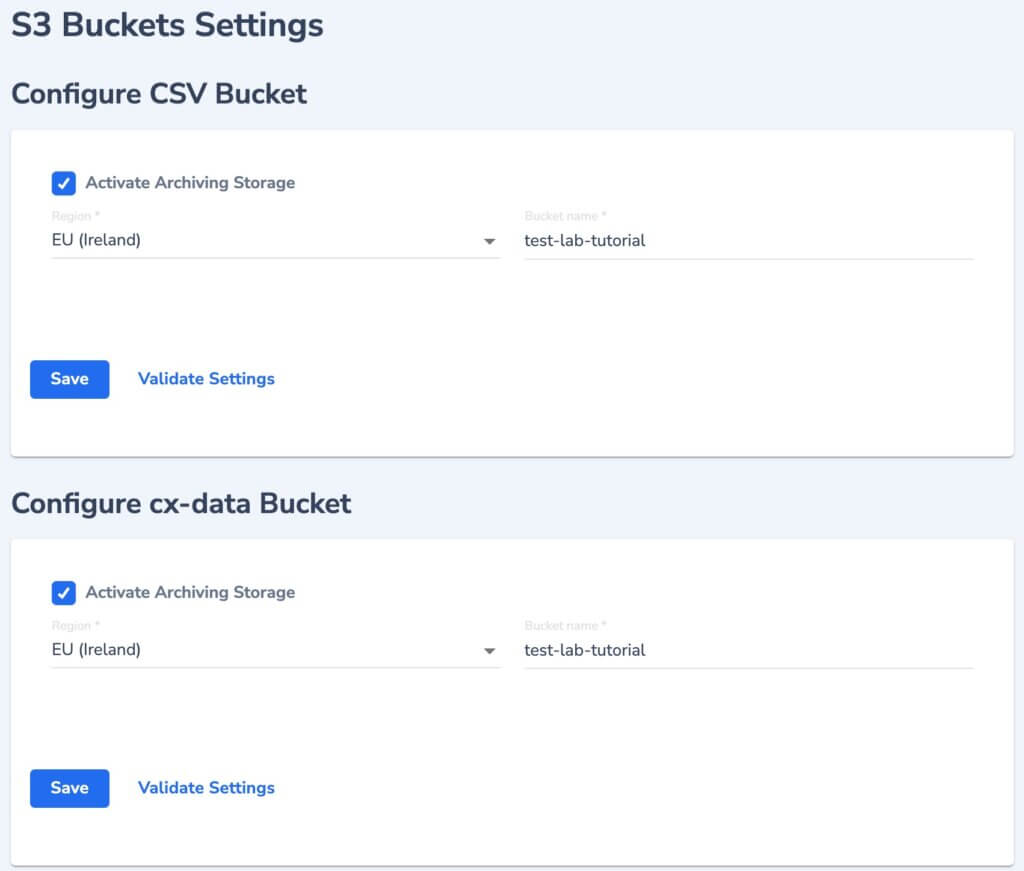
First, you’ll need to have the name of the bucket used for Coralogix archiving. You can find this by going to Data Flow-> Setup Archive.
There two types of archives:
CSV – which stores the archive logs in a csv format
cx-data – which stores the archive logs in a parquet format
One of them or both can be active.
Access the S3 bucket through the AWS console. It will have o a parent folder called ‘cx’ → ‘csv’/’parquet’ → ‘v1’ (for parquet) or ‘v2’ (for csv) → team_id → dt → hr. Under each one of these there are log files divided into 10-minute chunks. All hours are UTC. Each log file will be in CSV or Parquet format and includes log lines with:
CSV: timestamp, metadata information, and the log itself as text (JSON fields are not parsed into different CSV entries).
Athena is an AWS service that makes it easy to query the log files using standard SQL syntax. Using Athena commands you will create a DB and a schema and then query the logs.
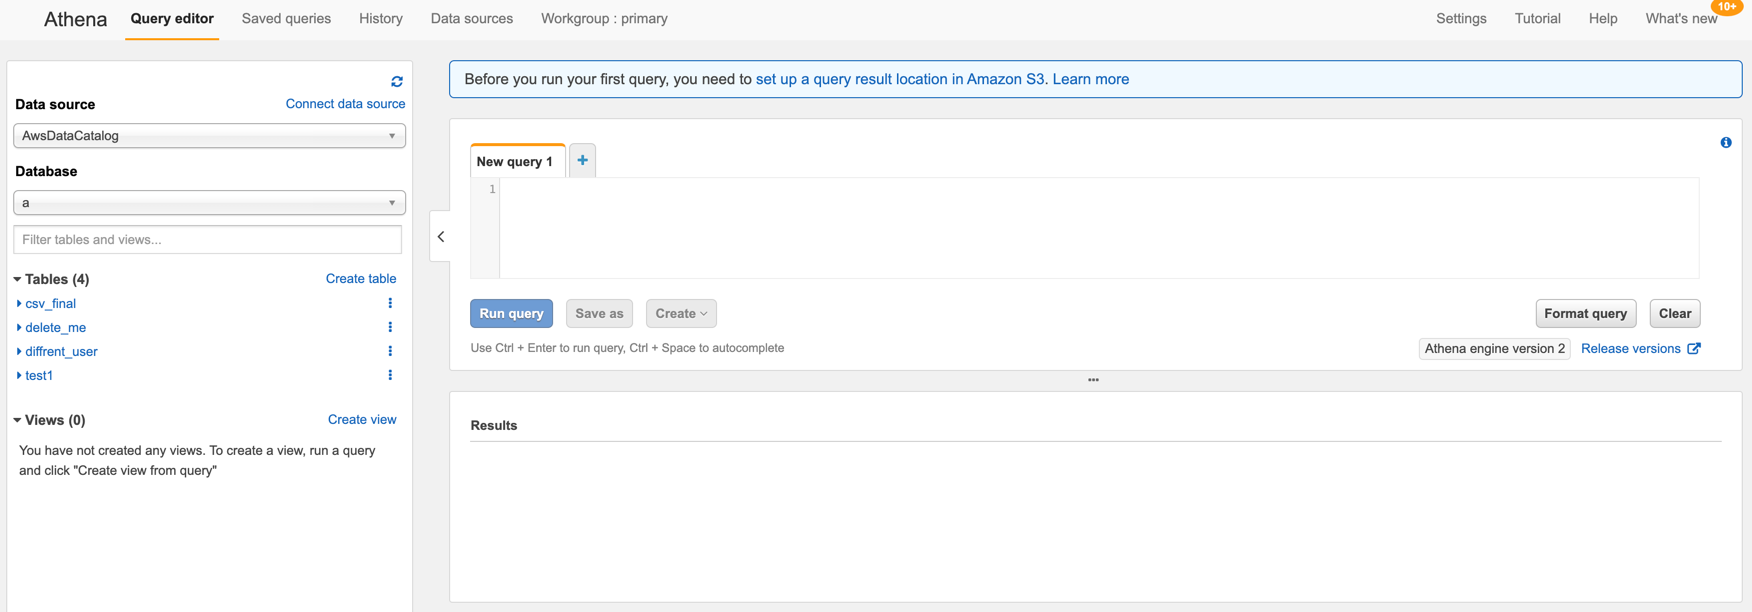
Open Athena service in your AWS account. You will see the following screen:
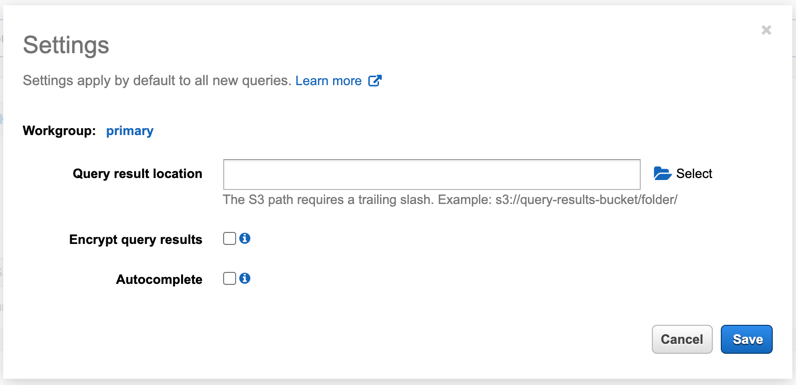
As you can see at the top you need to set up a query result location in Amazon S3 first. Click on the blue link and put there your S3 bucket name.
Once the configuration is completed the following commands need to be run in the Athena query editor:
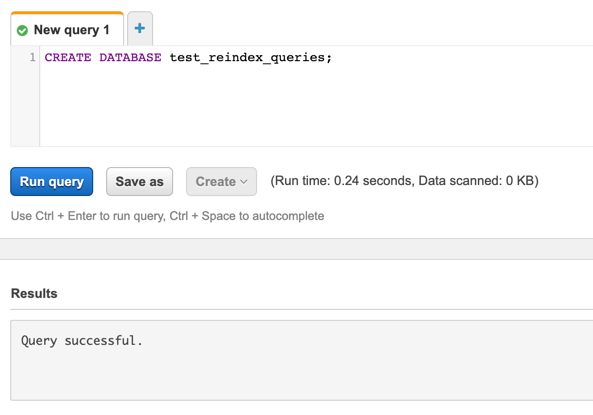
Database creation
This command creates a database:
CREATE DATABASE <db_name>;
Example: CREATE DATABASE reindex_queries;
More information about the CREATE DATABASE command – link.
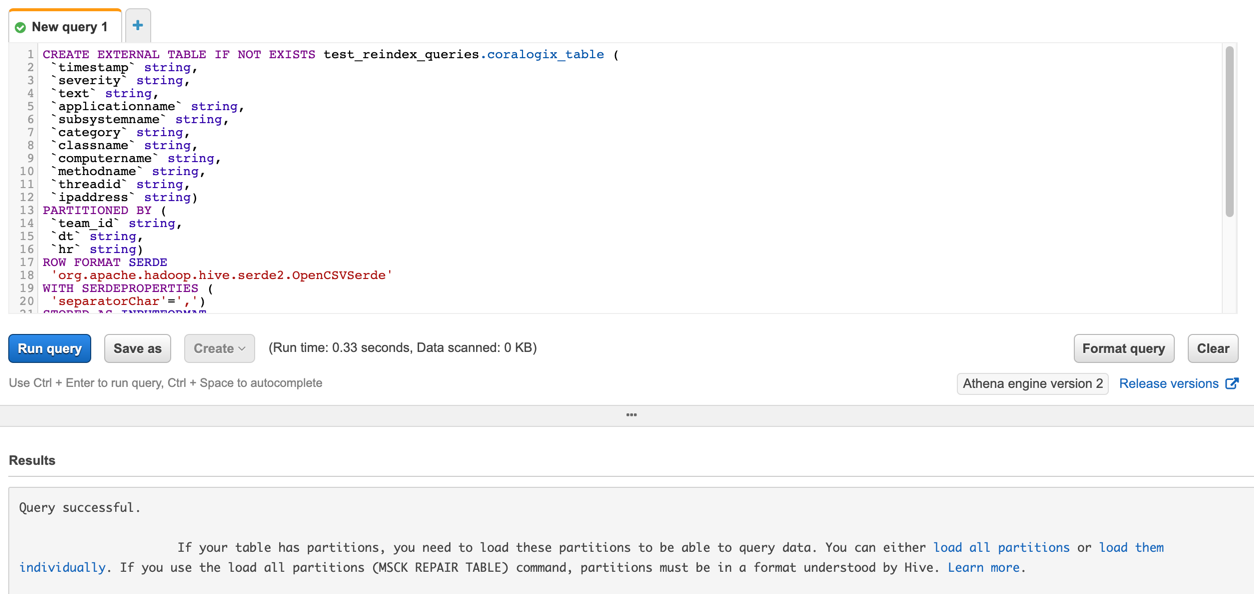
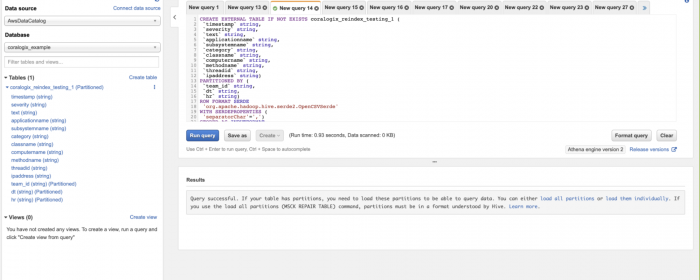
Table creation
This command creates a table called <table_name> within the database, <db_name>. This table will have entries that are mapped to the Coralogix logs from the archive, so it is important not to change the order of fields at the first section of the command. ‘Text’ is the field that contains the log as it appears in the logs screen.
Following a successful run of the ‘CREATE TABLE’ command, you will see on the left side a new table. If you click on it you will see the entries.
More information about the CREATE TABLE command – link.
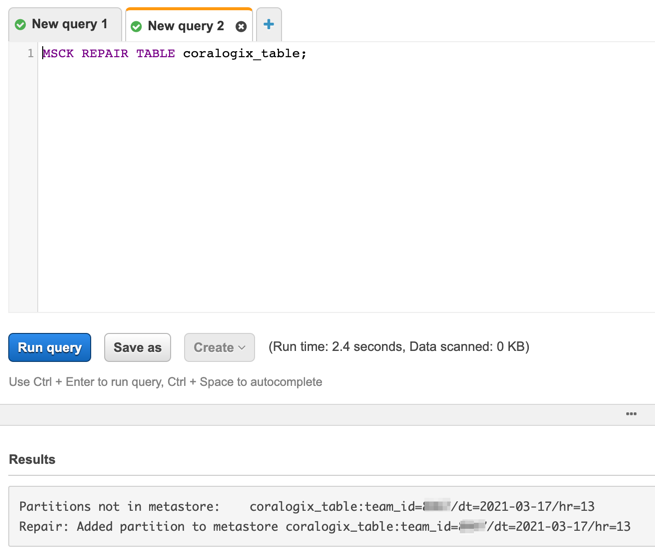
Update partitions
When you need to query new data (From a time period you didn’t query before) there is a need to update with the new Date/Hours.
To do this you will click “Load partitions”
SELECT query
Using the ‘SELECT’ you can query the logs.
CSV examples:
Example 1:
SELECT substr(timestamp, 1, 23) as timestamp, applicationname, subsystemname, severity, threadid, try(json_extract(text, '$.kubernetes.host')) as kubernetes_host, textFROM"<db_name>"."<table_name>"WHERE severity='Info' AND applicationname='prod' AND subsystemname!='abcde' AND team_id='XXX' AND dt = '2021-01-26' AND hr >= '03' AND hr < '04' AND json_extract(text, '$.kubernetes.host') IS NOT NULLLIMIT 100;
The above command will bring the first 100 logs that fit the query. It will retrieve the first 23 characters in the timestamp fields, the other indicated fields. In addition, it will extract from the text field (the log as it appears in Coralogix’s log screen) fields: kubernetes.host. It will retrieve their value into result fields called kubernetes.host. It will bring these fields from our DB and table. The query parameters are under the WHERE section. ‘IS NOT NULL’ makes sure that the logs we bring will have the field with a value.
Note that if the database is chosen on the left side then specifying the database is not needed.
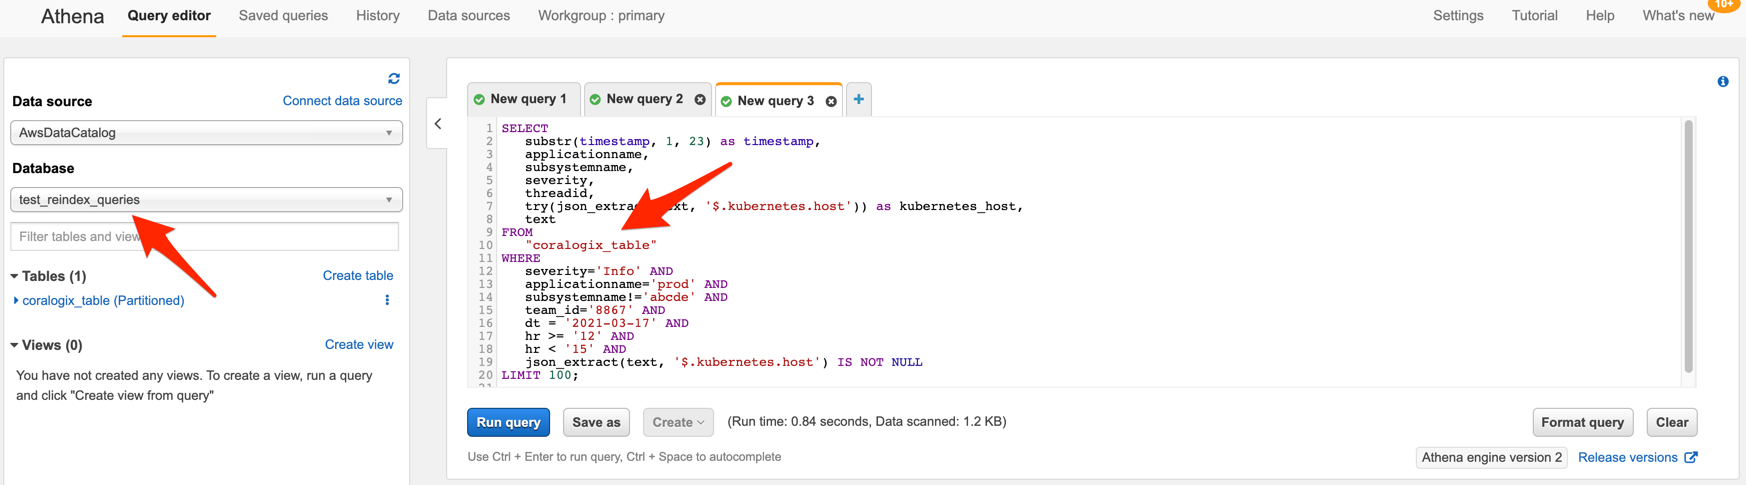
Example 2:
In this query we are searching for free text “throttler” in the log:
SELECT
   substr(timestamp, 1, 23) as timestamp,
   applicationname,
   subsystemname,
   severity,
   text
FROM
   "coralogix_table"
WHERE
   applicationname='ip_log' AND
   team_id='12345' AND
   dt = '2021-03-17' AND
   hr >= '21' AND
   hr < '23' AND
   text LIKE '%throttler%'
LIMIT 100
The query above returns the first 100 records with timestamp between 2021-03-17 21:00-23:00, application name ip_log, any subsystem name, any severity and text which contains a word “throttler”. The team_id 12345 is used only as a filter and will not be displayed in the results.
Example 3:
SELECT
   try(json_extract(text, '$.clientIp')) as clientIp,
   try(json_extract(text, '$.userId')) as userId,
   COUNT(*) as count
FROM
   "<db_name>"."<table_name>"
WHERE
   team_id='xxxxx' AND
   dt = '2021-03-22' AND
   hr >= '14' AND
   hr < '17' AND
   json_extract(text, '$.clientIp') IS NOT NULL AND
   json_extract(text, '$.userId') IS NOT NULL AND
   text LIKE '%503 service unavailable%' AND
   date_parse(substr(timestamp, 1, 19),'%Y-%m-%dT%h:%i:%s') BETWEEN TIMESTAMP '2021-03-22 14:30:00' AND TIMESTAMP '2021-03-22 16:10:00'
GROUP BY text
ORDER BY count DESC;
The query above returns clientIp and userId fields and a count of their combinations:
It is done by COUNT(*) as count in the SELECT session and by GROUP BY text. The results are ordered by count field. ASC and DESC determine whether results are sorted in ascending or descending order. hr field allows only to search in the specific time frame with 1 hour interval. It was not sufficient so in the example the timestamp field was added to WHERE section. As Athena requires Java timestamp format, the command substr takes the first 19 characters and the date_parse command maps the format %Y-%m-%dT%h:%i:%s to readable by Athena %Y-%m-%d %h:%i:%s.
Example 4:
SELECT
   try(json_extract(text,'$.message')) AS message,
   COUNT(*) as count
FROM
   "<db_name>"."<table_name>"
WHERE
   applicationname='prod'
   AND team_id='xxxxx'
   AND dt >= '2021-04-01'
   AND dt <= '2021-05-28'
   AND hr >= '00'
   AND hr < '24'
   AND CAST(json_extract(text,'$.message') AS varchar)='reset'
   AND CAST(json_extract(text,'$.message') AS varchar)='machine'
GROUP BY text
ORDER BY count DESC;
This query is similar to the one above but shows new ways of filtering. It shows how to limit results by adding a date range and also by a text (“reset” and “machine”) which is a part of the message field. It returns the message field and a count of its combinations.
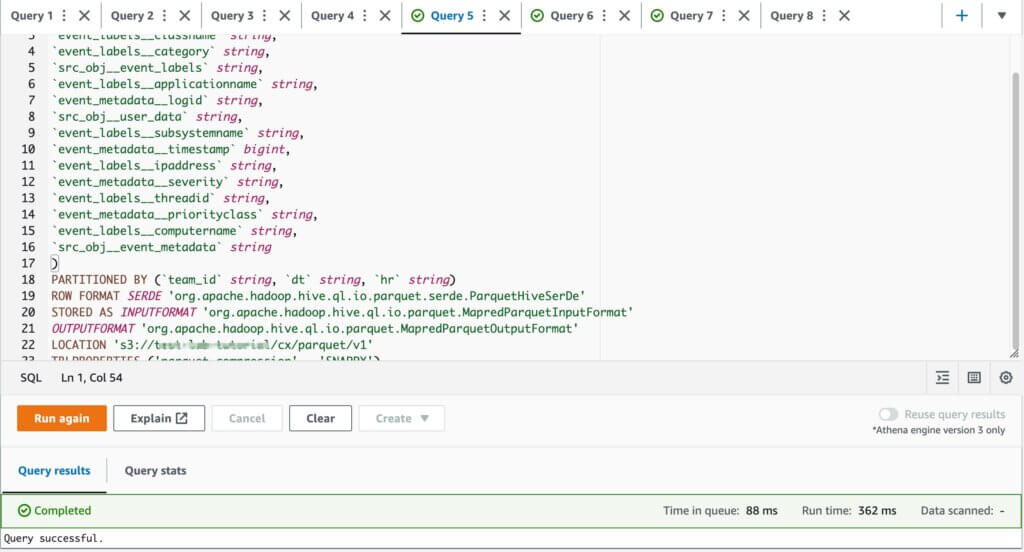
PARQUET examples:
Example 1:
SELECT * FROM "<db_name>"."<table_name>" LIMIT 10;
The above command will bring the first 10 logs. You can use this query to test if you can reach the archive and also to see fields which you can use for more detailed queries.
Example 2:
SELECT
   try(json_extract(src_obj__event_labels, '$.applicationname')) as applicationname,
   try(json_extract(src_obj__event_labels, '$.subsystemname')) as subsystemname,
   src_obj__user_data as log,
   try(json_extract(src_obj__event_metadata, '$.timestamp')) as time
FROM "<db_name>"."<table_name>"
WHERE
   (JSON_EXTRACT_SCALAR(src_obj__event_labels, '$.applicationname'))='prod'
   AND (JSON_EXTRACT_SCALAR(src_obj__event_labels, '$.subsystemname'))='nginx'
   AND dt >= '2022-11-01'
   AND dt <= '2022-11-05'
   AND (JSON_EXTRACT_SCALAR(src_obj__event_metadata, '$.severity'))='Debug'
   AND (JSON_EXTRACT_SCALAR(src_obj__user_data, '$.message')) LIKE '%Connected%';
The query above returns three columns: applicationname, subsystemname, log with debug logs which contain a message fields with a word “Connected” where the application name is prod, the subsystem name is nginx which were created between 2022-11-01 and 2022-11-05.
Query with Save
This command is also known as CTAS (Create Table AS). This is a variation on the ‘CREATE TABLE’ command mentioned above.
Query data and save in a specific location (also creates a table that needs to be deleted):
CREATE TABLE reindex_queries.ctasWITH ( format='TEXTFILE', field_delimiter=',', external_location='s3://coralogix-athena-results-test/reindex-testing/query_1/') ASSELECT substr(timestamp, 1, 23) as timestamp, try(json_extract(json_parse(text), '$.log.kind')) AS kind, applicationname, subsystemname, severity, threadid, textFROM "coralogix_example"."coralogix_reindex_testing_1"WHERE applicationname='auditing' AND team_id='XXX' AND dt = '2021-01-26' AND hr >= '03' AND hr < '04' AND CAST(json_extract(text, '$.log.kind') AS varchar)='Event' AND text like '%Started%'LIMIT 1000;
The first part of the command indicates that a new table called ‘ctas’ will be created for database ‘reindex_queries’. The table will be of type ‘text’, with ‘,’ as delimiter, and will be created in the named bucket.
Download CSV file with results
Athena will put the result in an S3 bucket location defined in its configuration but also you can download the csv file:
Having the query result in CSV format on an S3 bucket allows you to either send them to Coralogix or access them with another tool (Excel, for example).
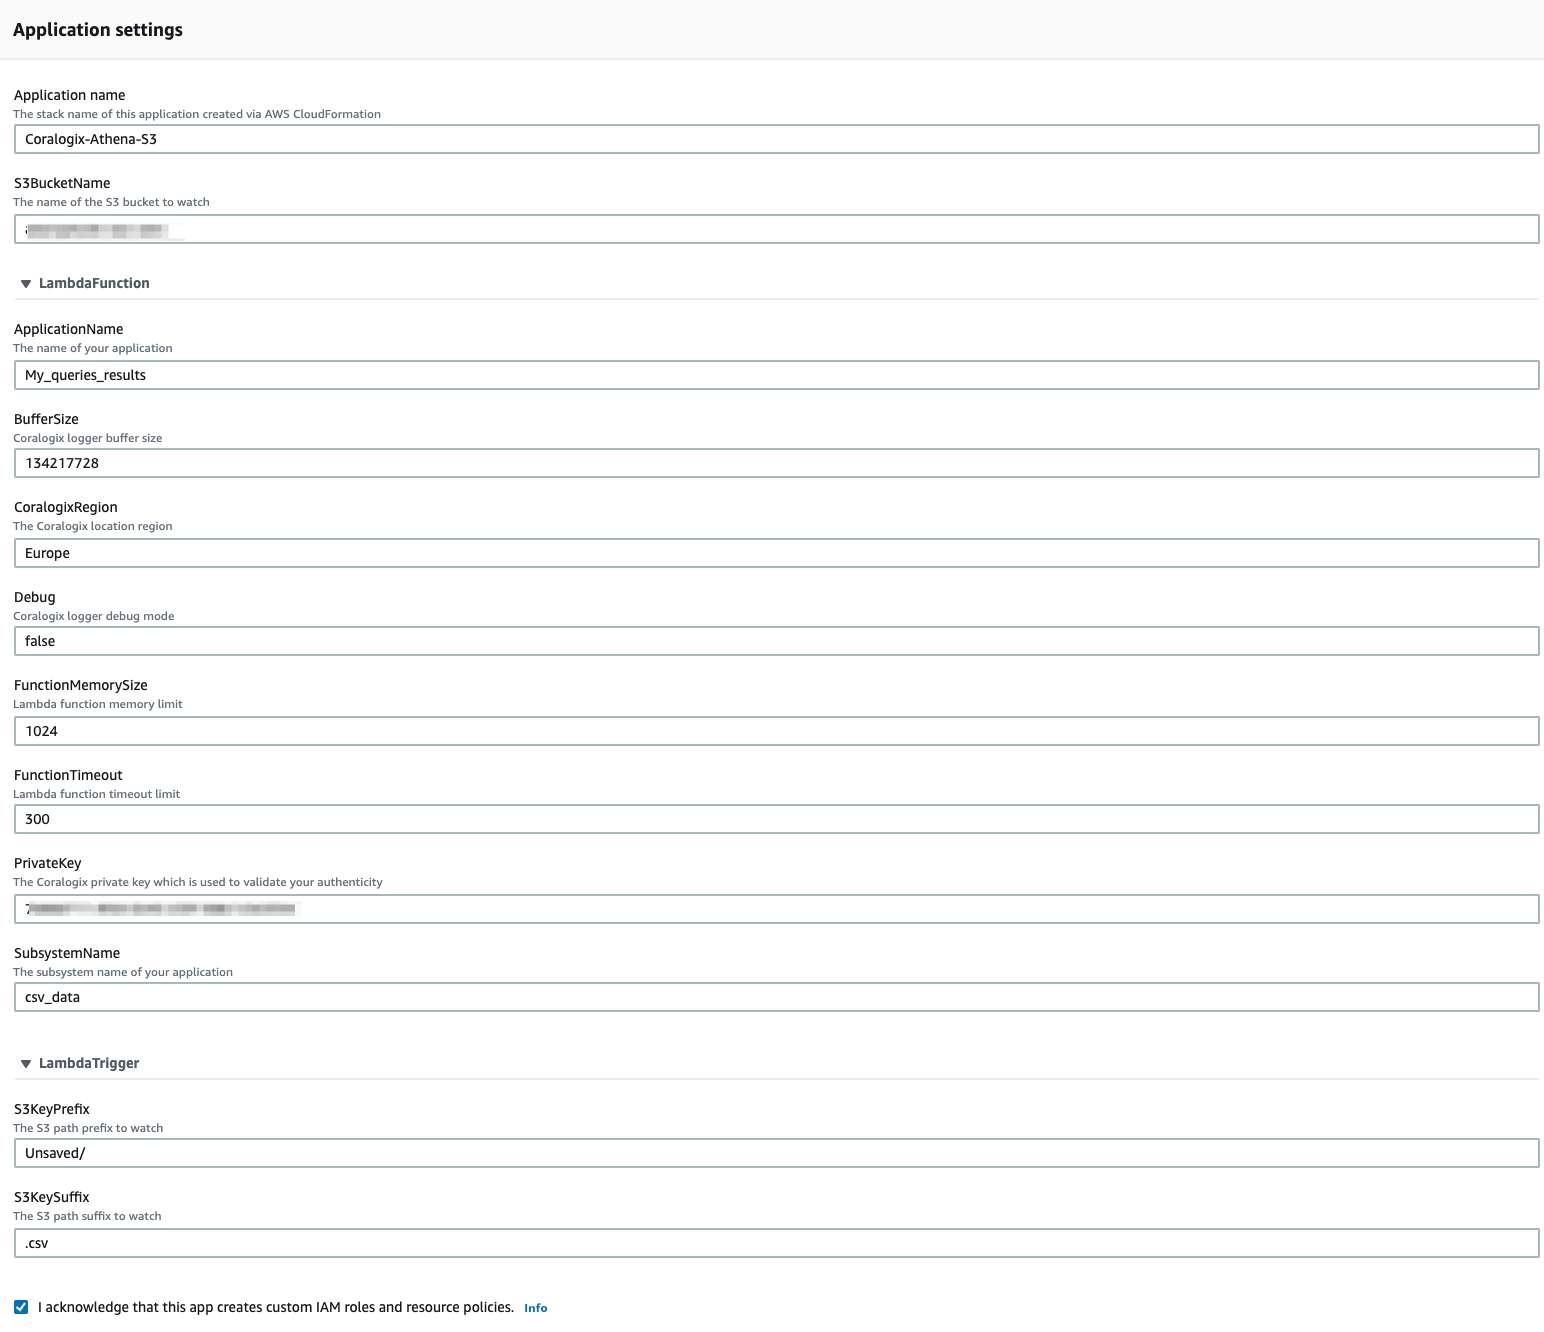
S3BucketName – The name of the S3 bucket storing the CSV files.
ApplicationName – A mandatory metadata field that is sent with each log and helps to classify it.
CoralogixRegion – Select the region associated with your Coralogix domain. This is a Coralogix parameter and does not relate to your to your AWS region.
SubsystemName – A mandatory metadata field that is sent with each log and helps to classify it.
S3KeyPrefix and S3KeySuffix should be adjusted based on your configuration. S3KeyPrefix is a folder at your bucket (for example default Athena directory: Unsaved/) and S3KeySuffix is the extensions of files (by default .csv)
4. Put a thick next to “I acknowledge that this app creates custom IAM roles and resource policies.” and click the Deploy button. That’s all!
Once new file is uploaded to the bucket, it will be read by the application and data will be send to Coralogix.
Athena Pricing
There is a cost associated with Athena usage. It is in the order of $5 per TB of data scanned. You can see more about Athena pricing here: https://aws.amazon.com/athena/pricing/.
On this page
Live Webinar
Next-Level O11y: Why Every DevOps Team Needs a RUM Strategy
 Oh no!We didn’t find anything for “”,