Custom actions
Custom actions turn values from a log or span into clickable jumps to Coralogix screens, internal tools, dashboards, or third-party services. Define a URL template once with placeholders that pull fields from the selected log or span, then trigger the action from any matching record to open the destination with the right context already filled in. No more manual copy-paste between tools.
What you need
To create actions, you need permission to manage actions in your Coralogix account and a dataset that contains the fields you plan to inject into URLs. To trigger an action, the destination must accept browser navigation. Most in-product routes and third-party web apps qualify.
Open the Actions panel
-
Go to Explore, then select Logs or Spans.
-
Select the more actions menu, then select Manage actions.
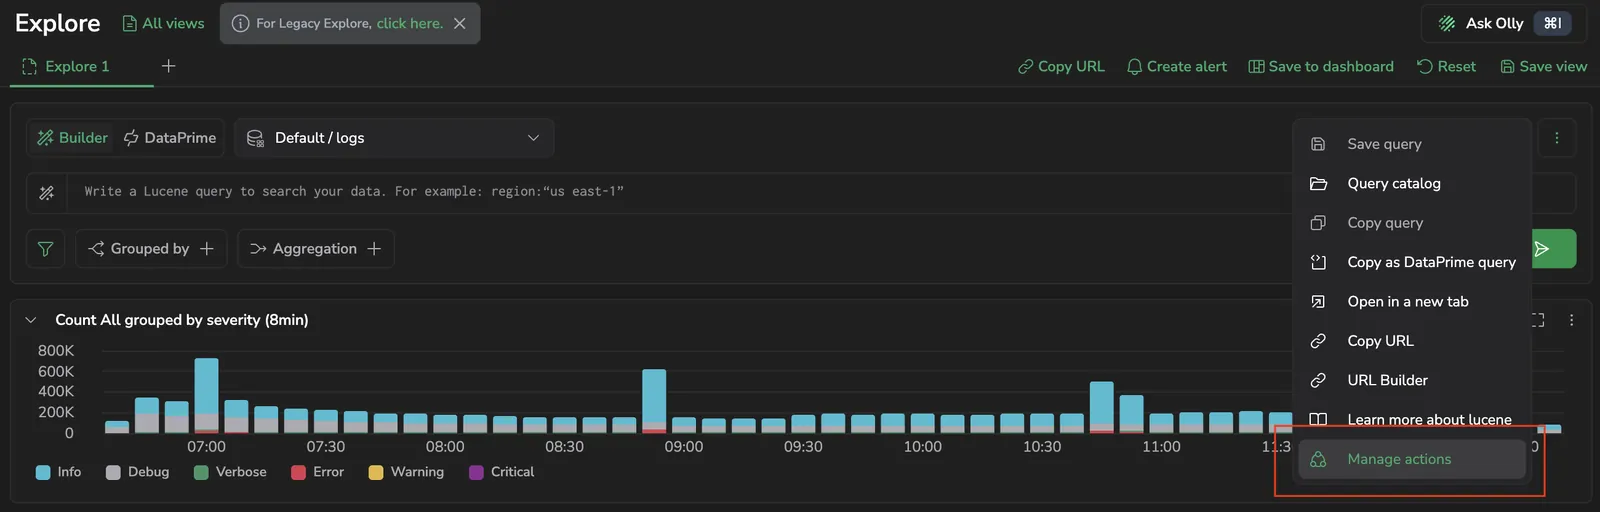
The Actions panel opens on the right with two sections:
- Private: actions only you can see and use.
- Shared: actions created by you or others that are visible to the team.
Create an action
-
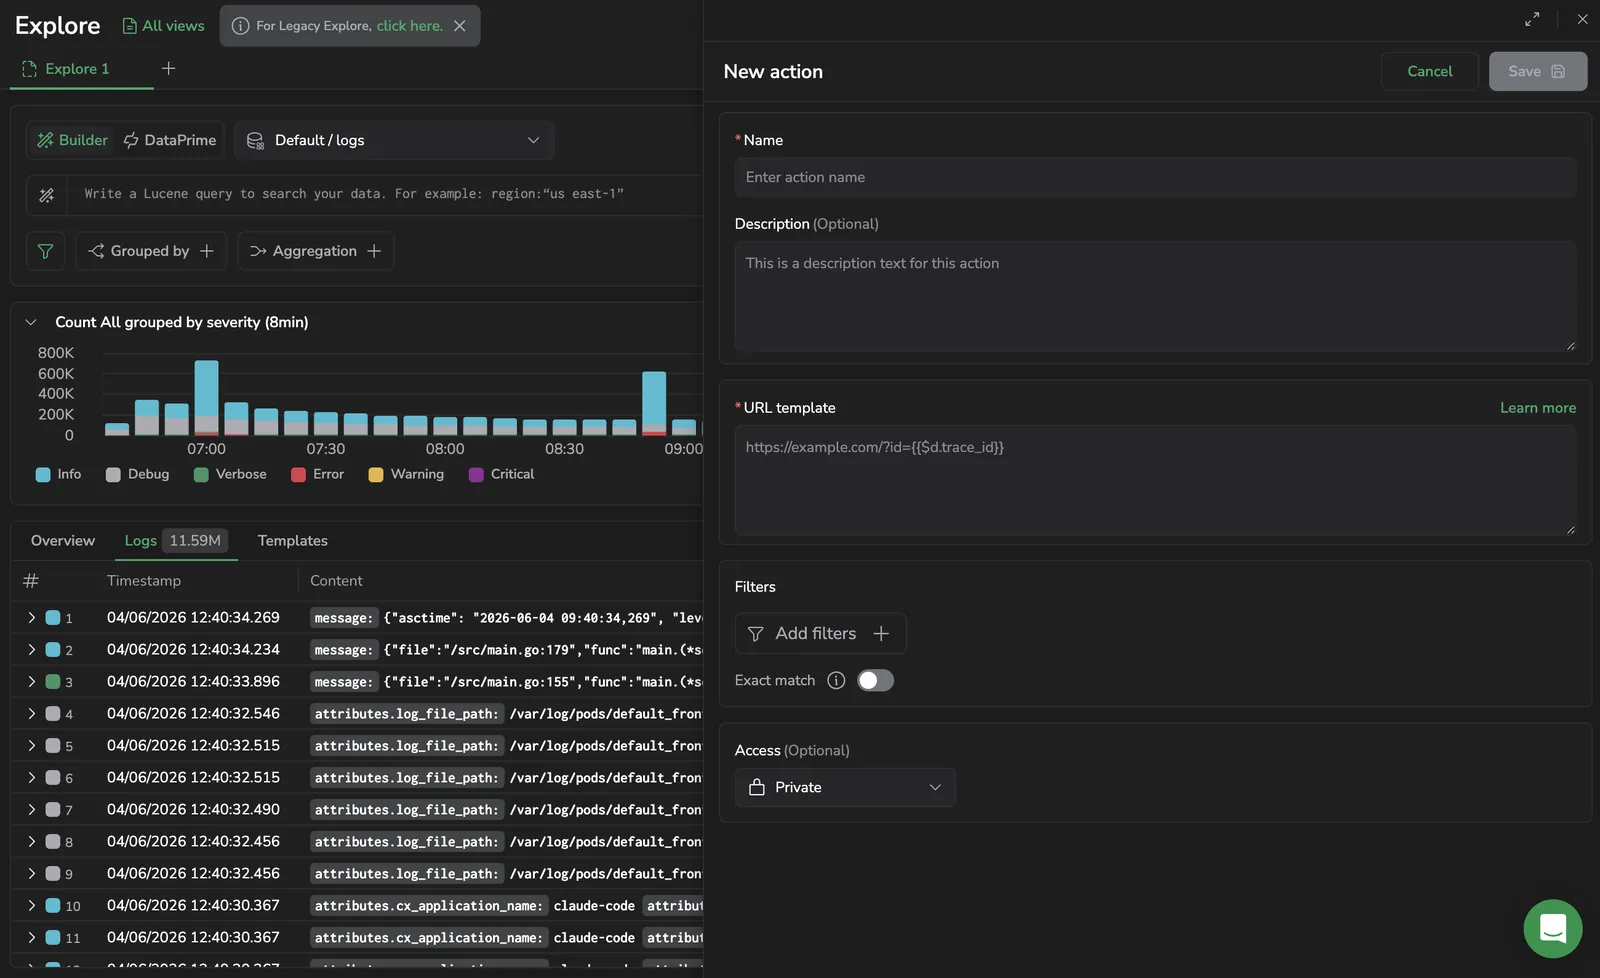
From the Actions panel, select Add new action.
-
Fill in the form:
- Name: the label shown in the action menu and catalog. Up to 50 characters.
- Description: a short note explaining when to use the action.
- URL template: the destination URL with
{{...}}placeholders that pull fields from the selected log or span. URLs must start withhttp://orhttps://. As you type, an Extracted placeholders read-out shows every placeholder detected in the template, and typing{{opens an autocomplete dropdown of available field keypaths from the active dataset schema. - Filters: narrow when the action appears by Application and Subsystem. Toggle Exact match to require the row to contain every field referenced in the URL template.
- Access: Private keeps the action to your account, and Shared makes it visible to teammates under the Shared section of the catalog.
-
Select Save.
The action appears in the catalog and is immediately available wherever its filters and placeholders resolve from the current row.
URL template variables
Use double curly braces ({{ }}) anywhere in the URL template. Three variable namespaces are available:
| Variable | What it resolves to | Example |
|---|---|---|
$d | Fields from the selected log or span, including nested paths. | {{$d.trace_id}}, {{$d.log_str.span_id}} |
$m | Coralogix metadata fields attached to the log or span. | {{$m.applicationName}}, {{$m.subsystemName}}, {{$m.severity}}, {{$m.timestamp}} |
$l | Span fields, available only when the active dataset is spans. | {{$l.span_id}}, {{$l.trace_id}}, {{$l.service.name}} |
Placeholders are literal field-path lookups (dot notation only). They are not JavaScript expressions: arithmetic, ternaries, function calls, and bracket notation inside {{...}} are not evaluated. Field names that contain hyphens, spaces, or characters outside $x.path.with.dots aren't reachable via a placeholder — choose a field with a dotted path instead.
Resolved values are URL-encoded (encodeURIComponent) before substitution, so values that contain spaces, slashes, or other reserved characters reach the destination intact. Destinations open in a new browser tab with noopener and noreferrer set on the link.
Where actions appear
An action is listed in the menu only when every placeholder in its URL template resolves from the current row. Actions with unresolved placeholders are hidden — there is no greyed-out state.
- From a row's menu: the action appears when every placeholder resolves against the row.
- From an attribute value's menu: in addition to row resolution, the field you select feeds whatever placeholder references its keypath. For example, an action template containing
{{$d.order_id}}appears in the value menu when you select anorder_idvalue, with that exact value injected. The same action also appears in the row menu, using the row'sorder_idfield.
If you want an action restricted to the value menu, target a field that's not always present at the row level — but be aware there's no separate "value-only" placeholder.
Trigger an action
After saving, an action becomes available wherever its filters match and every placeholder in its URL template can resolve from the current log or span.
- Run a query in Explore so the grid contains the log or span you want to act on.
- Open the action menu in one of two ways:
- From a row: open the more actions menu next to the row.
- From an attribute value: select the value of any field in the log or span. The cell menu shows Custom Actions with a submenu of every matching action. The selected value is injected into the placeholder that targets the same field keypath.
- In the Custom Actions submenu:
- Use the search box to find an action by name.
- Switch between the All, Private, and Shared tabs to filter by access scope.
- Select Manage actions at the bottom to open the Actions panel and create or edit actions.
- Select the action. The destination URL opens in a new browser tab with all placeholders replaced.
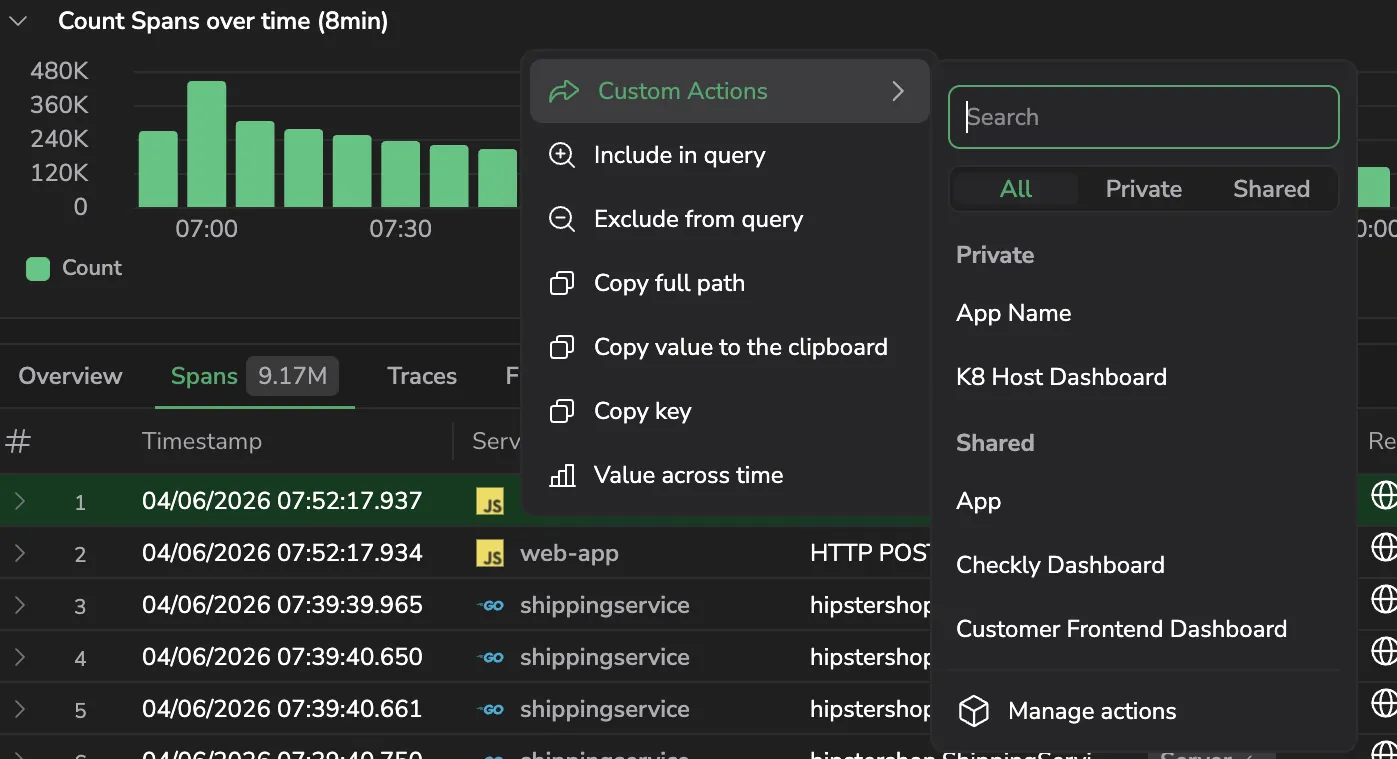
The trigger menu shows at most 8 matching actions. If you have more, narrow them down using the tabs or search.
If an action you expect doesn't appear, the most common reason is that the row (or selected value) doesn't carry every field the URL template references. Open Manage actions and check the placeholders against the row's available fields.
Example URL templates
Authoring an action follows the same shape every time. Take the destination URL, replace each dynamic value with {{$d.field}}, {{$m.field}}, or {{$l.field}}, paste the result into URL template, give the action a name, and save. The same recipe handles a Coralogix screen, a Grafana board, and a Jira ticket. Only the destination URL changes.
The recipes below cover the most common workflows. Replace the angle-bracketed placeholders (<team>, <your-domain>, and so on) with values from your account, and adjust the field names to match your log shape.
Jump from a log to its trace. Best when the log carries a trace_id.
https://<team>.coralogix.com/#/tracing/{{$d.trace_id}}
Open Explore filtered to logs that share a key with the current log, over the last 15 minutes.
https://<team>.coralogix.com/#/explore/logs?queryType=lucene&query=<key>:"{{$d.<key>}}"&relativeTime=last-15-minutes
Open the Spans dataset filtered to the same trace_id as the current log.
https://<team>.coralogix.com/#/explore/spans?queryType=lucene&query=trace_id:"{{$d.trace_id}}"&relativeTime=last-15-minutes
Move from a log carrying session_id to all events in that user's session.
https://<team>.coralogix.com/#/explore/logs?queryType=lucene&query=cx_rum.session_context.session_id:"{{$d.session_id}}"
Land on a Grafana board pre-filtered to the service that emitted the log.
https://grafana.<your-domain>.com/d/<dashboard-id>/<dashboard-name>?var-service={{$m.subsystemName}}
Open the Jira issue-creation form with the summary and description populated from log fields.
https://<your-atlassian-domain>.atlassian.net/secure/CreateIssueDetails!init.jspa?pid=<jira_pid>&issuetype=<jira_issue_type>&summary={{$d.msg}}&description={{$d.logRecord.body}}
Look up an error string, identifier, or message. Trigger from the value menu on the matching field; the clicked value is what flows into the placeholder.
https://www.google.com/search?q={{$d.msg}}
For deep links into Explore (the ?queryType, ?query, ?relativeTime, ?dataset parameters in the recipes above), see Deep links and URL parameters.
Limitations
| Area | Limit |
|---|---|
| URL scheme | Must start with http:// or https://. Other schemes (mailto:, slack:, custom protocols) are not supported. |
| Triggering surface | Actions trigger from individual log rows or attribute values. They are not available from chart visualizations, aggregations, or grouped views. |
| Variables | Only the $d, $m, and $l namespaces are supported, using dot notation only. Bracket notation, math, ternaries, function calls, and any other JavaScript expression inside {{...}} are not evaluated. |
| Trigger-menu cap | The Custom Actions submenu shows up to 8 matching actions. Use the All / Private / Shared tabs or the search box to narrow when you have more. |
| URL length | Up to 32,768 characters per URL template. |
| Action name | Up to 50 characters. |
| Authentication | The destination opens in a new browser tab. The user must already be signed in to that destination. Actions cannot pass credentials. |
Troubleshoot
| Problem | Cause | Resolution |
|---|---|---|
| The action does not appear on a log | The action's filters exclude the current log, or one of its placeholders can't be resolved from the row. | Open the action and adjust the filters. Confirm the log carries every field the URL template references. |
| The action does not appear in the trigger menu | Actions whose placeholders don't all resolve are hidden — there is no greyed-out state. | Check the Extracted placeholders read-out on the action and confirm each field exists on the current row. |
| The action will not save | The URL does not start with http:// or https://. | Prefix the URL with the correct scheme. |
| A field with a hyphen or space won't resolve | Placeholders use dot notation only — fields whose keypath includes characters outside the dot syntax can't be reached. | Reshape the underlying log to expose the value at a dot-accessible keypath (for example, parse it into a separate field). |
| Teammates cannot see an action | The action's Access is set to Private. | Edit the action and switch Access to Shared. |
Related resources
Next steps
Download query results as CSV, TSV, or JSON with Export data.