Elasticsearch Autocomplete with Search-As-You-Type

You may have noticed how on sites like Google you get suggestions as you type. With every letter you add, the suggestions are improved, predicting the query that you want to search for. Achieving Elasticsearch autocomplete functionality is facilitated by the search_as_you_type field datatype.
This datatype makes what was previously a very challenging effort remarkably easy. Building an autocomplete functionality that runs frequent text queries with the speed required for an autocomplete search-as-you-type experience would place too much strain on a system at scale. Let’s see how search_as_you_type works in Elasticsearch.

Theory
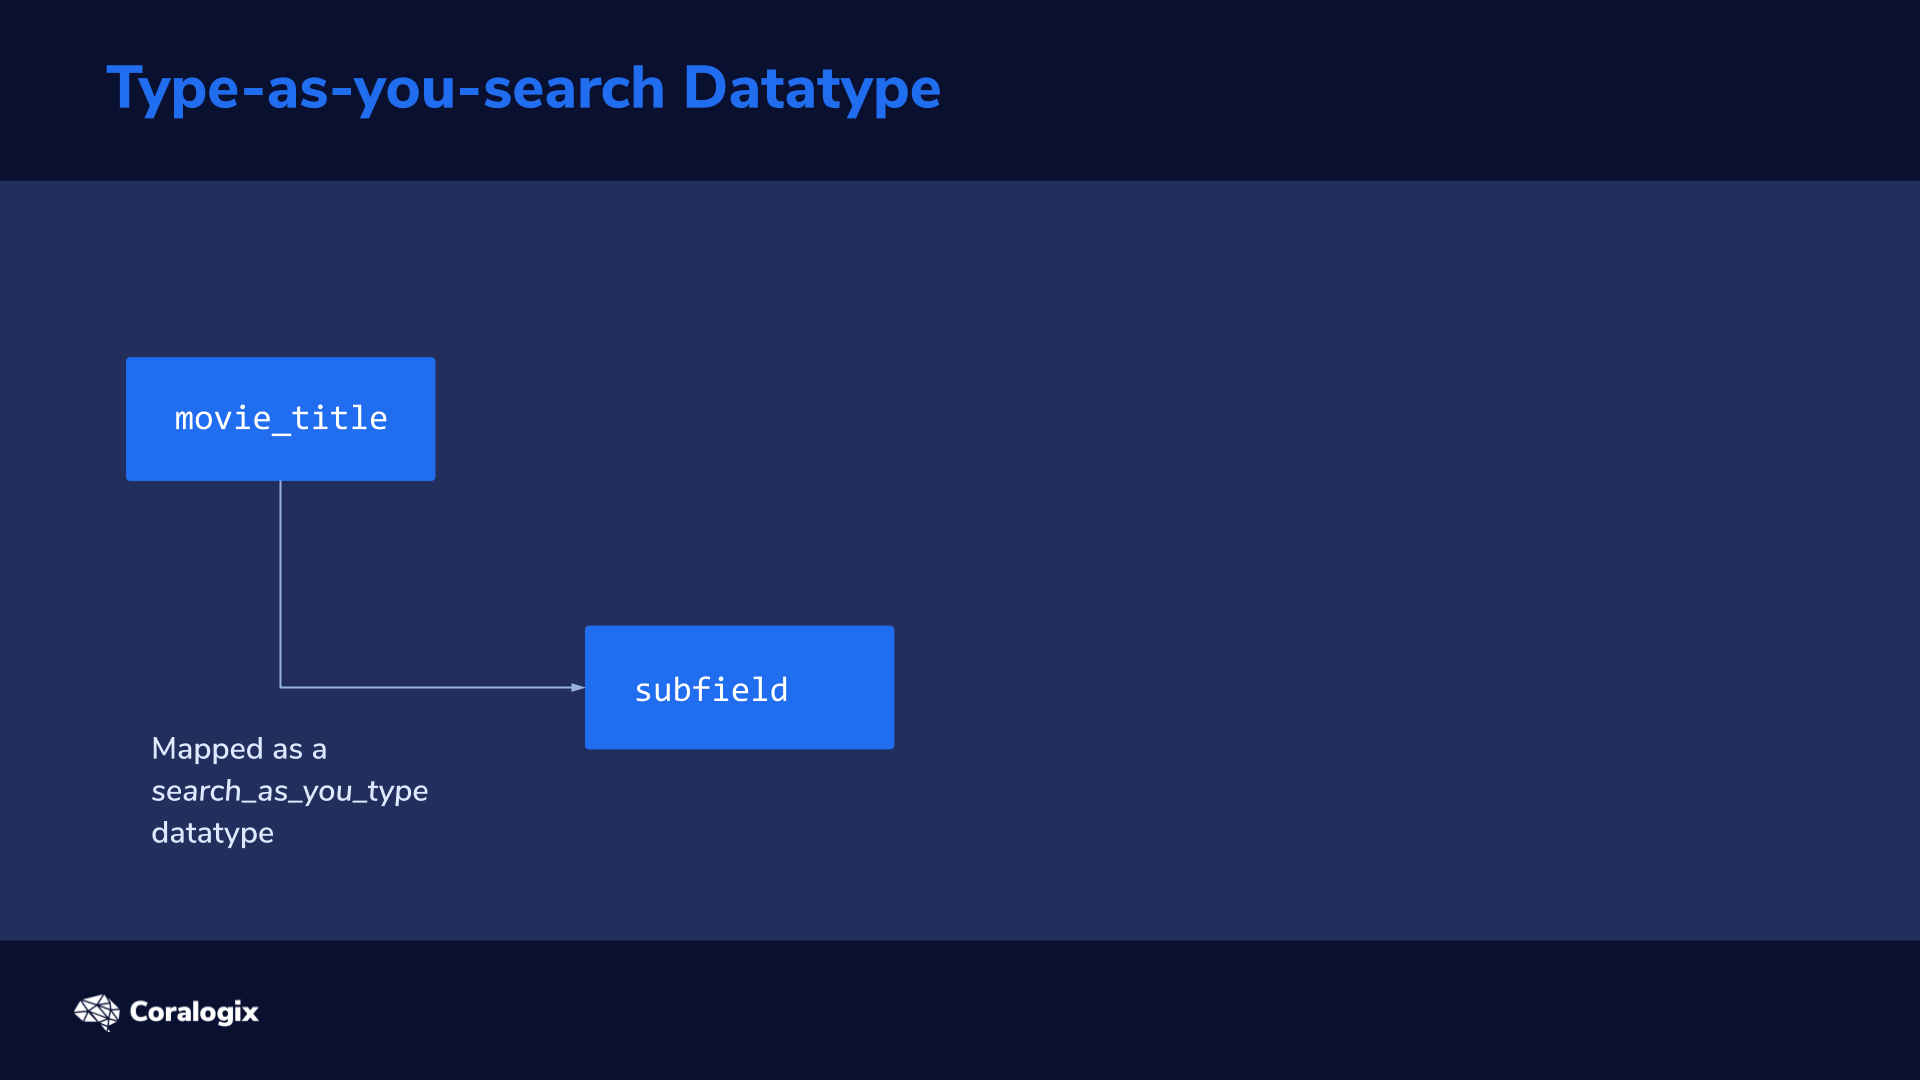
When data is indexed and mapped as a search_as_you_type datatype, Elasticsearch automatically generates several subfields
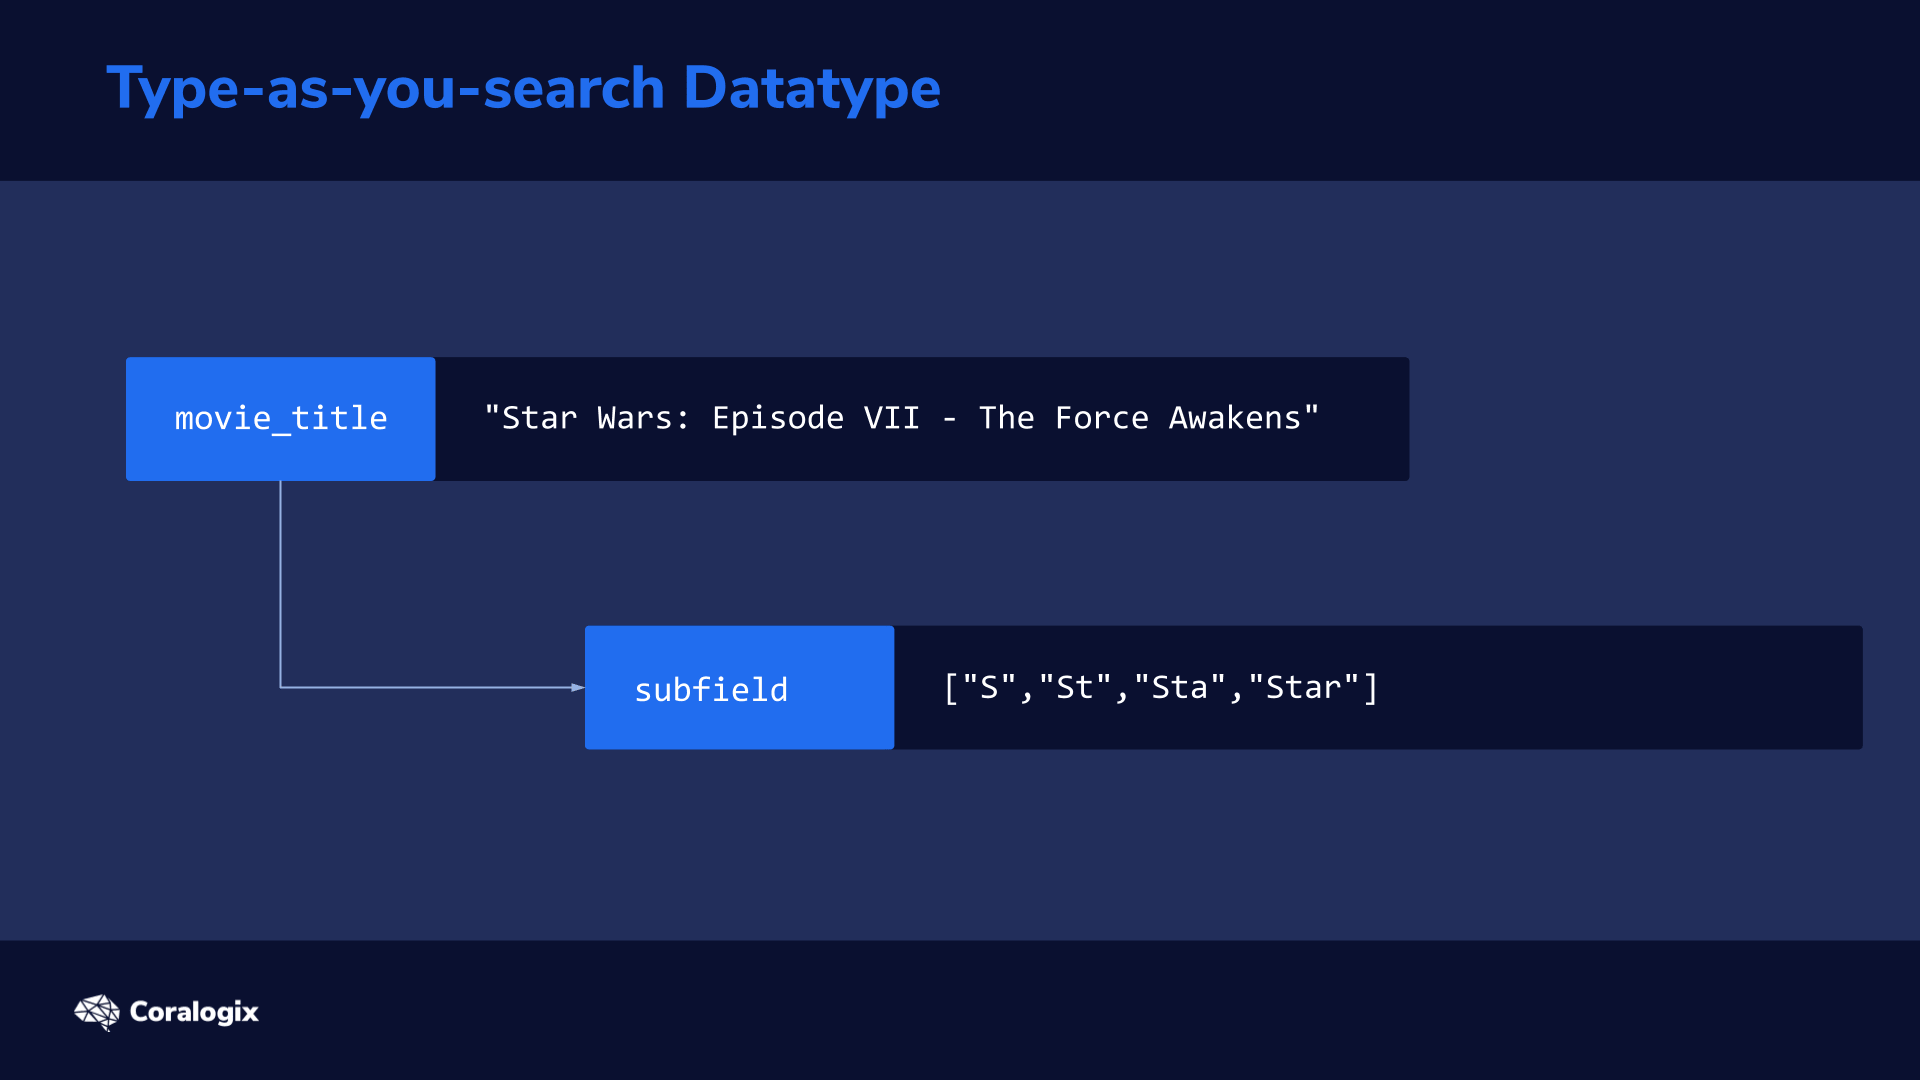
to split the original text into n-grams to make it possible to quickly find partial matches.
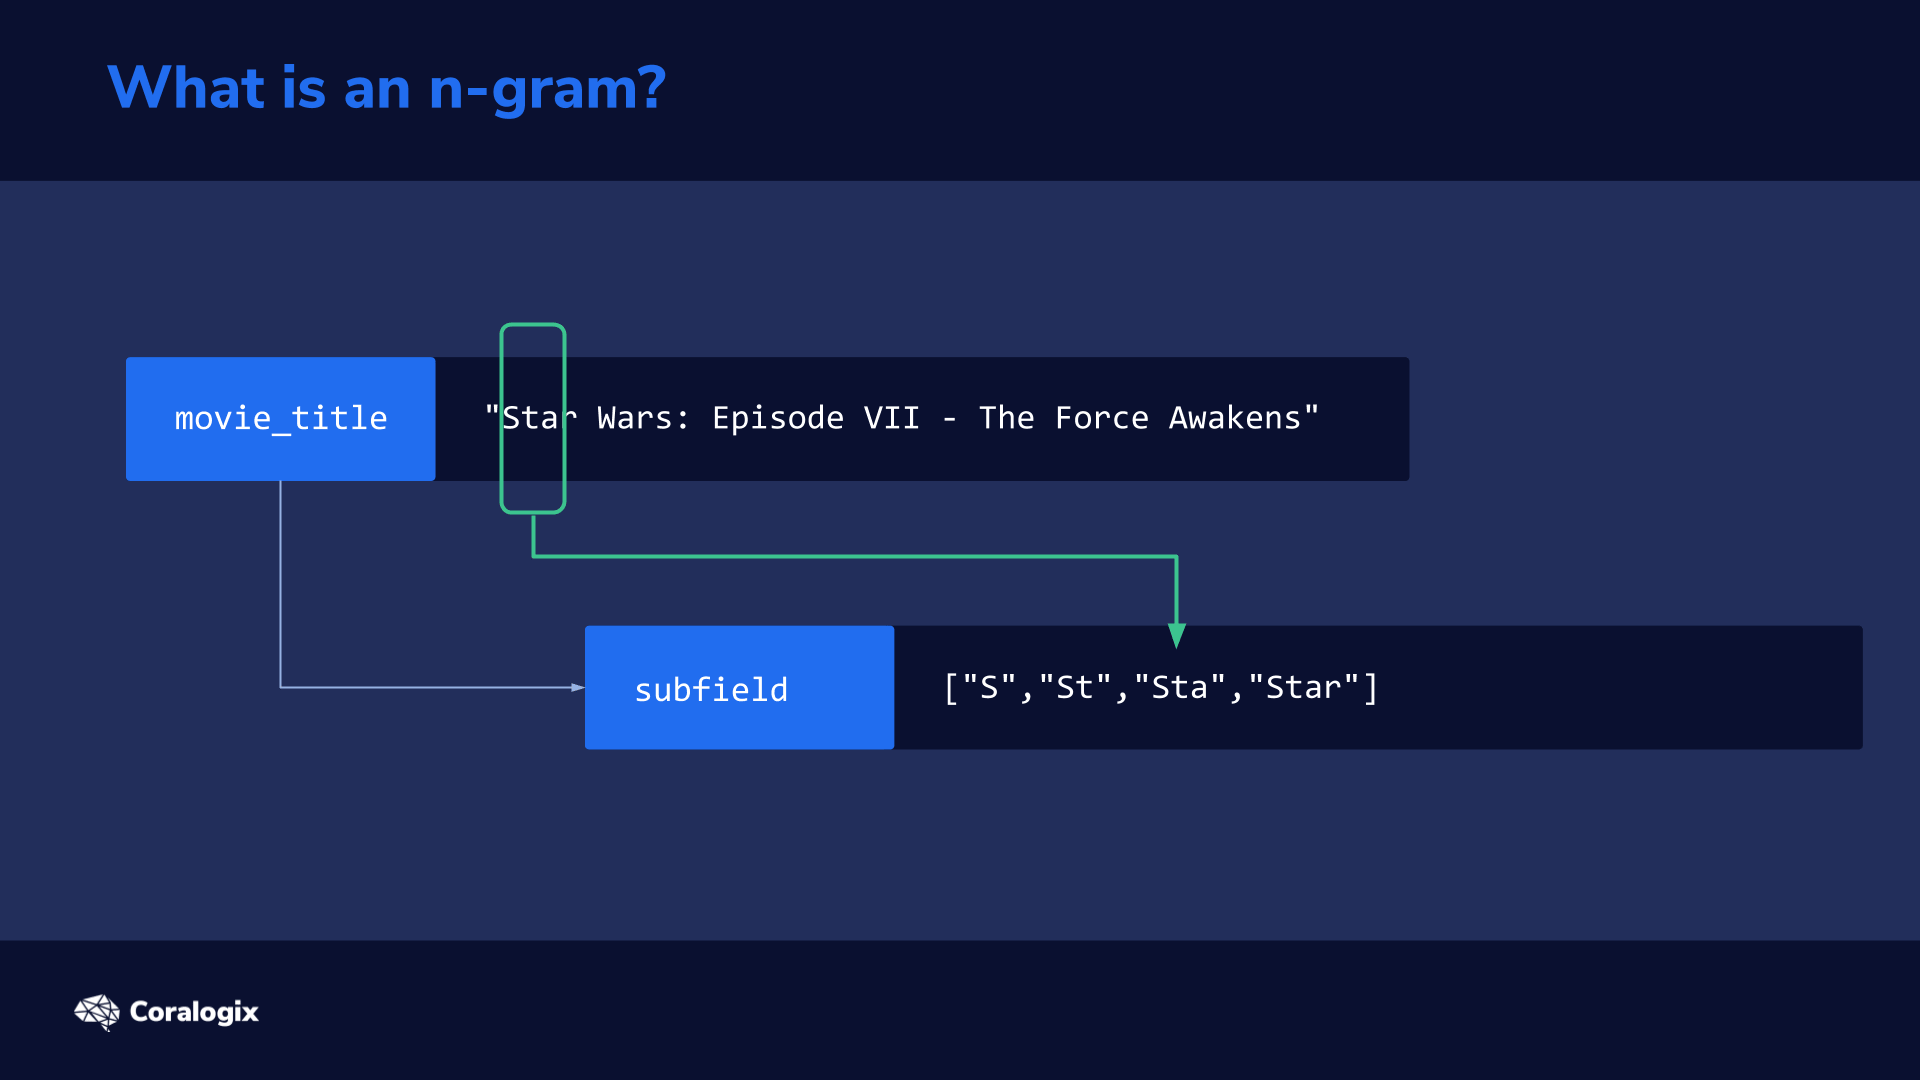
You can think of an n-gram as a sliding window that moves across a sentence or word to extract partial sequences of words or letters that are then indexed to rapidly match partial text every time a user types a query.
The n-grams are created during the text analysis phase if a field is mapped as a search_as_you_type datatype.
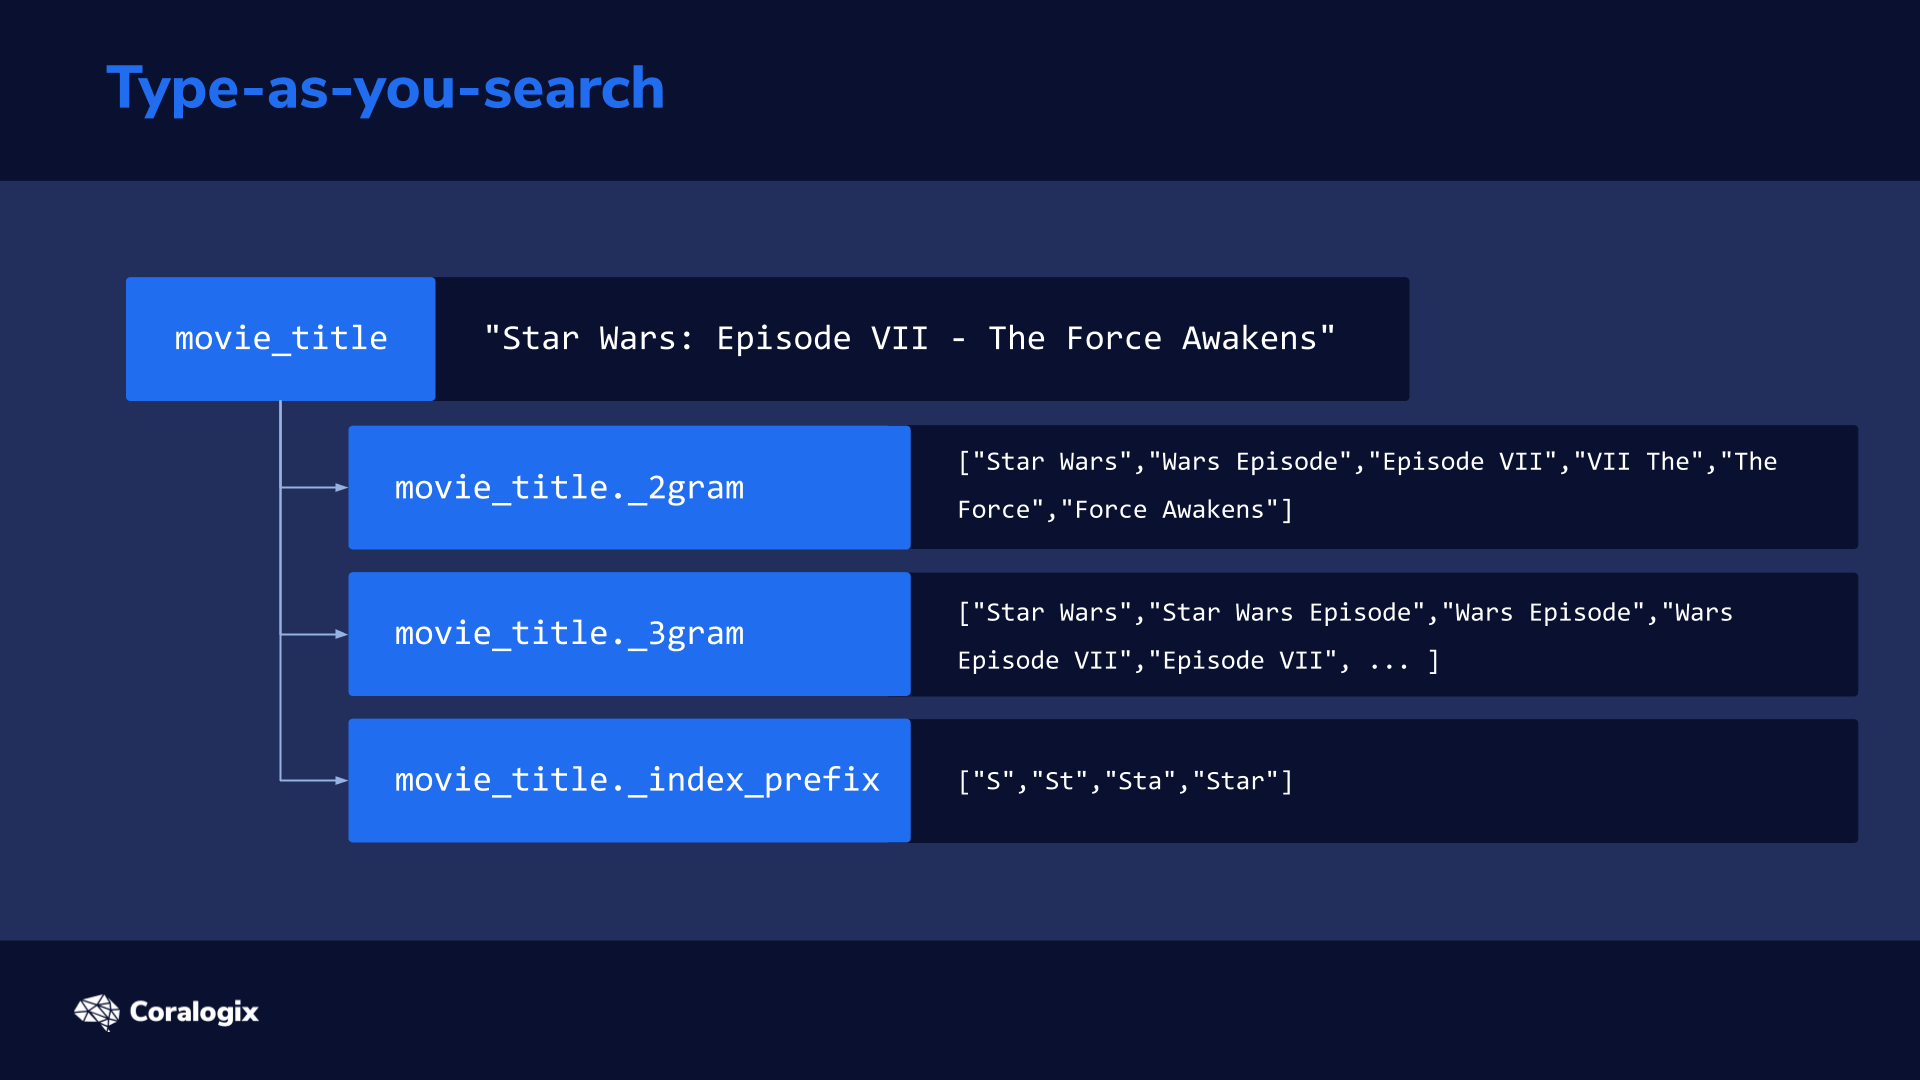
Let’s understand the analyzer process using an example. If we were to feed this sentence into Elasticsearch using the search_as_you_type datatype
"Star Wars: Episode VII - The Force Awakens"
The analysis process on this sentence would result in the following subfields being created in addition to the original field:
| Field | Example Output | |
| movie_title | The “root” field is analyzed as configured in the mapping | ["star","wars","episode","vii","the","force","awakens"] |
| movie_title._2gram | Splits sentence up by two words | ["Star Wars","Wars Episode","Episode VII","VII The","The Force","Force Awakens"] |
| movie_title._3gram | Splits the sentence up by three words | ["Star Wars","Star Wars Episode","Wars Episode","Wars Episode VII","Episode VII", ... ] |
| movie_title._index_prefix | This uses an edge n-gram token filter to split up each word into substrings, starting from the edge of the word | ["S","St","Sta","Star"] |
The subfield of movie_title._index_prefix in our example mimics how a user would type the search query one letter at a time. We can imagine how with every letter the user types, a new query is sent to Elasticsearch. While typing “star” the first query would be “s”, the second would be “st” and the third would be “sta”.
In the upcoming hands-on exercises, we’ll use an analyzer with an edge n-gram filter at the point of indexing our document. At search time, we’ll use a standard analyzer to prevent the query from being split up too much resulting in unrelated results.
Hands-on Exercises
For our hands-on exercises, we’ll use the same data from the MovieLens dataset that we used in earlier. If you need to index it again, simply download the provided JSON file and use the _bulk API to index the data.
wget https://media.sundog-soft.com/es7/movies.json
curl --request PUT localhost:9200/_bulk -H "Content-Type: application/json" --data-binary @movies.json
Analysis
First, let’s see how the analysis process works using the _analyze API. The _analyze API enables us to combine various analyzers, tokenizers, token filters and other components of the analysis process together to test various query combinations and get immediate results.
Let’s explore edge ngrams, with the term “Star”, starting from min_ngram which produces tokens of 1 character to max_ngram 4 which produces tokens of 4 characters.
curl --silent --request POST 'https://localhost:9200/movies/_analyze?pretty'
--header 'Content-Type: application/json'
--data-raw '{
   "tokenizer" : "standard",
   "filter": [{"type":"edge_ngram", "min_gram": 1, "max_gram": 4}],
   "text" : "Star"
}'
This yields the following response and we can see the first couple of resulting tokens in the array:

Pretty easy, wasn’t it? Now let’s further explore the search_as_you_type datatype.
Search_as_you_type Basics
We’ll create a new index called autocomplete. In the PUT request to the create index API, we will apply the search_as_you_type datatype to two fields: title and genre.
To do all of that, let’s issue the following PUT request.
curl --request PUT 'https://localhost:9200/autocomplete'
--header 'Content-Type: application/json'
-d '{
   "mappings": {
       "properties": {
           "title": {
               "type": "search_as_you_type"
           },
           "genre": {
               "type": "search_as_you_type"
           }
       }
   }
}'

>>>
{"acknowledged":true,"shards_acknowledged":true,"index":"autocomplete"}
We now have an empty index with a predefined data structure. Now we need to feed it some information.
To do this we will just reindex the data from the movies index to our new autocomplete index. This will generate our search_as_you_type fields, while the other fields will be dynamically mapped.
curl --silent --request POST 'https://localhost:9200/_reindex?pretty' --header 'Content-Type: application/json' --data-raw '{
 "source": {
   "index": "movies"
 },
 "dest": {
   "index": "autocomplete"
 }
}' | grep "total|created|failures"
The response should return a confirmation of five successfully reindexed documents:

We can check the resulting mapping of our autocomplete index with the following command:
curl localhost:9200/autocomplete/_mapping?pretty
You should see the mapping with the two search_as_you_type fields:

Search_as_you_type Advanced
Now, before moving further, let’s make our life easier when working with JSON and Elasticsarch by installing the popular jq command-line tool using the following command:
sudo apt-get install jq
And now we can start searching!
We will send a search request to the _search API of our index. We’ll use a multi-match query to be able to search over multiple fields at the same time. Why multi-match? Remember that for each declared search_as_you_type field, another three subfields are created, so we need to search in more than one field.
Also, we’ll use the bool_prefix type because it can match the searched words in any order, but also assigns a higher score to words in the same order as the query. This is exactly what we need in an autocomplete scenario.
Let’s search in our title field for the incomplete search query, “Sta”.
curl -s --request GET 'https://localhost:9200/autocomplete/_search?pretty' --header 'Content-Type: application/json' --data-raw '{
   "size": 5,
   "query": {
       "multi_match": {
           "query": "Sta",
           "type": "bool_prefix",
           "fields": [
               "title",
               "title._2gram",
               "title._3gram"
           ]
       }
   }
}'
You can see that indeed the autocomplete suggestion would hit both films with the Star term in their title.
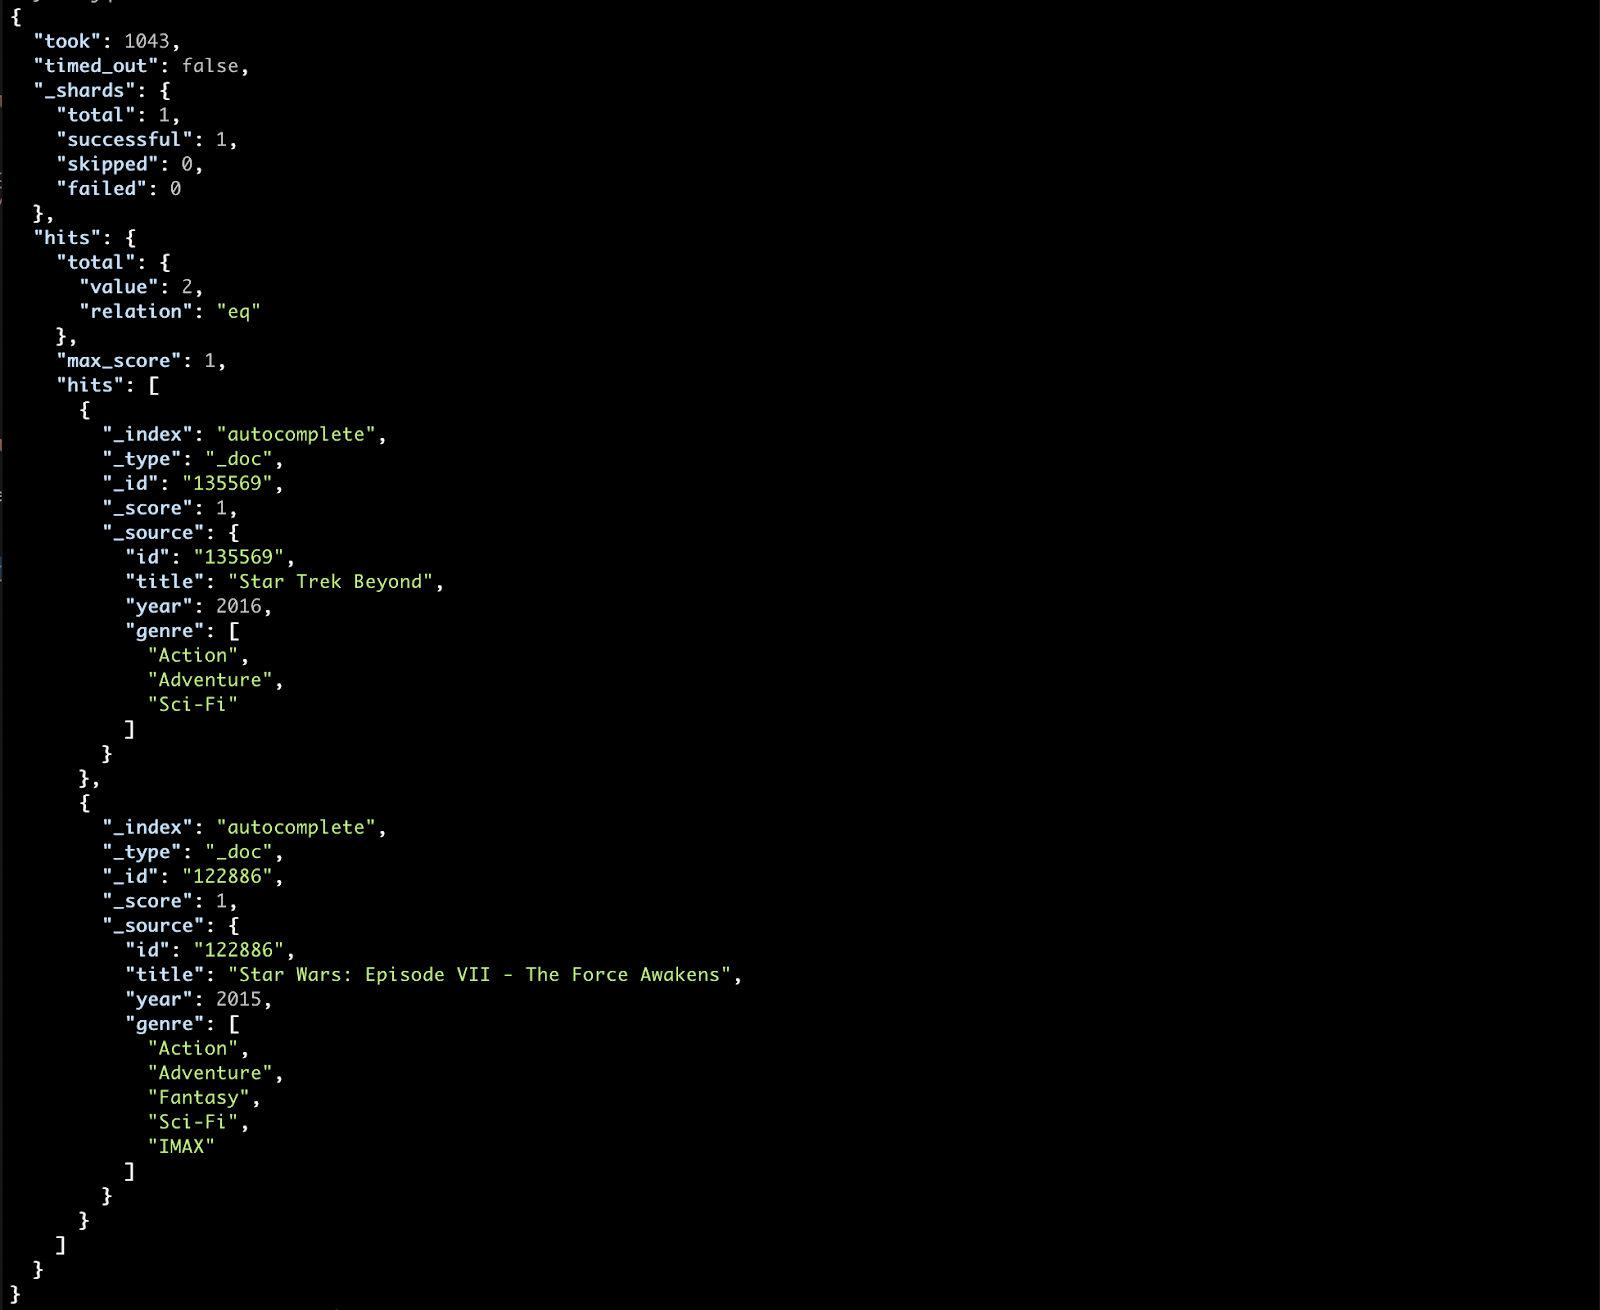
Now let’s do something fun to see all of this in action. We’ll make our command interpreter fire off a search request for every letter we type in.
Let’s go through this step by step.
- First, we’ll define an empty variable. Every character we type will be appended to this variable.
INPUT=''
-
- Next, we will define an infinite loop (instructions that will repeat forever, until you want to exit and press CTRL+C or Cmd+C). The instructions will do the following:
a) Read a single character we type in.
b) Append this character to the previously defined variable and print it so that we can see what will be searched for.
c) Fire off this query request, with what characters the variable contains so far.
d) Deserialize the response (the search results), with the jq command line tool we installed earlier, and grab only the field we have been searching in, which in this case is the title
e) Print the top 5 results we have received after each request.
while true
do
 IFS= read -rsn1 char
 INPUT=$INPUT$char
 echo $INPUT
 curl --silent --request GET 'https://localhost:9200/autocomplete/_search'
 --header 'Content-Type: application/json'
 --data-raw '{
     "size": 5,
     "query": {
         "multi_match": {
             "query": "'"$INPUT"'",
             "type": "bool_prefix",
             "fields": [
                 "title",
                 "title._2gram",
                 "title._3gram"
             ]
         }
     }
 }' | jq .hits.hits[]._source.title | grep -i "$INPUT"
done
If we would be typing “S” and then “t”→”a”→”r”→” “→”W”, we would get result like this:

Notice how with each letter that you add, it narrows down the choices to “Star” related movies. And with the final “W” character we get the final Star Wars suggestion.
Congratulations on going through the steps of this lesson. Now you can experiment on much bigger datasets and you are well prepared to reap the benefits that the Search_as_you_type datatype has to offer.
Learn More
- Text analysis concepts
- Basic parts of an analyzer and standard analyzer (aka the default)
- Shingle and edge ngram token filters
If, later on, you want to dig deeper on how to get such data, from the Wikipedia API, you can find a link to a useful article at the end of this lesson


