Introducing the Coralogix CLI: Headless Observability for Every Agent.
Running ELK on Kubernetes with ECK – Part 1

More and more employers are looking for people experienced in building and running Kubernetes-based systems, so it’s a great time to start learning how to take advantage of the new technology. Elasticsearch consists of multiple nodes working together, and Kubernetes can automate the process of creating these nodes and taking care of the infrastructure for us, so running ELK on Kubernetes can be a good options in many scenarios.
We’ll start this with an overview of Kubernetes and how it works behind the scenes. Then, armed with that knowledge, we’ll try some practical hands-on exercises to get our hands dirty and see how we can build and run Elastic Cloud on Kubernetes, or ECK for short.
What we’ll cover:
- Fundamental Kubernetes concepts
- Use Vagrant to create a Kubernetes cluster with one master node and two worker nodes
- Create Elasticsearch clusters on Kubernetes
- Extract a password from Kubernetes secrets
- Publicly expose services running on Kubernetes Pods to the Internet, when needed.
- How to install Kibana
- Inspect Pod logs
- Install the Kubernetes Web UI (i.e. Dashboard)
- Install plugins on an Elasticsearch node running in a Kubernetes container
| System Requirements: Before proceeding further, we recommend a system with at least 12GB of RAM, 8 CPU cores, and a fast internet connection. If your computer doesn’t meet the requirements, just use a VPS (virtual private server) provider. Google Cloud is one service that meets the requirements, as it supports nested virtualization on Ubuntu (VirtualBox works on their servers). |
There’s a trend, lately, to run everything in isolated little boxes, either virtual machines or containers. There are many reasons for doing this so we won’t get into it here, but if you’re interested, you can read Google’s motivation for using containers.
Let’s just say that containers make some aspects easier for us, especially in large-scale operations.
Managing one, two, or three containers is no big deal and we can usually do it manually. But when we have to deal with tens or hundreds of them, we need some help.
This is where Kubernetes comes in.
What is Kubernetes?
By way of analogy, if containers are the workers in a company, then Kubernetes would be the manager, supervising everything that’s happening and taking appropriate measures to keep everything running smoothly.
After we define a plan of action, Kubernetes does the heavy lifting to fulfill our requirements.
Examples of what you can do with K8s:
- Launch hundreds of containers, or whatever number needed with much less effort
- Set up ways that containers can communicate with each other (i.e. networking)
- Automatically scale up or down. When demand is high, create more containers, even on multiple physical servers, so that the stress of the high demand is distributed across multiple machines, making it easier to process. As soon as demand goes down, it can remove unneeded containers, as well as the nodes that were hosting them (if they’re sitting idle).
- If there are a ton of requests coming in, Kubernetes can load balance and evenly distribute the workload to multiple containers and nodes.
- Containers are carefully monitored with health checks, according to user-defined specifications. If one stops working, Kubernetes can restart it, create a new one as a replacement, or kill it entirely. If a physical machine running containers fails, those containers can be moved to another physical machine that’s still working correctly.
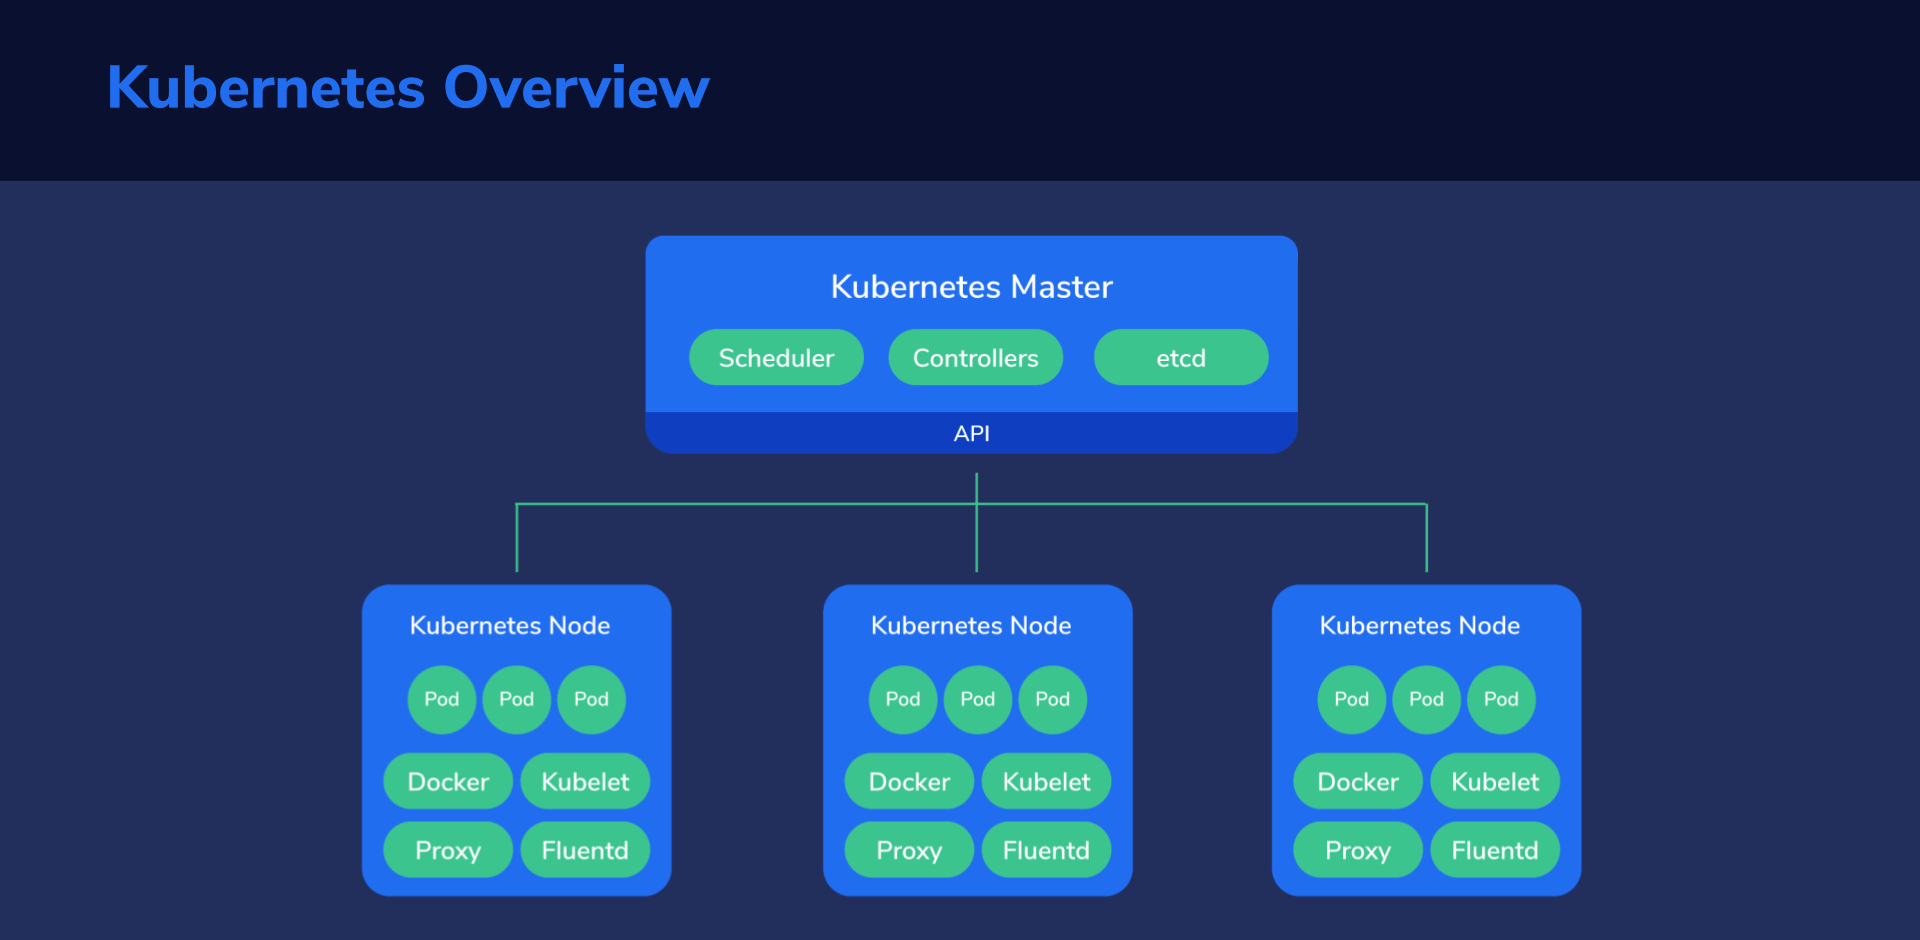
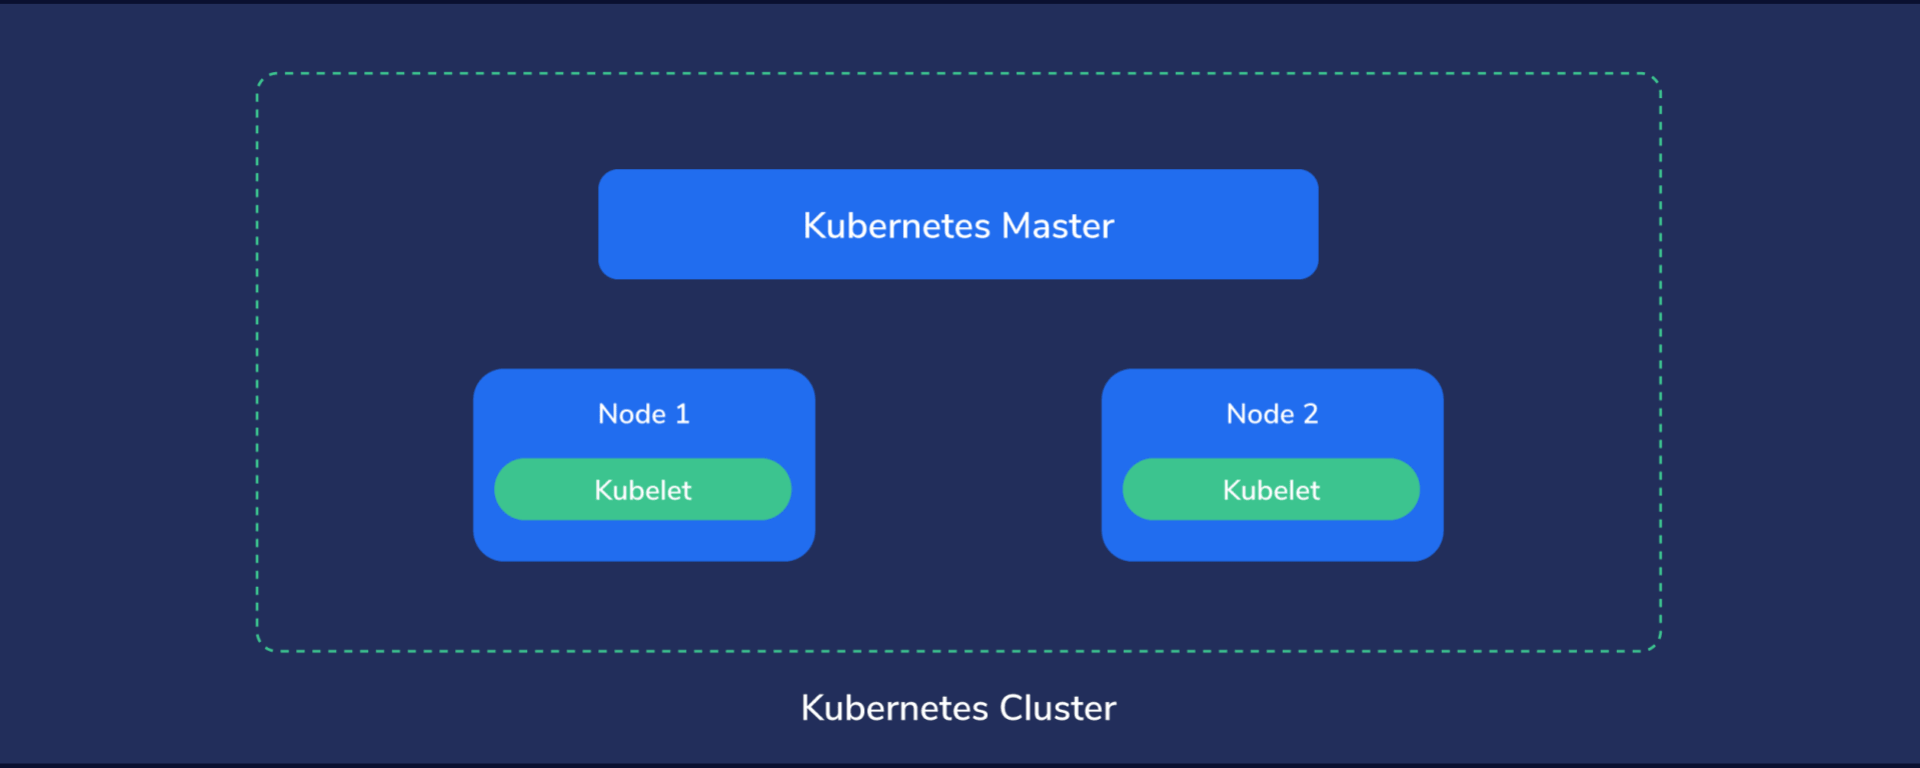
Kubernetes Cluster Structure
Let’s analyze the structure from the top down to get a good handle on things before diving into the hands-on section.
First, Kubernetes must run on computers of some kind. It might end up being on dedicated servers, virtual private servers, or virtual machines hosted by a capable server.
Multiple such machines running Kubernetes components form a Kubernetes cluster, which is considered the whole universe of Kubernetes, because everything, from containers to data, to monitoring systems and networking exists here.
In this little universe, there has to be a central point of command, like the “brains” of Kubernetes. We call this the master node. This node assumes control of the other nodes, sometimes also called worker nodes. The master node manages the worker nodes, while these, in turn, run the containers and do the actual work of hosting our applications, services, processing data, and so on.
Master Node
Basically, we’re the master of our master node, and it, in turn, is the master of every other node.
We instruct our master node about what state we want to achieve which then proceeds to take the necessary steps to fulfill our demands.
Simply put, it automates our plan of action and tries to keep the system state within set parameters, at all times.
Nodes (or Worker Nodes)
The Nodes are like the “worker bees” of a Kubernetes cluster and provide the physical resources, such as CPU, storage space, memory, to run our containers.
Basic Kubernetes Concepts
Up until this point, we kept things simple and just peaked at the high-level structure of a Kubernetes cluster. So now let’s zoom in and take a closer look at the internal structure so we better understand what we’re about to get our hands dirty with.
Pods
Pods are like the worker ants of Kubernetes – the smallest units of execution. They are where applications run and do their actual work, processing data. A Pod has its own storage resources, and its own IP address and runs a container, or sometimes, multiple containers grouped together as a single entity.
Services
Pods can appear and disappear at any moment, each time with a different IP address. It would be quite hard to send requests to Pods since they’re basically a moving target. To get around this, we use Kubernetes Services.
A K8s Service is like a front door to a group of Pods. The service gets its own IP address. When a request is sent to this IP address, the service then intelligently redirects it to the appropriate Pod. We can see how this approach provides a fixed location that we can reach. It can also be used as a mechanism for things like load balancing. The service can decide how to evenly distribute all incoming requests to appropriate Pods.
Namespaces
Physical clusters can be divided into multiple virtual clusters, called namespaces. We might use these for a scenario in which two different development teams need access to one Kubernetes cluster.
With separate namespaces, we don’t need to worry if one team screws up the other team’s namespace since they’re logically isolated from one another.
Deployments
In deployments, we describe a state that we want to achieve. Kubernetes then proceeds to work its magic to achieve that state.
Deployments enable:
- Quick updates – all Pods can gradually be updated, one-by-one, by the Deployment Controller. This gets rid of having to manually update each Pod. A tedious process no one enjoys.
- Maintain the health of our structure – if a Pod crashes or misbehaves, the controller can replace it with a new one that works.
- Recover Pods from failing nodes – if a node should go down, the controller can quickly launch working Pods in another, functioning node.
- Automatically scale up and down based on the CPU utilization of Pods.
- Rollback changes that created issues. We’ve all been there 🙂
Labels and Selectors
First, things like Pods, services, namespaces, volumes, and the like, are called “objects”. We can apply labels to objects. Labels help us by grouping and organizing subsets of these objects that we need to work with.
The way Labels are constructed is with key/value pairs. Consider these examples:
app:nginx
site:example.com
Applied to specific Pods, it can easily help us identify and select those that are running the Nginx web server and are hosting a specific website.
And finally, with a selector, we can match the subset of objects we intend to work with. For example, a selector like
app = nginx
site = example.com
This would match all the Pods running Nginx and hosting “example.com”.
Ingress
In a similar way that Kubernetes Services sit in front of Pods to redirect requests, Ingress sits in front of Services to load balance between different Services using SSL/TLS to encrypt web traffic or using name-based hosting.
Let’s take an example to explain name-based hosting. Say there are two different domain names, for example, “a.example.com” and “b.example.com” pointing to the same ingress IP address. Ingress can be made to route requests coming from “a.example.com” to service A and requests from “b.example.com” to service B.
Stateful Sets
Deployments assume that applications in Kubernetes are stateless, that is, they start and finish their job and can then be terminated at any time – with no state being preserved.
However, we’ll need to deal with Elasticsearch, which needs a stateful approach.
Kubernetes has a mechanism for this called StatefulSets. Pods are assigned persistent identifiers, which makes it possible to do things like:
- Preserve access to the same volume, even if the Pod is restarted or moved to another node.
- Assign persistent network identifiers, even if Pods are moved to other nodes.
- Start Pods in a certain order, which is useful in scenarios where Pod2 depends on Pod1 so, obviously, Pod1 would need to start first, every time.
- Rolling updates in a specific order.
Persistent Volumes
A persistent volume is simply storage space that has been made available to the Kubernetes cluster. This storage space can be provided from the local hardware, or from cloud storage solutions.
When a Pod is deleted, its associated volume data is also deleted. As the name suggests, persistent volumes preserve their data, even after a Pod that was using it disappears. Besides keeping data around, it also allows multiple Pods to share the same data.
Before a Pod can use a persistent volume, though, it needs to make a Persistent Volume Claim on it.
Headless Service
We previously saw how a Service sits in front of a group of Pods, acting as a middleman, redirecting incoming requests to a dynamically chosen Pod. But this also hides the Pods from the requester, since it can only “talk” with the Service’s IP address.
If we remove this IP, however, we get what’s called a Headless Service. At that point, the requester could bypass the middle man and communicate directly with one of the Pods. That’s because their IP addresses are now made available to the outside world.
This type of service is often used with Stateful Sets.
Kubectl
Now, we need a way to interact with our entire Kubernetes cluster. The kubectl command allows us to enter commands to get kubectl to do what we need. It then interacts with the Kubernetes API, and all of the other components, to execute our desired actions.
Let’s look at a few simple commands.
For example, to check the cluster information, we’d would enter:
kubectl cluster-info
If we wanted to list all nodes in the cluster, we’d enter:
kubectl get nodes
We’ll take a look at many more examples in our hands-on exercises.
Operators
Some operations can be complex. For example, upgrading an application might require a large number of steps, verifications, and decisions on how to act if something goes wrong. This might be easy to with one installation, but what if we have 1000 to worry about?
In Kubernetes, hundreds, thousands, or more containers might be running at any given point. If we would have to manually do a similar operation on all of them, it’s why we’d want to automate that.
Enter Operators. We can think of them as a sort of “software operators,” replacing the need for human operators. These are written specifically for an application, to help us, as service owners, to automate tasks.
Operators can deploy and run the many containers and applications we need, react to failures and try to recover from them, automatically backup data, and so on. This essentially lets us extend Kubernetes beyond its out-of-the-box capabilities without modifying the actual Kubernetes code.
Custom Resources
Since Kubernetes is modular by design, we can extend the API’s basic functionality. For example, the default installation might not have appropriate mechanisms to deal efficiently with our specific application and needs. By registering a new Custom Resource Definition, we can add the functionality we need, custom-tailored for our specific application. In our exercises, we’ll explore how to add Custom Resource Definitions for various Elasticsearch applications.
Hands-On Exercises
Basic Setup
Ok, now the fun begins. We’ll start by creating virtual machines that will be added as nodes to our Cluster. We will use VirtualBox to make it simpler.
1. Installing VirtualBox
1.1 Installing VirtualBox on Windows
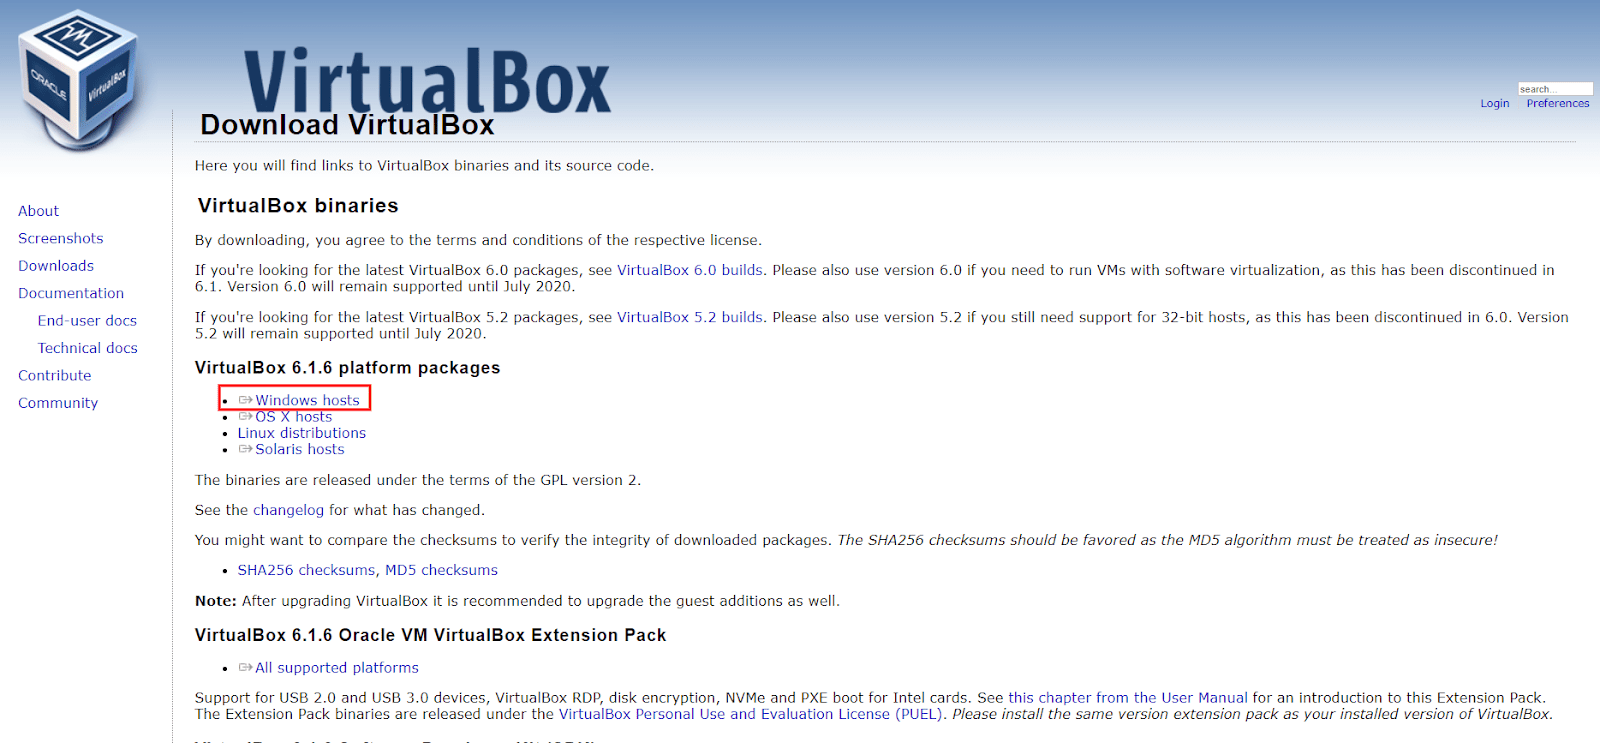
Let’s go to the download page: https://www.virtualbox.org/wiki/Downloads and click on “Windows Hosts”.
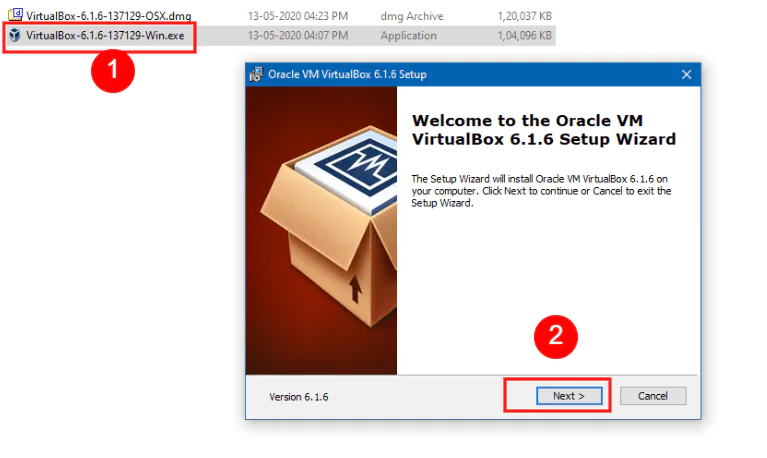
We can then open the setup file we just downloaded and click “Next” in the installation wizard, keeping the default options selected.
After finishing with the installation, it’s a good idea to check if everything works correctly by opening up VirtualBox, either from the shortcut added to the desktop, or the Start Menu.
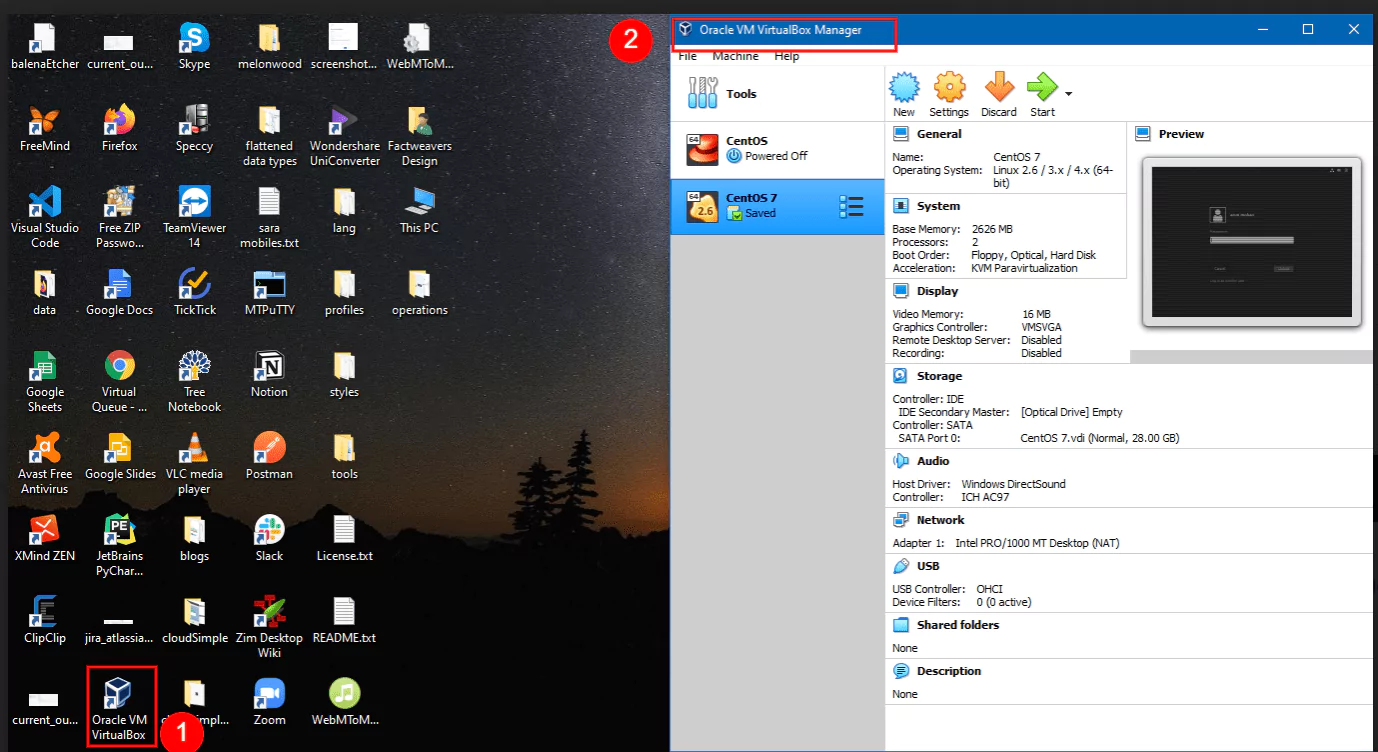
If everything seems to be in order, we can close the program and continue with the Vagrant setup.
1.2 Installing VirtualBox on Ubuntu
First, we need to make sure that the Ubuntu Multiverse repository is enabled.
Afterward, we install VirtualBox with the next command:
sudo apt-get update && sudo apt-get install virtualbox-qt
Let’s try to run VirtualBox to ensure the install was successful:
virtualbox
Once the app opens up, we can close it and continue with Vagrant.
1.3 Installing VirtualBox on macOS
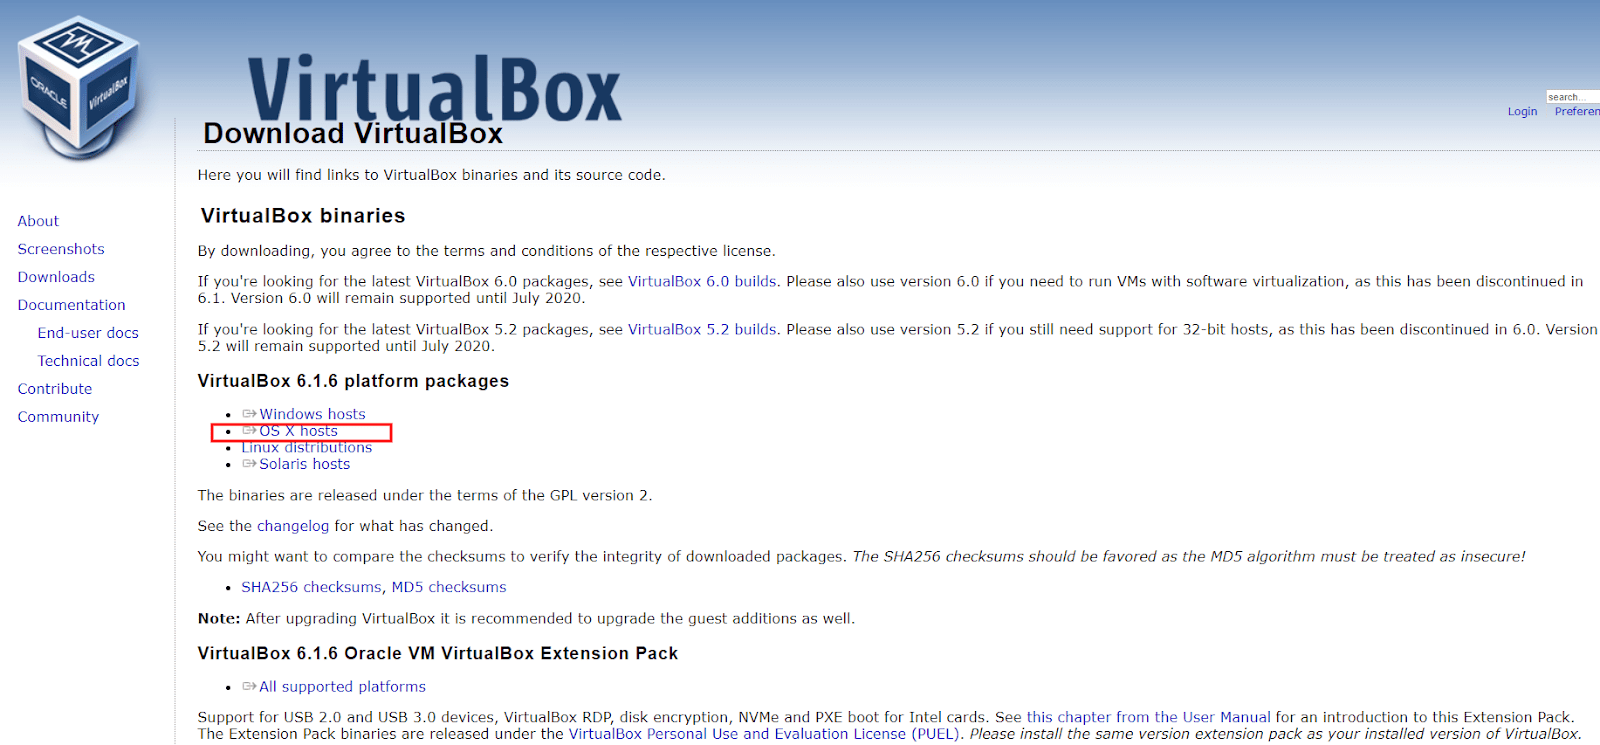
Let’s download the setup file from https://www.virtualbox.org/wiki/Downloads and click on “OS X hosts.”
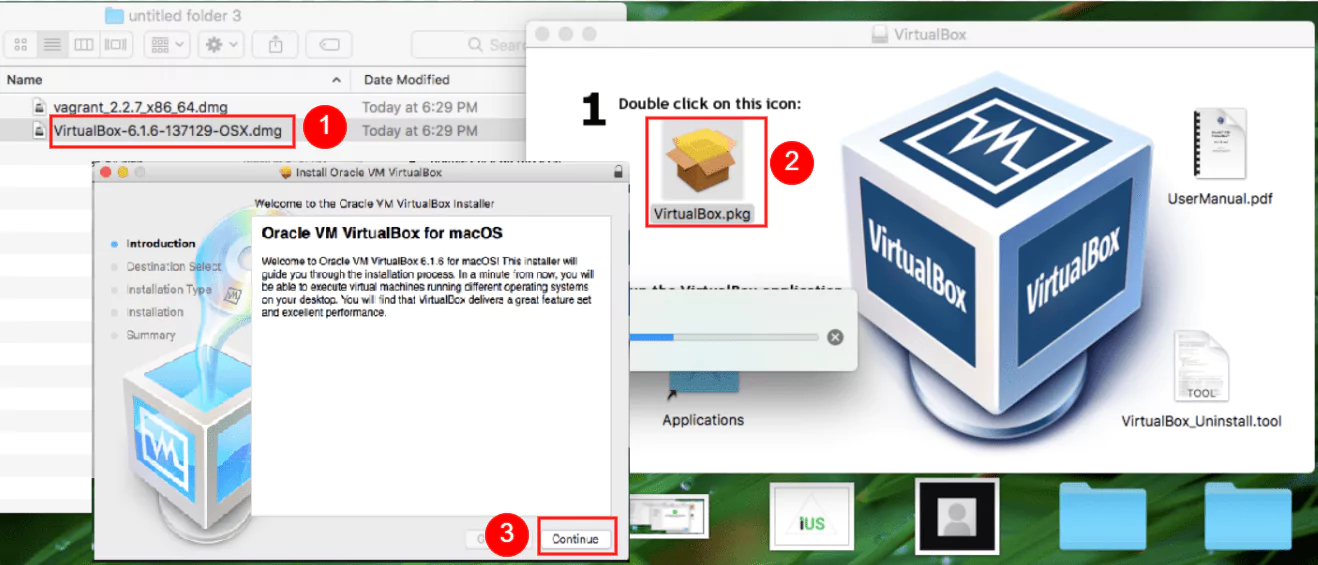
We can now open the DMG file, execute the PKG inside and run the installer. We keep the default options selected and continue with the steps in the install wizard.
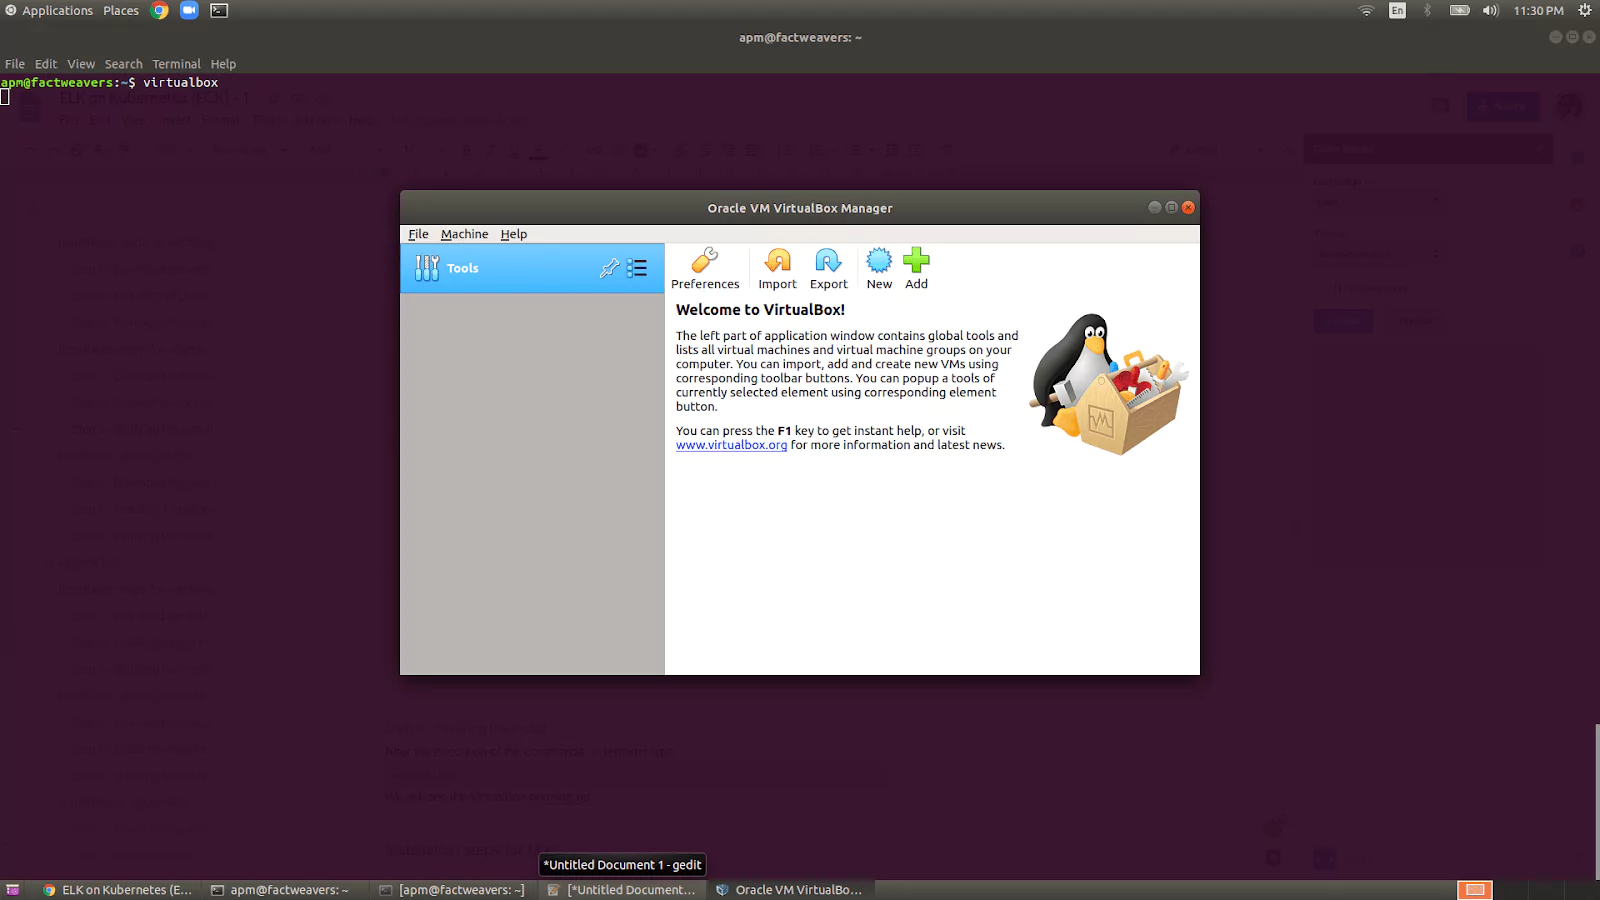
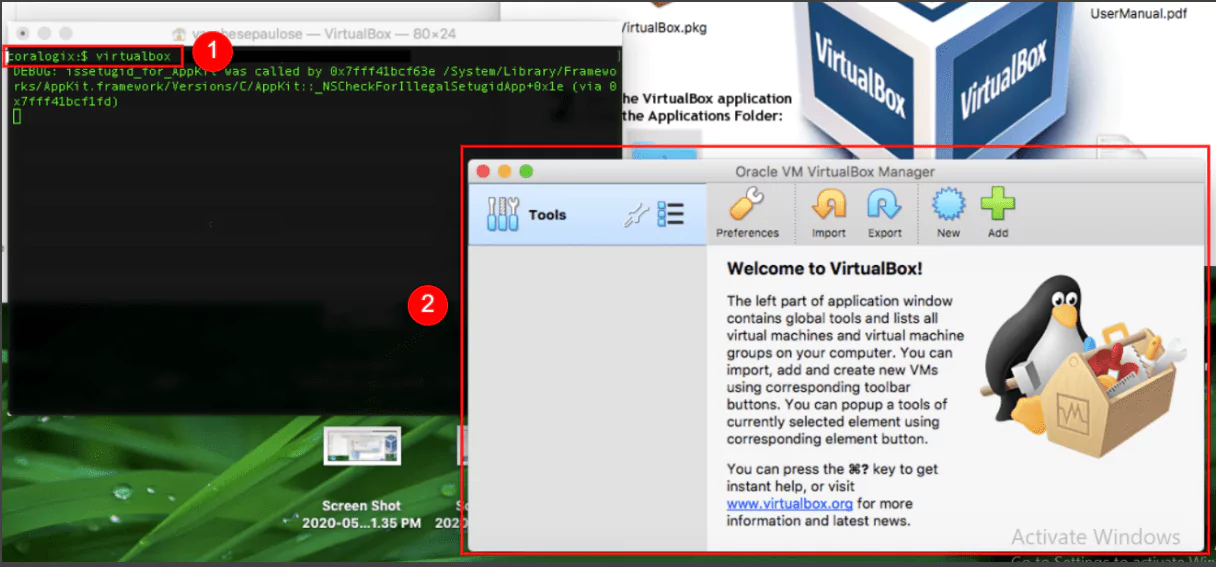
Let’s open up the terminal and check if the install was successful.
virtualbox
If the application opens up and everything seems to be in order, we can continue with the Vagrant setup.
2. Installing Vagrant
It would be pretty time-consuming to set up each virtual machine for use with Kubernetes. But we will use Vagrant, a tool that automates this process, making our work much easier.
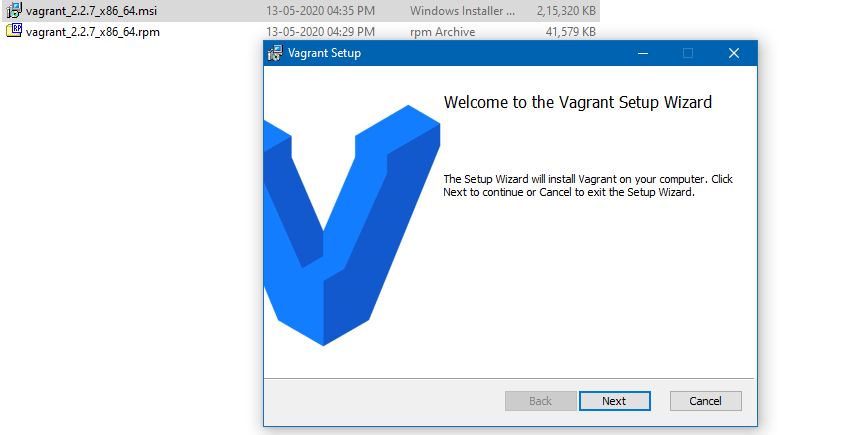
2.1 Installing Vagrant on Windows
Installing on Windows is easy. We just need to visit the following address, https://www.vagrantup.com/downloads.html, and click on the appropriate link for the Windows platform. Nowadays, it’s almost guaranteed that everyone would need the 64-bit executable. Only download the 32-bit program if you’re certain your machine has an older, 32-bit processor.
Now we just need to follow the steps in the install wizard, keeping the default options selected.
If at the end of the setup you’re prompted to restart your computer, please do so, to make sure all components are configured correctly.
Let’s see if the “vagrant” command is available. Click on the Start Menu, type “cmd” and open up “Command Prompt”. Next, type:
vagrant --version

If the program version is displayed, we can move on to the next section and provision our Kubernetes cluster.
2.2 Installing Vagrant on Ubuntu
First, we need to make sure that the Ubuntu Universe repository is enabled.
If that’s enabled, installing Vagrant is as simple as running the following command:
sudo apt-get update && sudo apt-get install vagrant
Finally, let’s double-check that the program was successfully installed, with:
vagrant --version
2.3 Installing Vagrant on macOS
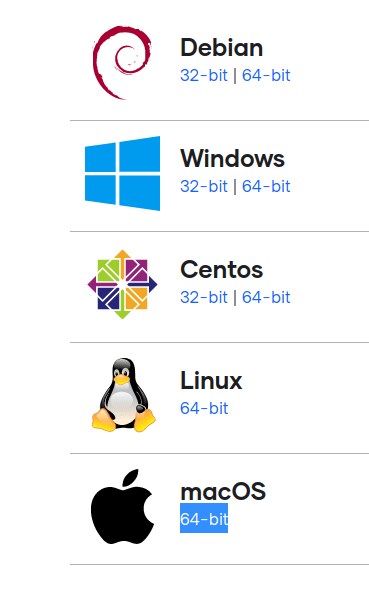
Let’s first download the setup file from https://www.vagrantup.com/downloads.html, which, at the time of this writing, would be found at the bottom of the page, next to the macOS icon.
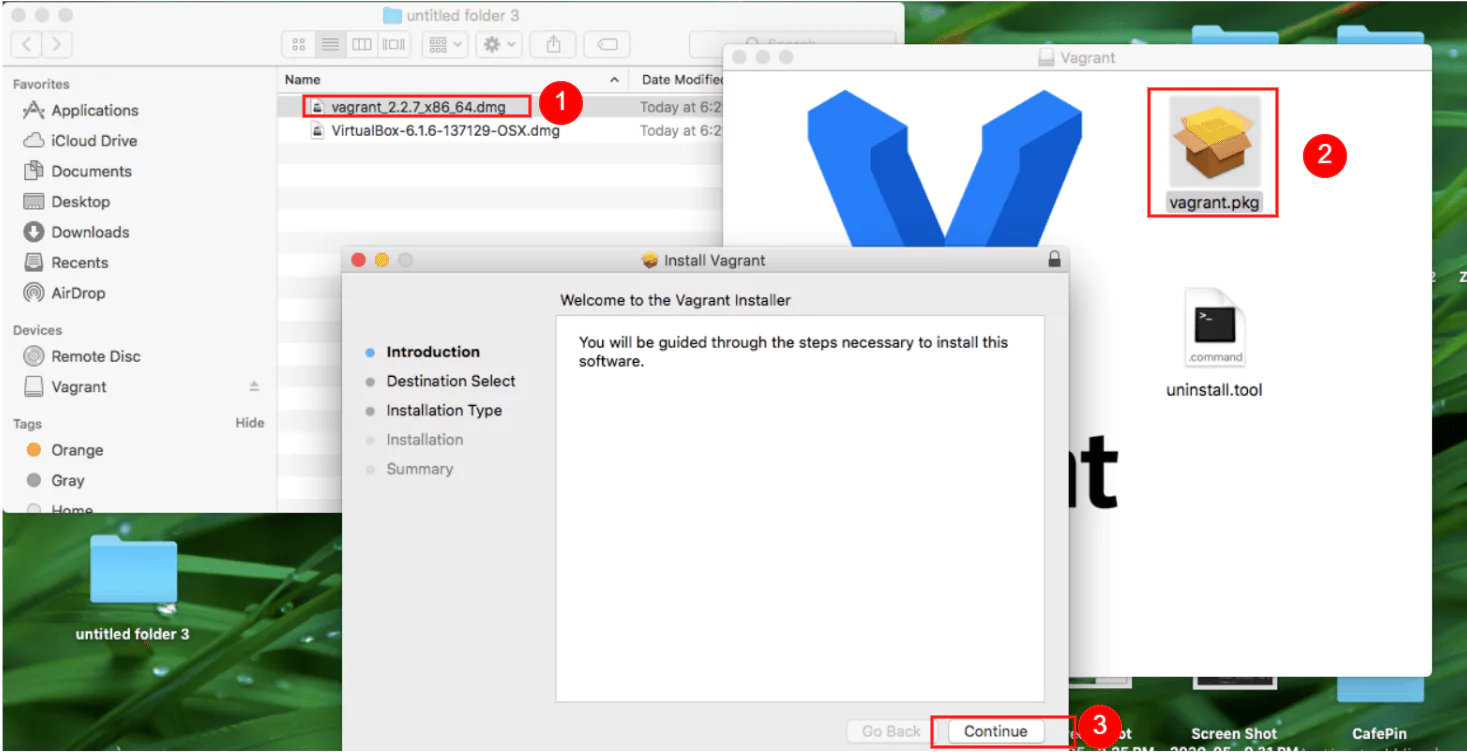
Once the download is finished, let’s open up the DMG file, execute the PKG inside, and go through the steps of the install wizard, leaving the default selections as they are.
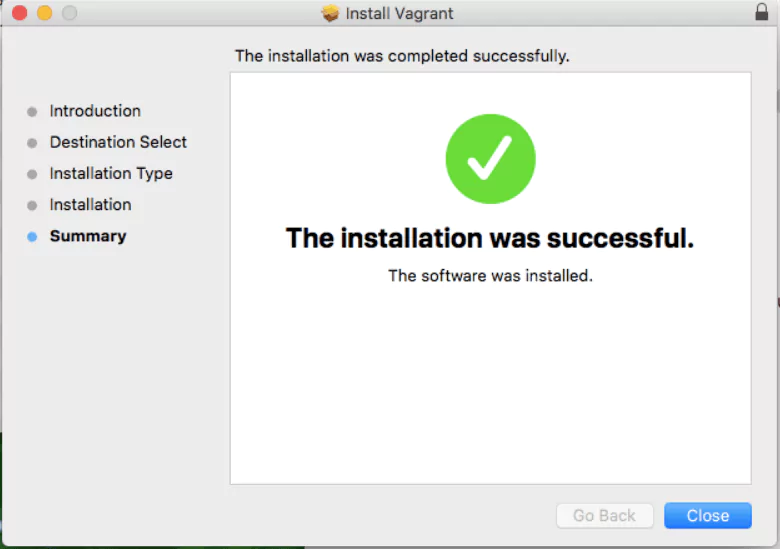
Once the install is complete, we will be presented with this window.
But we can double-check if Vagrant is fully set up by opening up the terminal and typing the next command:
vagrant --version
Provisioning the Kubernetes Cluster
Vagrant will interact with the VirtualBox API to create and set up the required virtual machines for our cluster. Here’s a quick overview of the workflow.

Once Vagrant finishes the job, we will end up with three virtual machines. One machine will be the master node and the other two will be worker nodes.
Let’s first download the files that we will use with Vagrant, from https://github.com/coralogix-resources/elastic-cloud-on-kubernetes-webinar/raw/master/k8s_ubuntu.zip
Credit for files: https://bitbucket.org/exxsyseng/k8s_ubuntu/src/master/
Next, we have to extract the directory “k8s_ubuntu” from this ZIP file.
Now let’s continue, by entering the directory we just unzipped. You’ll need to adapt the next command to point to the location where you extracted your files.
For example, on Windows, if you extracted the directory to your Desktop, the next command would be “cd Desktopk8s_ubuntu”.
On Linux, if you extracted to your Downloads directory, the command would be “cd Downloads/k8s_ubuntu”.
cd k8s_ubuntu
We’ll need to be “inside” this directory when we run a subsequent “vagrant up” command.
Let’s take a look at the files within. On Windows, enter:
dir
On Linux/macOS, enter:
ls -lh
The output will look something like this:
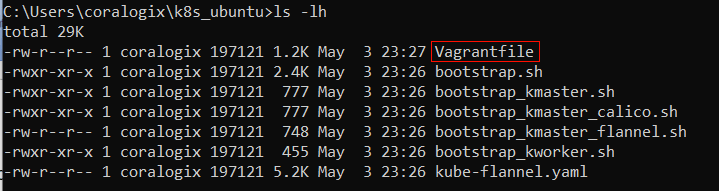
We can see a file named “Vagrantfile”. This is where the main instructions exist, telling Vagrant how it should provision our virtual machines.
Let’s open the file, since we need to edit it:
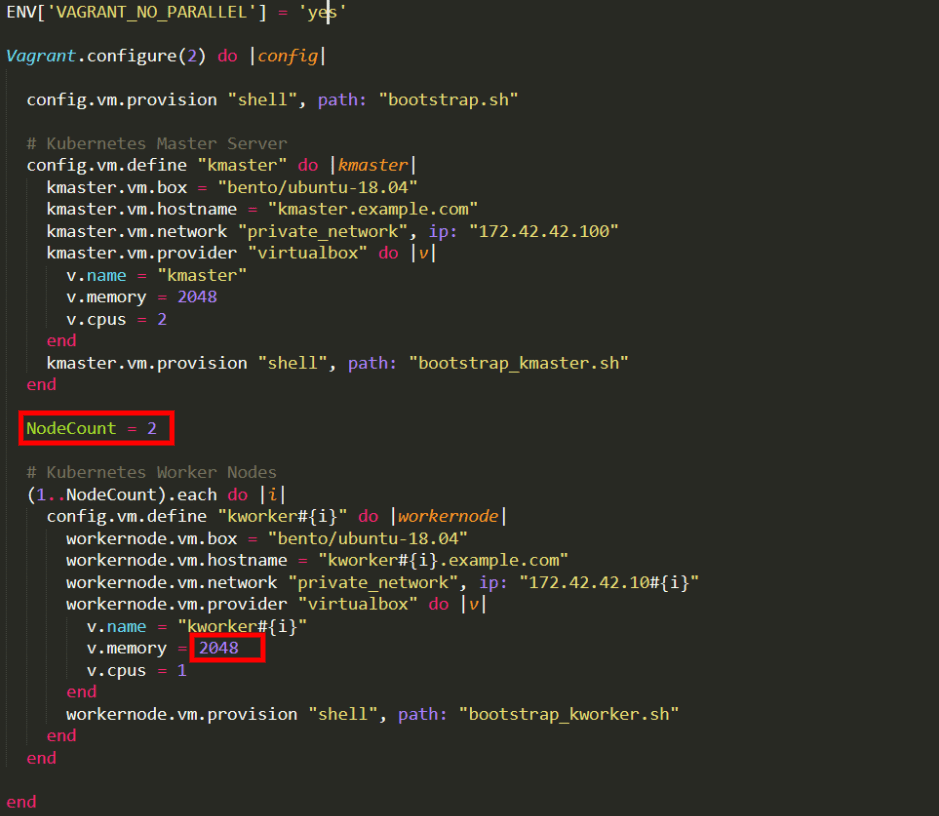
Note: In case you’re running an older version of Windows, we recommend you edit in WordPad instead of Notepad. Older versions of Notepad have trouble interpreting EOL (end of line) characters in this file, making the text hard to read since lines wouldn’t properly be separated.
Look for the text “v.memory” found under the “Kubernetes Worker Nodes” section. We’ll assign this variable a value of 4096, to ensure that each Worker Node gets 4 GB of RAM because Elasticsearch requires at least this amount to function properly with the 4 nodes we will add later on. We’ll also change “v.cpus” and assign it a value of 2 instead of 1.
After we save our edited file, we can finally run Vagrant:
vagrant up
Now, this might take a while since there’re quite a few things that need to be downloaded and set up. We’ll be able to follow its progress in the output and we may get a few prompts to accept some changes.
When the job is done, we can SSH into the master node by typing:
vagrant ssh kmaster
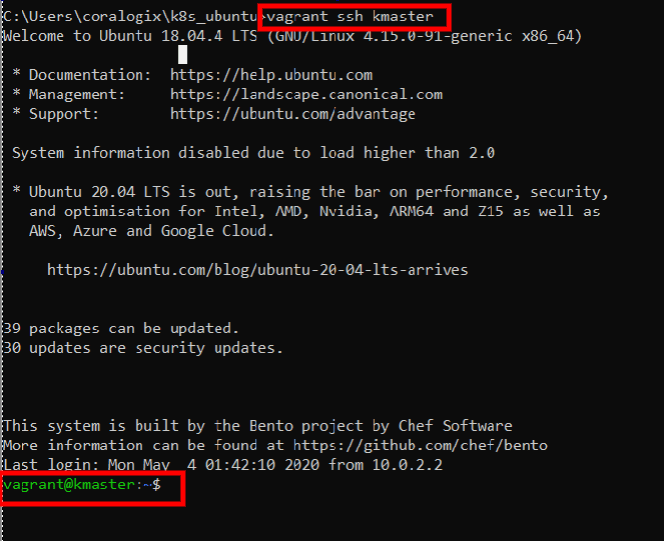
Let’s check if Kubernetes is up and running:
kubectl get nodes
This will list the nodes that make up this cluster:

Pretty awesome! We are well on our way to implementing the ELK stack on Kubernetes. So far, we’ve created our Kubernetes cluster and just barely scratched the surface of what we can do with such automation tools.
Stay tuned for more about Running ELK on Kubernetes with the rest of the series!
Part 2 – Coming December 22nd, 2020
Part 3 – Coming December 29th, 2020