Elasticsearch Tutorial: From Deployment to Basic Usage

Elastic is “an index”, “a search engine”, “a big data solution”, an analytics platform with advanced data visualizations and incredibly fast search capabilities. In short, it’s a solution for many problems.
The Elasticsearch platform provides a distributed search cluster that enables large amounts of data to be indexed and searched at scale. It has quickly become the perfect solution for e-commerce applications, dating apps, log collection, weather analysis, government planning, Cyber Security, IoT, and much much more.
The key features of Elasticsearch provide distributed advanced search and aggregation of data, whilst providing high availability, security, and other data management features.
In this intro to Elasticsearch tutorial, we are going to explore the power of Elasticsearch and cover the basics of how to use it.
Note: This tutorial will help you get started using Elasticsearch. It assumes that you’ve already weighed the pros and cons of using Elasticsearch in your particular instance, especially considering Elastic’s new SSPL license change.
Getting Started
Elastic hides the complex search and distribution infrastructure from beginners, allowing you to start with a basic understanding and gradually increase your knowledge to unlock additional benefits along the way.
This post will cover everything you need to know to get started, including:
- Deploying Elastic with Docker
- Creating and deleting indices
- Editing documents
- And more!
How does Elasticsearch work?
Elasticsearch operates by retrieving and managing semi-structured data and document-oriented objects. The internal workings of Elasticsearch use the “shared nothing” architecture. Elasticsearch uses Apache Lucene’s under the hood which is an inverted index as its primary data structure.
How is information stored in Elasticsearch?
In its rawest form, Lucene is a text search engine. It stores text in a custom binary format which is optimized for retrieval purposes. Lucene’s architecture is that of “indices containing documents”. Each index consists of several segments and these segments are saved in several files inside the Elasticsearch platform. Documents are split up into several lookup structures, which reside in the files.
If you browse the data folder on an elastic node you will see the above Lucene index and segment structure. Instead of storing JSON formatted data on the filesystem, the files contain optimized binary data which is accessed via the Elasticsearch API. This API provides the data as JSON.

How does Elasticsearch find information?
When it comes to searching the data in Elasticsearch, Elastic uses an inverted index. This in its most basic form provides a mapping of each unique ‘word’ to the list of documents containing that word. This process is what enables Elastic to locate documents with given keywords so quickly.
Can Elasticsearch work across multiple nodes?
Elastic is a distributed platform, meaning it’s designed to run across multiple nodes. Multiple nodes form a cluster. Each of the nodes in a cluster has Index information stored in one or more partitions, these are referred to as shards. The Elasticsearch platform is capable of dynamically distributing and allocating shards to nodes in the cluster. Elasticsearch also provides the capabilities to replicate shards to nodes for resilience.
This process and capability enable the platform to be highly flexible with data distribution, which provides great capabilities to protect data stored within an Elastic cluster.
Deploying Elasticsearch
For this post, we’ll set up and run a single node instance however in production the Elastic Stack can be deployed on-premises, in the cloud, in docker, and a number of other ways. The requirements for the base infrastructure remain mostly the same. Firstly, and most importantly, you are going to want a minimum of three nodes (Virtual Machines or Containers).
TIP – You should ideally design this to span multiple zones to build a fully resilient cluster. For example, in the Cloud, you want to ensure you have nodes sitting in different zones to mitigate risks of outages.
Prerequisites
For this tutorial, you will need to meet the following prerequisites:
- Docker
- 1 GB of Storage
- Knowledge of CURL
- Knowledge of Terminal
We will use Docker to quickly get an Elasticsearch instance up and running. If you haven’t used Docker before, you can jump over to their website to get yourself familiar.
There are a number of ways to deploy Elasticsearch. The goal of this article is to get you up and working in the shortest possible time. We are going to build a single node cluster to demonstrate the power of Elastic, but this should only be used for development and testing environments.
TIP – Never run an Elastic cluster on a single node for production.
Deploying to Docker
Let’s get Elasticsearch deployed. As we are going to run this in docker jump into a terminal session and pull the Elastic image. In this tutorial, we are going to use version 7.9.3. To pull the images to your machine run the below:
docker pull elasticsearch:7.9.3Pulling the image should look like this:

Now that you have the image it’s time to run the image in a container. Elasticsearch will need a few ports to be forwarded to our localhost so we can access the Elasticsearch services. We will forward port 9200 which is the Elasticsearch API. We also add the configuration for a single development node ‘-e discovery.type=single-node’
docker run -d --name elasticsearch -p 9200:9200 -e "discovery.type=single-node" elasticsearch:7.9.3Running the container should look like this:

The returned string is the docker container id. This now means that the image is running. We can verify that this is the case by running docker ps.
docker psThis will now list all running docker containers:

Great, so the image is now running as a container on your local machine. Let see if we can access the Elasticsearch API. A simple GET request to our localhost should connect to the Elasticsearch container when we use port 9200. Using curl lets see if our container is working:
curl localhost:9200/You should receive the below from your GET request:
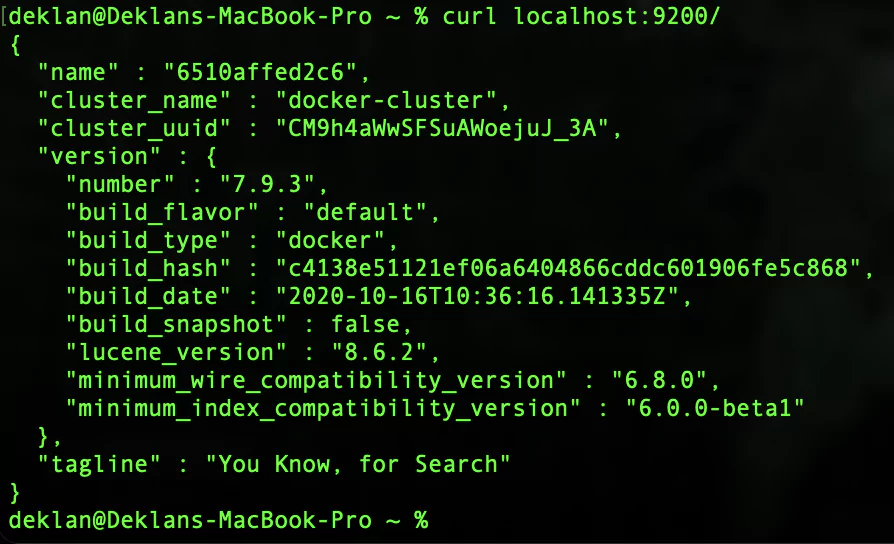
Nice! You now have a local container running Elasticsearch. You can now start and stop your Elastic container with the following:
To stop the container:
docker stop elasticsearchTo start the container:
docker start elasticsearchCreating an Index
Now that we have a working Elasticsearch container it’s time to add some data to it. Adding data to Elasticsearch streams the data into an Apache Lucene Index under the hood. Elasticsearch then uses the Lucene indexes to search and retrieve data. Whilst it is not a requirement to know a lot about the working of Lucene, it most certainly helps when you start to get serious with Elasticsearch!
Elasticsearch is presented as a REST API. This means that you can either use POST or PUT methods to add data to the platform. The PUT method is used when you want to specify the id of the data item and POST is used when you want Elasticsearch to generate an id for the data item. You use the GET method to pull data back out of Elasticsearch. But more on that later!
Let’s add some data to Elasticsearch:
curl -XPOST 'localhost:9200/logs/test' -H 'Content-Type: application/json' -d'

{

        "timestamp": "2020-12-05 12:24:00",

        "message": "Adding data to Elasticsearch",

        "reason_code": "01",

        "username": "Deklan"

}

'
In this test example, we are using JSON to format our input. We are creating a record containing a timestamp, a message, a reason code, and a username. You can of course structure the data as required for your use case. Running the command results in the below:

We can see that the request was accepted and Elasticsearch returns information about the request that was processed.
Let’s take a look at using the PUT method to create a record with a specific ID. In this example, we are creating a reason code that will be used in our first record.
curl -X PUT 'localhost:9200/app/reason/1' -H 'Content-Type: application/json' -d '

{

  "id": 1,

  "details": "This is a test reason code",

  "created": "2020-12-05 12:24:00"

}

'
If all has gone well your response should look something like this:

So now we know how to put data into Elasticsearch. At this point, you might be asking yourself, how can we index the data if we didn’t define a data structure? Well, this is the magic of Elasticsearch, you don’t need to. Elasticsearch will pull everything together for you, but it is possible to tweak your indexes when you are looking to get the best possible performance out of Elasticsearch.
Let’s see what indices have been created in our Elasticsearch instance:
curl -XGET 'localhost:9200/_cat/indices?v&pretty'Your response should look like this:

Great, so we can see that we have created one index called ‘app’ & one called ‘logs’. We can also see data relating to the indexes such as the number of documents and the store size.
Querying Elasticsearch
Things are starting to get exciting in this Elasticsearch tutorial now! We have data in our Elasticsearch instance and we are now going to explore how we can search and analyze it. The first method you should know is to fetch a single item. As discussed above we will now use the GET method to request data from the Elasticsearch API.
To request a single record we use the below.
Tip – The ‘?pretty’ at the end of the request will return the data in a more human understandable format.
curl -XGET 'localhost:9200/app/reason/1?pretty'Your response should look like this:
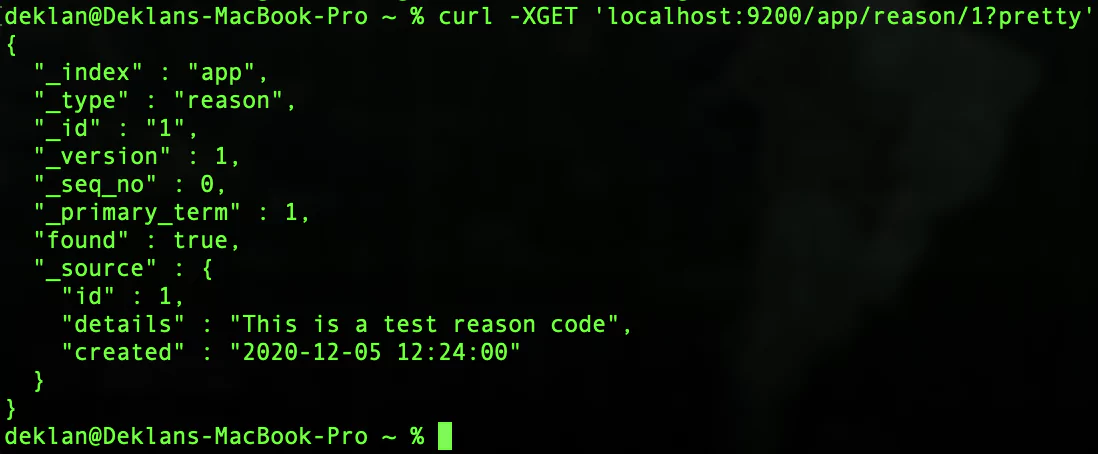
Cool! So now we are able to get data back out of our Elasticsearch instance. The metadata of the item is presented in fields that start with an underscore. The _source field will contain the objects that we have created. Building on what we have learned, we can now explore how to use Elasticsearch for searching.
To search your Elasticsearch instance send the following request. In this search we are looking for any record containing ‘Deklan’:
curl -XGET 'localhost:9200/_search?q=Deklan'Your response should look like this:

Let explore some of the extra metadata we got in the response from Elasticsearch. This can be found at the beginning of the response.
[table id=54 /]
Lucene queries
The searches we have just completed are called URI searches and they are the most basic way to query your Elasticsearch instances. Let’s build on this and look at how we can structure more advanced searches. For this, we need to use Lucene queries. Let’s take a look at some examples:
[table id=55 /]
Building on this, there are a number of ways to include boolean logic, the boosting of terms, and the use of fuzzy & proximity searches. It is also possible to use regular expressions.
Advanced Queries: DSL Queries in Elasticsearch
Expanding further into querying our Elasticsearch instance we are now going to explore how we can request a body search with a Query DSL for much more granular searches. There are a vast array of options that can be used to define the level of granularity provided by a search. Moreover, you can mix and match different options to create highly specialized searches.
A DSL query is built out of two kinds of clauses. The first is a leaf query clause that looks for a value in a specific field and the second is a compound query clause (This can contain one or multiple leaf query clauses).
Elasticsearch Query Types
There is a number of query types available in Elasticsearch including:
- Geo queries
- “More like this” queries
- Scripted queries
- Full-text queries
- Shape queries
- Span queries
- Term-level queries
- Specialized queries
Clauses in a filter context test documents in a boolean fashion: Does the document match the filter, “yes” or “no?” Filters are also generally faster than queries, but queries can also calculate a relevance score according to how closely a document matches the query. Filters do not use a relevance score. This determines the ordering and inclusion of documents:
Filters and Queries
Recently Elasticsearch has merged Elasticsearch queries and Elasticsearch filters, but these are still differentiated by context. The DSL is able to detect the difference between a filter and query context for query clauses. Filters are looped through in a boolean fashion. Elasticsearch will effectively filter based on Yes or No answers to the queries requested. Elasticsearch will then calculate the relevance score according to how closely the results match the query.
N.B – Filters do not use query scores.
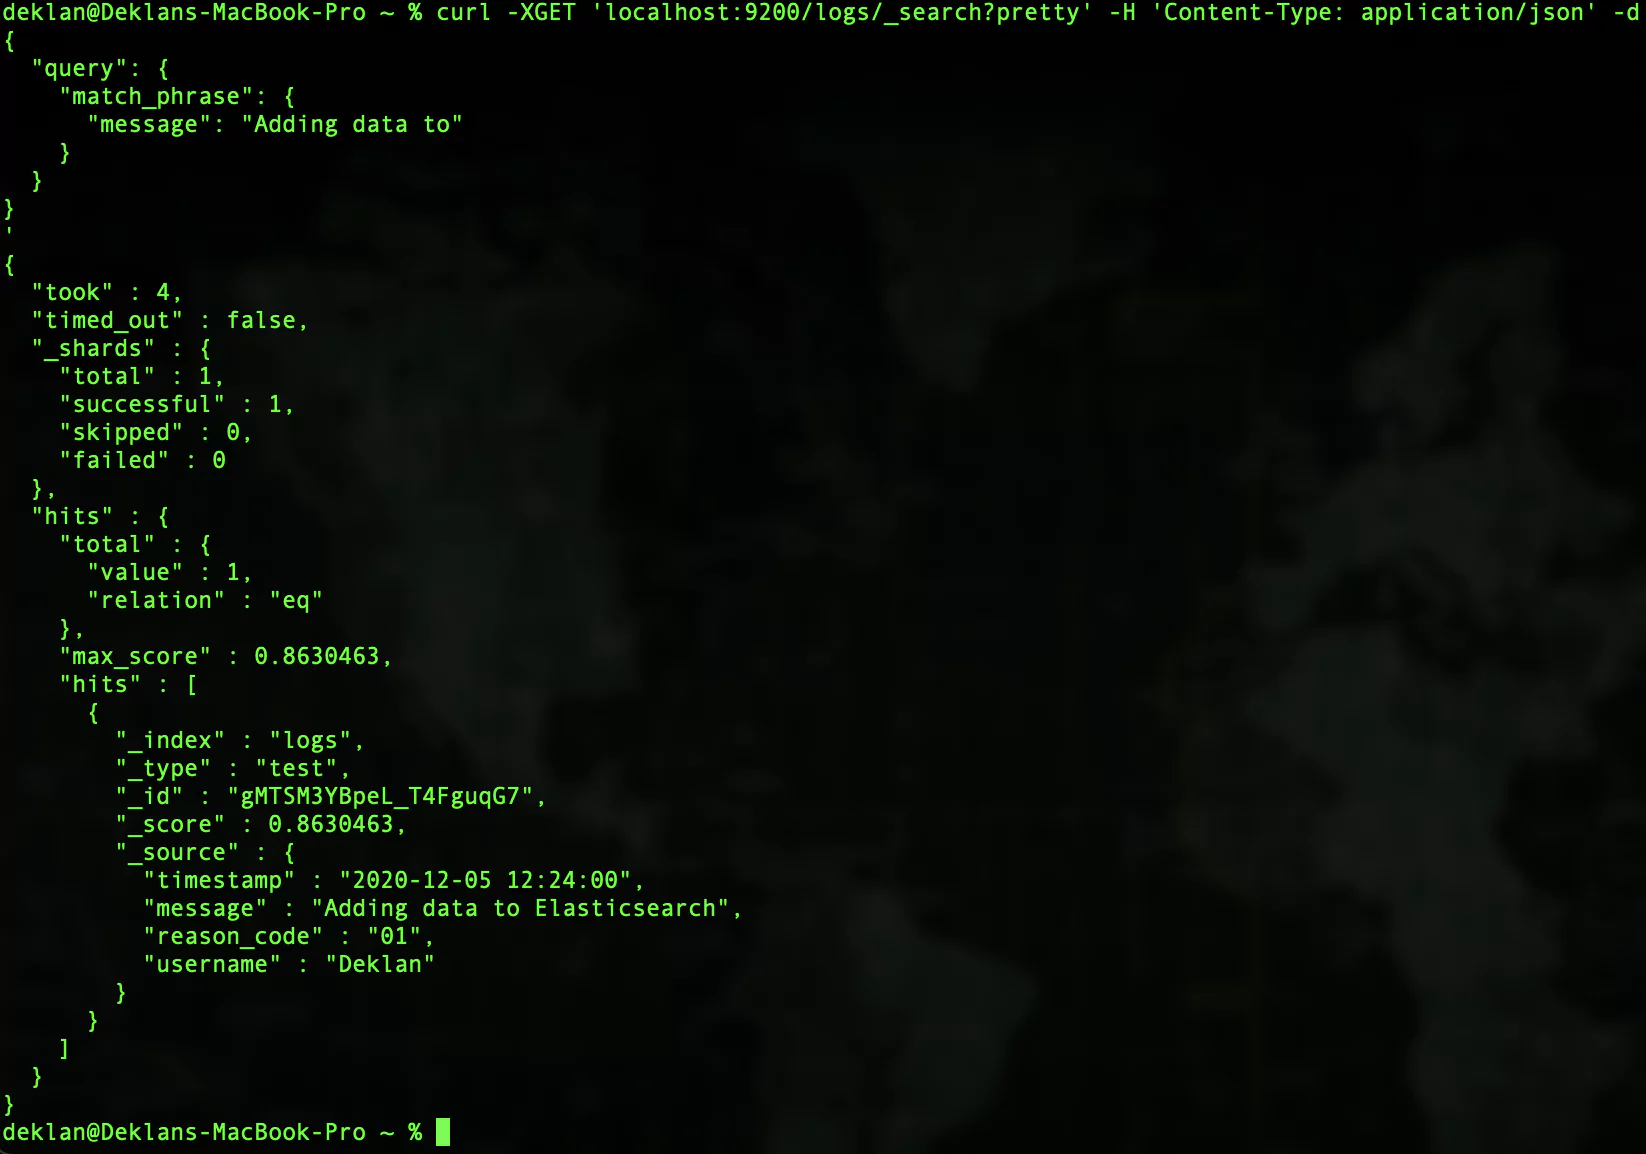
Let’s take a look at a DSL query:
curl -XGET 'localhost:9200/logs/_search?pretty' -H 'Content-Type: application/json' -d'

{

  "query": {

    "match_phrase": {

      "message": "Adding data to"

    }

  }

}

'

''
You should get a result that looks like this:
Deleting Data
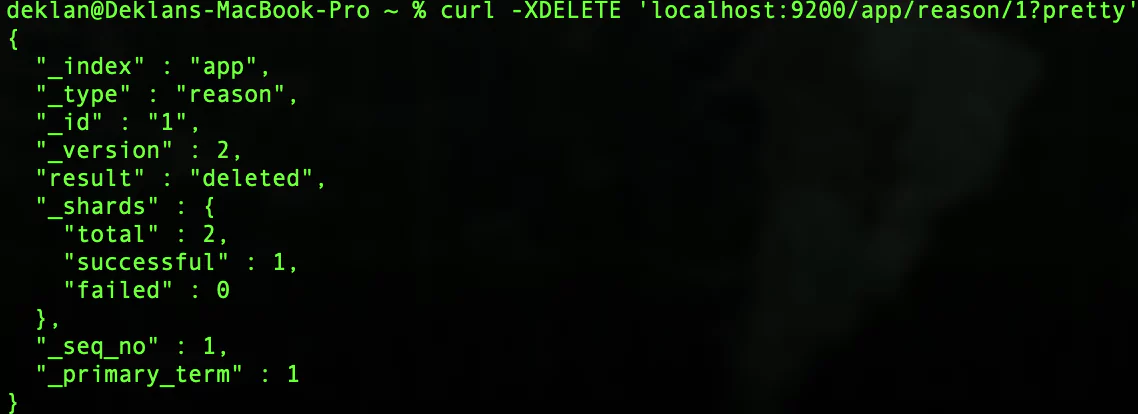
Deleting data is as simple as using the DELETE method on your HTTP requests. To try this out, let’s delete the reason code which we created at the beginning of this tutorial.
To delete the reason code we use the following request:
curl -XDELETE 'localhost:9200/app/reason/1?pretty'If all has gone well you should get a response like this:
Should you wish to delete an index you would use the following request:
curl -XDELETE 'localhost:9200/app?pretty'Your response should look like this:

If you are looking to delete all of the indices you would issue the following request:
TIP – Use this with caution as it will remove all data.
curl -XDELETE 'localhost:9200/_all?pretty'A successful request will respond with the same as deleting an index as above.
Finally, to delete a single document you would send the following request:
curl -XDELETE 'localhost:9200/index/type/document'Conclusion
In this Elasticsearch tutorial, we have run through getting yourself up and working in Elasticsearch. You have learned how to spin up a Docker Elasticsearch instance, the basic steps of CRUD operations in Elasticsearch.
Our goal was to give you a solid foundation in which to expand your understanding of Elasticsearch. Elasticsearch is such a dynamic platform that has so many use cases. Hopefully, this will set you up so you can now start to explore just how powerful Elasticsearch is.


