Tutorial: Elasticsearch Snapshot Lifecycle Management (SLM)

Let’s face it, nothing is perfect. The better we architect our systems, though, the more near-perfect they become. But even so, someday, something is likely to go wrong, despite our best effort. Part of preparing for the unexpected is regularly backing up our data to help us recover from eventual failures and this tutorial explains how to use the Elasticsearch Snapshot feature to automatically backup important data.
Snapshot Lifecycle Management, or SLM, as we’ll refer to it in this course, helps us fully automate backups of our Elasticsearch clusters and indices.
We can set up policies to instruct SLM when to backup, how often, and how long to keep each snapshot around before automatically deleting it.
To experiment with Elasticsearch Snapshot Lifecycle Management we’ll need to:
- Set up a repository where the snapshots can be stored
- Configure repository in our Elasticsearch cluster
- Define the SLM policy to automate snapshot creation and deletion
- Test the policy to see if we registered it correctly and works as expected
The steps we will take are easy to understand, once we break them down the basic actions.
1. Set Up a Repository
A repository is simply a place to save files and directories, just as you would on your local hard-drive. Elasticsearch uses repositories to store its snapshots.
The first type we’ll explore is the shared file system repository. In our exercise, since we’re working with a single node, this will be easy. However, when multiple nodes are involved, we would have to configure them to access the same filesystem, possibly located on another server.
The second repository type we will explore relies on cloud data storage services, that uses service-specific plugins to connect to services like AWS S3, Microsoft Azure’s object storage, or Google Cloud Storage Repository (GCS).
2. Configure Repository
After picking the repository that best fits our needs, it’s time to let Elasticsearch know about it. If we use a shared file system, we need to add a configuration line to the elasticsearch.yml file, as we’ll see in the exercises.
For cloud-based storage repositories, we’ll need to install the required repository plugin on each node. Elasticsearch needs to log in to these cloud services, so we will also have to add the required secret keys to its keystore. This will be fully explained in the exercises.
3. Define the Elasticsearch Snapshot Policy
At this point, all prerequisites are met and we can define the policy to instruct SLM on how to automate backups, with the following parameters
-
- schedule: What frequency and time to snapshot our data. You can make this as frequent as you require, without worrying too much about storage constraints. Snapshots are incremental, meaning that only the differences between the last snapshot and current snapshot need to be stored. If almost nothing changed between yesterday’s backup and today’s data, then the Elasticsearch snapshot will require negligible storage space, meaning that even if you have gigabytes of data, the snapshot might require just a few megabytes or less.
- name: Defines the pattern to use when naming the snapshots
- repository: Specifies where to store our snapshots
- config.indices: List of the indices to include
- retention: Is an optional parameter we can use to define when SLM can delete some of the snapshots. We can specify three options here:
- expire_after: This is a time-based expiration. For example, a snapshot created on January 1, with expire_after set to 30 days will be eligible for deletion after January 31.
- min_count: Tells Elasticsearch to keep at least this number of snapshots, even if all are expired.
- max_count: Tells Elasticsearch to never keep more than this number of snapshots. For example, if we have 100 snapshots and only one is expired, but max_count is set to 50, then 50 of the oldest snapshots will be deleted – even the unexpired ones.
4. Test the Policy
With our policy finally defined, we can display its status. This will list policy details and settings, show us how many snapshot attempts were successful, how many failed, when SLM is scheduled to run the next time, and other useful info.
Hands-on Exercises
SLM with a Shared File System Repository
With the theoretical part out of the way, we can finally learn by doing. Since we’re experimenting with a single node here, things will be very straightforward. For the repository, we will just use a directory located on the same machine where Elasticsearch is running.
First, let’s create the /mnt/shared/es directory.
mkdir -p /mnt/shared/es

# In a multi-node Elasticsearch cluster, you would then have to mount your shared storage,
# on each node, using the directory /mnt/shared/es as a mountpoint.
# When using NFS, besides entering the appropriate mount commands, such as
# sudo mount :/hostpath /mnt/shared/es
# you would also add relevant entries to your /etc/fstab file so that NFS shares are
# automatically mounted each time the servers boot up.
First, let’s make the Elasticsearch username and group the owners of /mnt/shared/es and then give the user full read and write permissions:
chown -R elasticsearch:elasticsearch /mnt/shared/es
chmod 750 /mnt/shared/es
Next, we’ll add the line path.repo: [“/mnt/shared/es”] to elasticsearch.yml, so that the service knows the location of its allocated repository. Note that on production systems, we should add this line to all master and data nodes:
vagrant@ubuntu-xenial:~$ sudo -su elasticsearch
elasticsearch@ubuntu-xenial:~$ echo 'path.repo: ["/mnt/shared/es"]' >> /etc/elasticsearch/elasticsearch.yml
On every node where we make this change, we need to restart Elasticsearch to apply the new setting:
vagrant@ubuntu-xenial:~$ sudo systemctl restart elasticsearch.service
At this point, we can now register the repository in our cluster like so:
vagrant@ubuntu-xenial:~$ curl --location --request PUT 'https://localhost:9200/_snapshot/backup_repository'
--header 'Content-Type: application/json'
--data-raw '{
   "type": "fs",
   "settings": {
       "location": "/mnt/shared/es/backup_repository"
   }
}'
>>>
{"acknowledged":true}
With the next command, we can list all registered repositories to make sure everything is configured properly.
vagrant@ubuntu-xenial:~$ curl 'localhost:9200/_snapshot?pretty'
>>>
{
 "backup_repository" : {
   "type" : "fs",
   "settings" : {
     "location" : "/mnt/shared/es/backup_repository"
   }
 }
}
We can now define our first SLM policy. Let’s go through the details of what the next action does:
"schedule": "0 03 3 * * ?",
schedule: We instruct it to run every day at 3:03 am. This is specified with a cron expression: <second> <minute> <hour> <day_of_month> <month> <day_of_week> [year], with the year parameter being optional.
"name": "<backup-{now/d}>",
name: All the Elasticsearch snapshot names will start with the fixed string “backup-” and the date will be appended to it. A random string of characters will be added at the end, to ensure each name is unique. It’s usually a good idea to use date math. This helps us easily spot the date and time of each object, since resulting names could look like “cluster6-2020.03.23_15:16”.
"repository": "backup_repository",
repository: This will store the snapshots in the repository that we previously registered in our cluster
"indices":["*"]
indices: By using the special asterisk wildcard character “*” we include all indices in our cluster.
"retention": {
   "expire_after": "60d"
retention and expire_after: We instruct SLM to periodically remove all snapshots that are older than 60 days.
vagrant@ubuntu-xenial:~$ curl --location --request PUT 'https://localhost:9200/_slm/policy/backup_policy_daily'
--header 'Content-Type: application/json'
--data-raw '{
 "schedule": "0 03 3 * * ?",
 "name": "<backup-{now/d}>",
 "repository": "backup_repository",
 "config": {
     "indices":["*"]
 },
 "retention": {
   "expire_after": "60d"
 }
}'
>>>
{"acknowledged":true}
Let’s check out the status of our newly created policy.
vagrant@ubuntu-xenial:~$ curl 'localhost:9200/_slm/policy/backup_policy_daily?human'
>>>
{
 "backup_policy_daily": {
   "version": 1,
   "modified_date": "2020-03-27T18:16:56.660Z",
   "modified_date_millis": 1585333016660,
   "policy": {
     "name": "<backup-{now/d}>",
     "schedule": "0 03 3 * * ?",
     "repository": "backup_repository",
     "retention": {
       "expire_after": "60d"
     }
   },
   "next_execution": "2020-03-28T03:03:00.000Z",
   "next_execution_millis": 1585364580000,
   "stats": {
     "policy": "backup_policy_daily",
     "snapshots_taken": 0,
     "snapshots_failed": 0,
     "snapshots_deleted": 0,
     "snapshot_deletion_failures": 0
   }
 }
}
Besides confirming the policy settings we just defined, we can also see when this will run the next time (next_execution), how many snapshots were taken, how many have failed and so on.
Of course, we may not be able to wait until the next scheduled run since we’re testing and experimenting, so we can execute the policy immediately, by using the following command:
curl --location --request POST 'https://localhost:9200/_slm/policy/backup_policy_daily/_execute'
>>>
{"snapshot_name":"backup-2020.03.28-382comzmt2--omziij6mgw"}
Let’s check how much data storage is now used by our repository.
elasticsearch@ubuntu-xenial:/mnt/shared/es$ du -h --max-depth=1
121M    ./backup_repository
For our first run, this should be similar in size to what is used by our indices.
Checking the status of the policy again will show us a new field, last_success, indicating the snapshot we just took earlier.
SLM with an AWS S3 Repository
AWS is very popular in the corporate world, so it’s useful to go through an example where we use an AWS S3 bucket to store our snapshots. The following steps require basic knowledge about S3 + IAM since we need to configure the bucket and secure login mechanisms, beforehand.
To be able to work with an S3 bucket, Elasticsearch requires a plugin we can easily install.
vagrant@ubuntu-xenial:/usr/share/elasticsearch$ sudo bin/elasticsearch-plugin install repository-s3
...
-> Installed repository-s3
Now restart the service to activate the plugin.
vagrant@ubuntu-xenial:~$ sudo systemctl restart elasticsearch.service
Next, Elasticsearch needs to be able to login to the services offered by AWS S3, in a secure manner. Login to your AWS account and create an IAM user with the necessary S3 permissions before continuing with this lesson.
To set up an authorized IAM User follow the steps bellow (a basic knowledge of AWS is assumed).
- First you need to have an AWS Account. Follow the official guides if you don’t already have one.
- You will be asked to enter a payment method but don’t worry all our tests will be coverable by the AWS Free Tier.
- Now login to the AWS Console and navigate to the IAM Users section.
- Click Add User → pick some username (eg. elasticsearch-s3) and select Programmatic access as the Access type.
- Now we need to give the user necessary permissions. We will make it simple for us now and use a predefined permission policy.
- Click Attach existing policies directly → search for AmazonS3FullAccess and make sure it is selected.
- Note: in production deployments be sure to follow the least privilege principle to be on the safe side. You can use the recommended repository settings.
- Click Next → skip the optional Tags → and click Create User.
Done! Make sure you securely store your Access key ID and Secret access key as the later won’t be shown again.
Once you’ve configured the IAM user, and you have your keys available, let’s add them to Elasticsearch’s keystore. This would need to be repeated for each node if it were a production cluster.
vagrant@ubuntu-xenial:/usr/share/elasticsearch$ sudo bin/elasticsearch-keystore add s3.client.default.access_key
vagrant@ubuntu-xenial:/usr/share/elasticsearch$ sudo bin/elasticsearch-keystore add s3.client.default.secret_key
We can now instruct the S3 client to reload its security settings and pick up the new login credentials.
vagrant@ubuntu-xenial:~$ curl --location --request POST 'https://localhost:9200/_nodes/reload_secure_settings?pretty'
At this point, we can register the cloud storage repository. The only mandatory parameter for registering an S3 repository is its bucket name.
vagrant@ubuntu-xenial:~$ curl --location --request PUT 'https://localhost:9200/_snapshot/backup_repository_s3'
> --header 'Content-Type: application/json'
> --data-raw '{
>   "type": "s3",
>   "settings": {
>     "bucket": "elastic-slm"
>   }
> }'
>>>
{"acknowledged":true}
If we now list all registered repositories, we should see both our shared file system repository and our cloud storage repository.
vagrant@ubuntu-xenial:~$ curl 'localhost:9200/_snapshot?pretty'
Now let’s define our second SLM policy. The policy settings will be similar to before, but we will now target our brand new S3 repository as the destination for our snapshots.
vagrant@ubuntu-xenial:~$ curl --location --request PUT 'https://localhost:9200/_slm/policy/backup_policy_daily_s3'
> --header 'Content-Type: application/json'
> --data-raw '{
>   "schedule": "0 03 3 * * ?",
>   "name": "<backup-{now/d}>",
>   "repository": "backup_repository_s3",
>   "config": {
>       "indices":["*"]
>   },
>   "retention": {
>     "expire_after": "60d",
>     "min_count": 10,
>     "max_count": 100
>   }
> }'
>>>
{"acknowledged":true}
Let’s fire off an Elasticsearch snapshot operation.
vagrant@ubuntu-xenial:~$ curl --location --request POST 'https://localhost:9200/_slm/policy/backup_policy_daily_s3/_execute'
>>>
{"snapshot_name":"backup-2020.03.28-9l2wkem3qy244eat11m0vg"}
The confirmation is displayed immediately. This might sometimes give the illusion that the job is done. However, when a lot of data has to be uploaded, the transfer might continue in the background, for a long time.
If we login to our AWS S3 bucket console, we might see chunked files starting to appear.
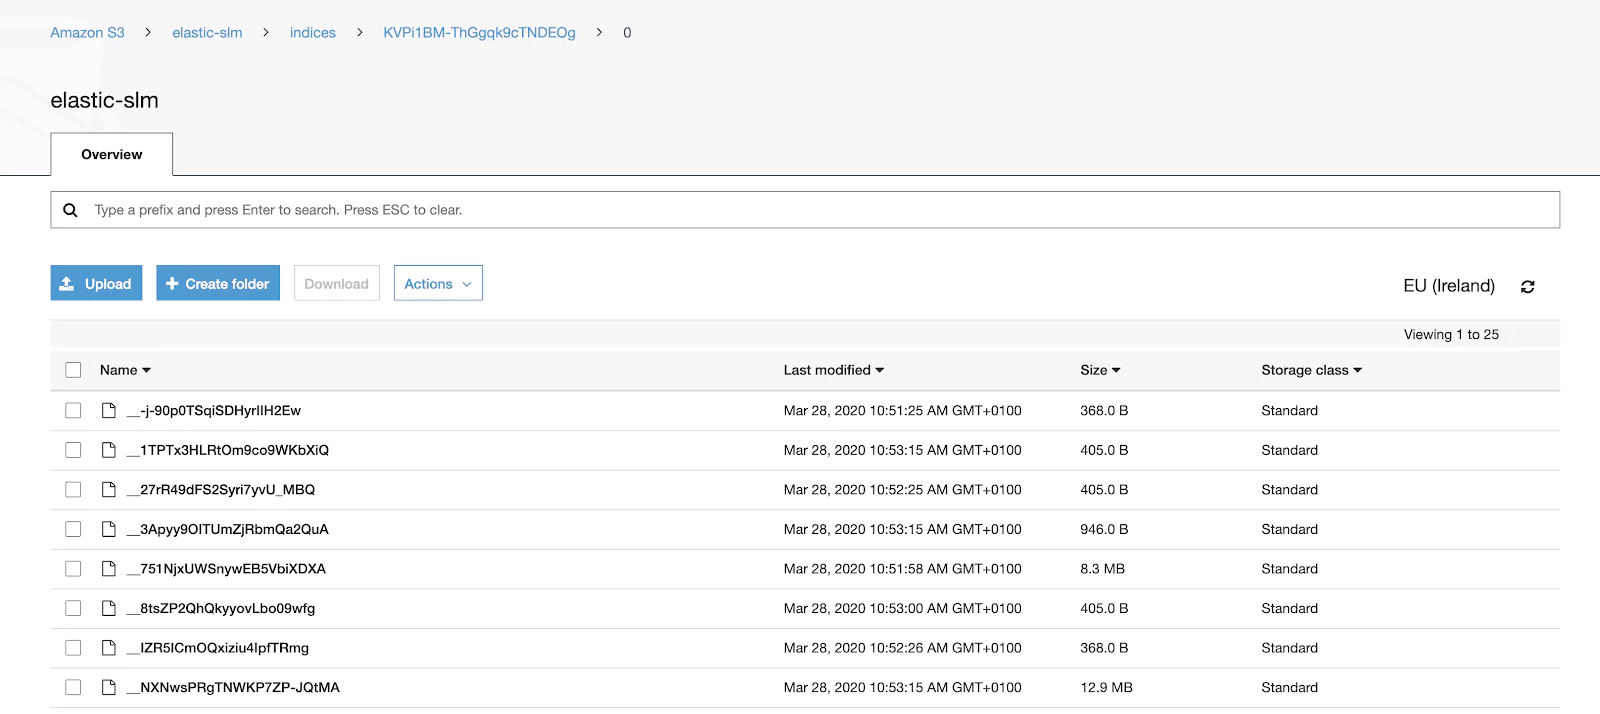
If available, we can also use the AWS command line interface to check the size of our bucket after the snapshot operation is completed.
aws s3 ls s3://elastic-slm --human-readable --recursive --summarize
...
Total Objects: 48
  Total Size: 120.7 MiB
Congratulations on all your hard work! You’re now armed with the knowledge to create awesome systems that automatically backup important data and can save the day when disaster strikes.
Learn More
- Endpoints of SLM API
- Details of the Snapshot module
- Various Repository Plugins and related security settings
- Cron expressions and date math
- AWS
- Creating an S3 bucket
- Creating an IAM User
- Using IAM Roles in EC2
- Defining an S3 bucket policy
- Using AWS CLI