Flux Tutorial: Implementing Continuous Integration Into Your Kubernetes Cluster

This hands-on Flux tutorial explores how Flux can be used at the end of your continuous integration pipeline to deploy your applications to Kubernetes clusters.

What is Flux?

Flux is an open-source tool that enables you to automate your application delivery pipelines to Kubernetes clusters. Flux uses source control platforms like Git, enabling users to describe their desired application state. While it was originally developed by Weaveworks, it’s recently been open-sourced.

Flux has been rapidly growing in popularity, as it integrates into Kubernetes and is straightforward to set up. Much like the Terraform project, Flux enables DevOps engineers to deploy solutions to Kubernetes using a declarative configuration file. It’s simple to read and straightforward to update.

Additionally, the configuration files reside within your application’s existing source control platform, enabling a single point for all of your application’s code and configuration. 

Why Use Flux?

Once deployed, Flux synchronizes the Kubernetes manifests stored in your source control system with your Kubernetes clusters. This in turn uses periodical polling updating the cluster when changes are identified. 

This automated approach removes the need to run kubectl commands and monitor your clusters to see if they have deployed the correct configuration and workloads!

The key benefits of deploying Flux are as follows:

  • Your source control becomes a single source of the truth.
  • Your source control becomes a central place for all of your environments, and configurations which are defined in code.
  • All changes are observable and verified. 

How Does Flux Work?

Before we jump into deploying Flux, let’s familiarize ourselves with how the platform works! 

Flux configuration files are written in YAML manifests declaratively. These configuration files define everything required to deploy your application to your Kubernetes clusters. The steps for deployment & changes are as follows:

  1. The team describes the Kubernetes cluster configuration and defines this in a manifest that resides in their source control platform which is normally git.
  2. The memcached pod stores the running configuration.
  3. Flux periodically connects to your source control platform and compares the running configuration from the memcached pod vs the source control manifest.
  4. If changes are detected, Flux runs several kubectl apply and delete commands to bring the cluster in sync. The new running configuration is then saved to the memcached pod.

Flux can also poll container registries and update the Kubernetes manifest with the latest versions. This is very powerful should you wish to automate the deployment of new containers. 

Deploying Flux

In this Flux tutorial, we are going to deploy PodInfo to our Kubernetes cluster, but you can convert what we are doing to suit your requirements.

We are now going to run through the process of deploying Flux and configuring the solution to achieve the above. Before we jump in, make sure you have access to your Kubernetes cluster and access to the cluster-admin role. 

Note: We are assuming that your Kubernetes cluster is version 1.16 or newer and your kubectl binary is version 1.18 or newer. 

Install FluxCTL

Flux provides a binary that is used to deploy and manage Flux on your Kubernetes clusters. The first step of this Flux tutorial is to get Flux installed so we can start deploying it to our Kubernetes cluster.

To install Flux we will run the following command on macOS (In this tutorial we are using brew which is a package manager for OSX). 

brew install Fluxcd/tap/Flux

If you are using Linux:

curl -s https://toolkit.Fluxcd.io/install.sh | sudo bash

For Windows, you can find the binary here – https://github.com/Fluxcd/Flux2/releases

To confirm you have installed Flux and it’s working run: 

deklan@Deklans-MacBook-Pro ~ % Flux -v

You should get back the below:

deklan@Deklans-MacBook-Pro ~ % Flux -v

Flux version 0.8.2

deklan@Deklans-MacBook-Pro ~ % 

Using Flux to Create a Repo & Configuration

Before we use Flux to deploy to our cluster, we need to have a repository with our Kubernetes configuration. In this step of the Flux tutorial, we are going to create a repo in Git and define our workspace and namespace within it. The Flux binary will take care of all of this for you. This tutorial expects that you have already got kubectl working and your cluster is connected.

First, let’s define our Github credentials for Flux to use to deploy your new repo and link it to your cluster. 

export GITHUB_TOKEN='<YOUR TOKEN>’

export GITHUB_USER='<YOUR USERNAME>’

Generating a Github token is done on the Github site. Go to your profile and then select ‘Developer Settings’ on the left-hand side. From there select ‘Personal access token’ and then ‘Generate new token’. Flux requires the permissions below:

flux permissions

With your credentials loaded as environmental variables, we can now use the Flux command to create a repo, create configuration files and link them to your cluster. Run the below (modify the example to suit your requirements):

Flux bootstrap github 

  --owner=$GITHUB_USER 

  --repository=Flux            

  --branch=main 

  --path=./clusters/my-cluster 

  --personal

You should get a response like this:

deklan@Deklans-MacBook-Pro FluxTutorial % Flux bootstrap github 

  --owner=$GITHUB_USER 

  --repository=Flux            

  --branch=main 

  --path=./clusters/my-cluster 

  --personal

► connecting to github.com

✔ repository created

✔ repository cloned

✚ generating manifests

✔ components manifests pushed

► installing components in Flux-system namespace

namespace/Flux-system created

customresourcedefinition.apiextensions.k8s.io/alerts.notification.toolkit.Fluxcd.io created

customresourcedefinition.apiextensions.k8s.io/buckets.source.toolkit.Fluxcd.io created

customresourcedefinition.apiextensions.k8s.io/gitrepositories.source.toolkit.Fluxcd.io created

customresourcedefinition.apiextensions.k8s.io/helmcharts.source.toolkit.Fluxcd.io created

customresourcedefinition.apiextensions.k8s.io/helmreleases.helm.toolkit.Fluxcd.io created

customresourcedefinition.apiextensions.k8s.io/helmrepositories.source.toolkit.Fluxcd.io created

customresourcedefinition.apiextensions.k8s.io/kustomizations.kustomize.toolkit.Fluxcd.io created

customresourcedefinition.apiextensions.k8s.io/providers.notification.toolkit.Fluxcd.io created

customresourcedefinition.apiextensions.k8s.io/receivers.notification.toolkit.Fluxcd.io created

serviceaccount/helm-controller created

serviceaccount/kustomize-controller created

serviceaccount/notification-controller created

serviceaccount/source-controller created

clusterrole.rbac.authorization.k8s.io/crd-controller-Flux-system created

clusterrolebinding.rbac.authorization.k8s.io/cluster-reconciler-Flux-system created

clusterrolebinding.rbac.authorization.k8s.io/crd-controller-Flux-system created

service/notification-controller created

service/source-controller created

service/webhook-receiver created

deployment.apps/helm-controller created

deployment.apps/kustomize-controller created

deployment.apps/notification-controller created

deployment.apps/source-controller created

networkpolicy.networking.k8s.io/allow-scraping created

networkpolicy.networking.k8s.io/allow-webhooks created

networkpolicy.networking.k8s.io/deny-ingress created

◎ verifying installation

✔ install completed

► configuring deploy key

✔ deploy key configured

► generating sync manifests

✔ sync manifests pushed

► applying sync manifests

◎ waiting for cluster sync

✔ bootstrap finished

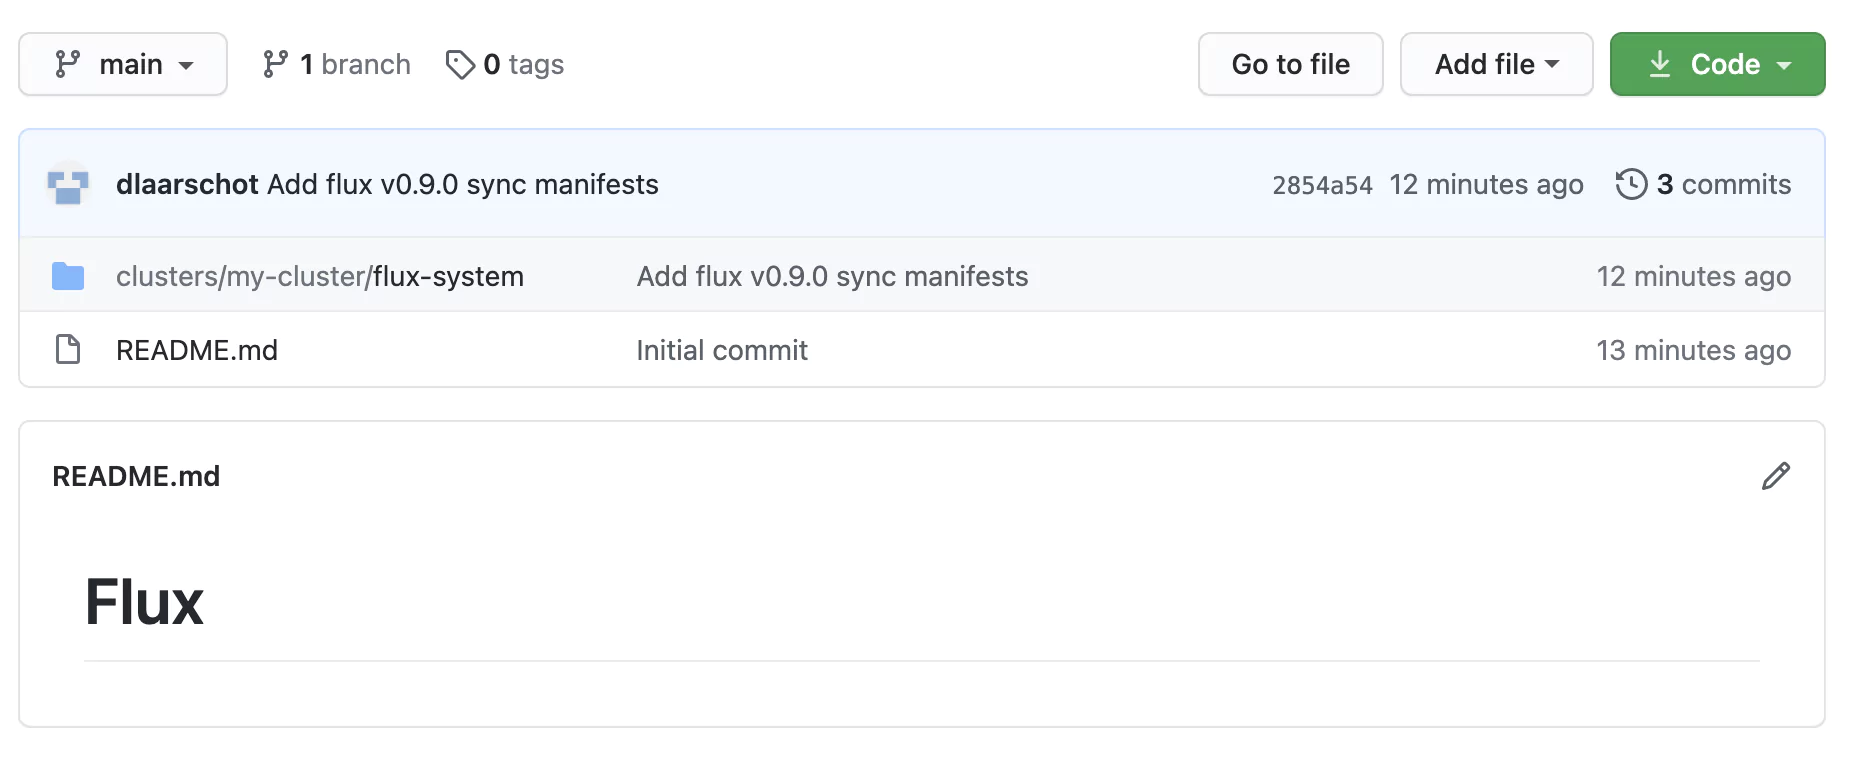
A quick check of our GitHub repo confirms the required configuration manifest files have been created! 

flux repo

Let’s check to see if the Flux pods are running. Using kubectl, run the following command:

kubectl get pods -n Flux-system 

The results should be similar to the below:

deklan@Deklans-MacBook-Pro Flux-system % kubectl get pods -n Flux-system  

NAME                                       READY   STATUS    RESTARTS   AGE

helm-controller-657d76475b-kb5b7           1/1     Running   0          19m

kustomize-controller-54fdf84b79-25dpw      1/1     Running   0          19m

notification-controller-769876bb9f-x76wv   1/1     Running   0          19m

source-controller-c55db769d-lmbh9          1/1     Running   0          19m

Using the Flux command, we can check to see the currently deployed service on the cluster. Run: 

Flux get kustomizations

This command will display all the services running on the cluster. Yours should look like the below:

NAME            READY   MESSAGE                                                         REVISION                                        SUSPENDED

Flux-system     True    Applied revision: main/08d4eb338ce75292b0669eef84b64e7db2b161cf main/08d4eb338ce75292b0669eef84b64e7db2b161cf   False

Now Flux is running! It’s time to deploy an application.

Files & Folders Created

First, let’s clone the new repo we have created to our local machine:

git clone <YOUR REPO>

Open the new repo up and navigate to the clusters/my-cluster/ folder. Your file structure should look similar to the below:

- cluster 

- my-cluster

- Flux-system

- gotk-components.yaml

- gotk-sync.yaml

- kustomization.yaml

The Flux-system folder contains the configuration for the Flux service running on the cluster. When deploying a new application, you should create a new folder under your cluster name to house the manifest files. Also for multi-cluster setups (for example development and production), you will have separate <my-cluster> folders to house their respective configuration. 

Deploying an Application

In this part of the Flux tutorial, we are going to deploy Podinfo. Podinfo is a tiny web application made with Go that showcases best practices of running microservices in Kubernetes. Now that we have a repo and it’s connected to our Kubernetes cluster using Flux, it’s time to build our configuration to define how our cluster should operate.

Add Podinfo Repository to Flux

Let’s deploy the Podinfo web app to the cluster. We will be using a public repository https://github.com/stefanprodan/podinfo. 

Make sure you are in the base level of your local GitHub repository. Create a GitRepository manifest pointing to hello-kubernetes repository’s master branch:

Now, create a folder to house the manifests:

mkdir ./clusters/my-cluster/app-podinfo

And, create the manifest files:

Flux create source git podinfo 

  --url=https://github.com/stefanprodan/podinfo 

  --branch=master 

  --interval=30s 

  --export > ./clusters/my-cluster/app-podinfo/podinfo-source.yaml

Note: We are exporting our manifest to the app-podinfo folder. Refer to the section above for more information on the file structure. 

The above command will create the following manifest:

---

apiVersion: source.toolkit.Fluxcd.io/v1beta1

kind: GitRepository

metadata:

  name: podinfo

  namespace: Flux-system

spec:

  interval: 30s

  ref:

    branch: master

  url: https://github.com/paulbouwer/podinfo-kubernetes

Let’s commit and push it back to our remote GitHub repository so that Flux will pick it up and add it to our Flux running configuration:

git add -A && git commit -m "Add Hello-Kube GitRepository"

And then commit this to the remote repo:

git push

Deploy the Podinfo Application

Now we have the connection to the repository configured, it’s time to deploy the application. Next, we will create a Flux Kustomization manifest for podinfo. This configures Flux to build and apply the kustomize directory located in the podinfo repository. Using the Flux command run the following:

Flux create kustomization podinfo 

  --source=podinfo 

  --path="./kustomize" 

  --prune=true 

  --validation=client 

  --interval=5m 

  --export > ./clusters/my-cluster/app-podinfo/podinfo-kustomization.yaml

The above command will create the below manifest file:

---

apiVersion: kustomize.toolkit.Fluxcd.io/v1beta1

kind: Kustomization

metadata:

  name: podinfo

  namespace: Flux-system

spec:

  interval: 5m0s

  path: ./kustomize

  prune: true

  sourceRef:

    kind: GitRepository

    name: podinfo

  validation: client

Now let’s push our changes to git.

git add . 

git commit -m 'Adding Podinfo’'

git push

Flux will monitor the repository and detect the changes. It should take about 30 seconds for the new changes to be deployed. You can check using the following command (it will run the Flux get command every two seconds:

watch Flux get kustomizations

Before Flux updated:

NAME            READY   MESSAGE                                                         REVISION                                        SUSPENDED

Flux-system     True    Applied revision: main/b774a7985a53a0855ceda7ba47633599272f9070 main/b774a7985a53a0855ceda7ba47633599272f9070   False

After Flux updated:

Every 2.0s: Flux get kustomizations


NAME            READY   MESSAGE                                                                 REVISION                                        SUSPENDED

Flux-system     True    Applied revision: main/28833d5292122eac421cbe05b5fbc0d439723f99         main/28833d5292122eac421cbe05b5fbc0d439723f99   False

podinfo         True    Applied revision: master/e43ebfa5bf4b87c46f2e1db495eb571cd398e2f7       master/e43ebfa5bf4b87c46f2e1db495eb571cd398e2f7 False

If we check our running pods using kubectl we can see that the application has been deployed and is running:

kubectl get pods                 

NAME                       READY   STATUS    RESTARTS   AGE

podinfo-65c5bdfc77-9zvp2   1/1     Running   0          94s

podinfo-65c5bdfc77-pl8j7   1/1     Running   0          110s

Deploying an Operator

In this section of the Flux tutorial, we are going to deploy an operator to our cluster. Operators are extensions to Kubernetes that enable functions to support your applications. A great example of this is the Coralogix operator that enables log shipping from your applications. The advantage of using operators in Flux is that their configuration resides in your Flux repository providing a single source of the truth. 

The example used in this Flux tutorial assumes you have an application configured ready for use with the Coralogix Kubernetes operator. We are going to use the Helm commandlet to deploy this operator. 

Helm can be installed on OSX using Brew:

Brew install helm

On Linux: 

Apt-get install helm

And on Windows check out the helm website – https://helm.sh/docs/intro/install/

Now we will use helm to deploy the operator. Firstly we need to add the repo to helm:

helm repo add cx-operator https://coralogix.github.io/cx-operator/  

The Coralogix operator requires an API key that can be stored in the keymanager of our cluster:

kubectl create secret generic coralogix-operator-secrets --from-literal=RULES_API_TOKEN=<KEY>

Now let’s use the helm package manager to check that the package is available for installation:

helm search repo cx-operator

The result should be similar to this:

deklan@Deklans-MacBook-Pro ~ % helm search repo cx-operator

NAME                    CHART VERSION APP VERSION DESCRIPTION                  

cx-operator/cx-operator 0.3.7+e08afe2 0.3.7       Coralogix Kubernetes Operator

deklan@Deklans-MacBook-Pro ~ % 

Now we know the package exists, let’s get it installed! We are setting the Coralogix API to the EU server in this command. 

deklan@Deklans-MacBook-Pro ~ % helm install --set config.coralogixApi.host=grpc-api.coralogixstg.wpengine.com cx-operator cx-operator/cx-operator

Great! We now have the operator installed! This operator can be used to define your integrations with Coralogix in your application configuration. The advantage is a simple interface defined as code that can be included in your Git repository which configures any additional services your application may require. You can find out more about the Coralogix operator for Kubernetes, so that you can increase your system observability and enhance your Flux deployment.

Conclusion

When it comes to continuous integration and Kubernetes clusters, Flux is one of the most lightweight platforms available to declaratively define your Kubernetes configuration. Flux enables you to push code rather than containers, and with operators like the Coralogix cx-operator, you can build your entire stack in a YAML manifest. 

The benefits include no learning curve for new engineers, a standardized deployment process, and a single source of the truth. Moreover, the Flux system is simple to use and provides the ability to sync multiple clusters for example development and production. 

This Flux tutorial has covered the basics so go ahead and get building the GitOps way!

The Coralogix Operator: A Tale of ZIO and Kubernetes

As our customers scale and utilize Coralogix for more teams and use cases, we decided to make their lives easier and allow them to set up their Coralogix account using declarative, infrastructure-as-code techniques.

In addition to setting up Log Parsing Rules and Alerts through the Coralogix user interface and REST API, Coralogix users are now able to use modern, cloud-native infrastructure provisioning platforms.

Part of this is managing Coralogix through Kubernetes custom resources. These custom resources behave just like any other Kubernetes monitoring resource; their main benefit is that they can be packaged and deployed alongside services deployed in the cluster (through a Helm chart, for example), and their definition can be managed by source code management tools. This also means that the process for modifying Coralogix rules and alerts can be the standard code review process applied to application changes. This is a big win on all fronts: better auditing, better change management leveraging pull requests and reviews, easier rollbacks, and more.

Intro

To demonstrate this functionality, let’s define an example alert. We start by defining it in a custom AlertSet resource:

apiVersion: "coralogixstg.wpengine.com/v1"
kind: AlertSet
metadata:
  name: test-alertset-1
spec:
  alerts:
    - name: test-alert-2
      description: "Testing the alerts operator"
      isActive: false
      severity: WARNING
      filters:
        filterType: TEXT
        severities:
          - ERROR
          - CRITICAL
        metadata:
          applications:
            - production
          subsystems:
            - my-app
            - my-service
        text: "authentication failed"
      condition:
        type: MORE_THAN
        parameters:
          threshold: 120
          timeframe: 10Min
          groupBy: host
      notifications:
        emails:
          - security@mycompany.com
          - mgmt@mycompany.com
        integrations: []

This resource describes several alerts that will be created in the Coralogix account associated with the Kubernetes cluster. The structure of the resource mirrors the Coralogix alert definition interface.

Once the resource definition is saved in a file, it can be applied and persisted to Kubernetes using kubectl:

kubectl apply -f test-alertset-1.yaml

The new alert immediately appears on the Coralogix user interface:

coralogix alert interface

How is this possible with Kubernetes? The Operator pattern can be used to extend the cluster with custom behavior. An operator is a containerized application running in the cluster that uses the Kubernetes API to react to particular events. Once installed and deployed in a cluster, the operator will automatically register its custom resources, allowing users to immediately start working with the Coralogix resources without any additional setup.

In the above use case, the operator would watch the event stream of Coralogix-specific custom resources and apply any addition/modification/deletion through the Coralogix API to the user’s account.

Operators can be written in any language. While other operator frameworks and libraries exist, especially for Go, we wanted to use Scala and ZIO to implement the Coralogix Operator in order to enjoy Scala’s expressive type system and the efficiency and developer productivity proven by many of our existing Scala projects.

Birth of a New Library

So, faced with the task of writing a Kubernetes Operator with ZIO, we investigated the optimal way to communicate with the Kubernetes API.

After evaluating several existing Java and Scala Kubernetes client libraries, none of them checked all of our boxes. All had different flaws: non-idiomatic data models, having to wrap everything manually in effects, lack of support for custom resources, and so forth. We felt we could do better and decided to create a new library, an idiomatic ZIO native library to work with the Kubernetes API.

This new library is developed in parallel with the Coralogix Operator, which already supports numerous features and runs in production. Both are fully open source. The library itself will soon be officially released.

Meet zio-k8s

Let’s have a closer look at our new library, called zio-k8s. It consists of several sub-projects:

  • The client library (zio-k8s-client), written using a mix of generated and hand-written code. The hand-written part contains a generic Kubernetes client implementation built on sttp. On top of that, generated data models and ZIO modules provide access to the full Kubernetes API;
  • Support for optics libraries (zio-k8s-client-quicklens, zio-k8s-client-monocle), allowing for easy modification and interrogation of the generated data model;
  • The custom resource definition (CRD) support (zio-k8s-crd), which is an sbt plugin providing the same data model and client code generator functionality for custom resource types;
  • And finally, the operator library (zio-k8s-operator), which provides higher level constructs built on top of the client library to help to implement operators.

We have some more ideas for additional higher-level libraries coming soon, so stay tuned. Meanwhile, let’s dive into the different layers.

Client

As mentioned above, the client library is a mix of generated code and a core generic Kubernetes client. To get the feel of it, let’s take a look at an example:

The following code will reimplement the example from the Kubernetes documentation for running Jobs in the cluster.

First, we need to import a couple of the Kubernetes data models:

import com.coralogix.zio.k8s.model.batch.v1.{Job, JobSpec}
import com.coralogix.zio.k8s.model.core.v1.{Container, PodSpec, PodTemplateSpec}
import com.coralogix.zio.k8s.model.pkg.apis.meta.v1.ObjectMeta

and also the ZIO module for working with Job resources:

import com.coralogix.zio.k8s.client.batch.v1.jobs
import com.coralogix.zio.k8s.client.batch.v1.jobs.Jobs

Now we will create a helper function that builds up the Job resource for calculating the digits of PI:

def job(digits: Int): Job =
  Job(
    metadata = ObjectMeta(generateName = "demo-job"),
    spec = JobSpec(
      backoffLimit = 4,
      template = PodTemplateSpec(
        spec = PodSpec(
          restartPolicy = "Never",
          containers = Vector(
            Container(
              name = "pi",
              image = "perl",
              command = Vector("perl", "-Mbignum=bpi", "-wle", s"print bpi($digits)"
  )))))))

As we can see the Kubernetes data models are simple case classes and their names and fields fully match the Kubernetes names, so using YAML examples to build up the fully typed Scala representation is very straightforward.

One special feature to mention is the use of a custom optional type instead of Option in these data models. This provides the implicit conversion from T to Optional[T] which significantly reduces the boilerplate in cases like the one above while still reducing the scope of this conversion to the Kubernetes models only. In practice, the custom optional type works just like the built-in one, and conversion between them is also straightforward.

Next, let’s create the ZIO program that will create a Job in the Kubernetes cluster:

val runJobs: ZIO[Jobs with Clock, K8sFailure, Unit] =
  for {
    job  <- jobs.create(job(2000), K8sNamespace.default)
    name <- job.getName
    _    <- waitForJobCompletion(name)
  } yield ()

The first thing to note is that each resource has its own ZIO layer. In this example, we can see that runJobs requires the Jobs module in its environment. This lets us access the resources in a resourcename.method fashion (like jobs.create) and additionally provides nice documentation of what resources a given effect needs access to.

The second interesting thing is getName. The Kubernetes data schema is full of optional values and in practice many times we want to assume that a given field is provided. We’ve already seen that for constructing resources the custom optional type tries to reduce the pain of this. The getter methods are the other side of it, they are simple getter effects unpacking the optional fields, failing the effect in case it is not defined. They can be used in places where optional fields are mandatory for the correct operation of the code, like above where we have to know the newly created Job resource’s name.

To finish the example, let’s see how the waitForJobCompletion can be implemented!

def waitForJobCompletion(jobName: String): ZIO[Jobs with Clock, K8sFailure, Unit] = {
  val checkIfAlreadyCompleted =
    for {
      job <- jobs.get(jobName, K8sNamespace.default)
      isCompleted = job.status.flatMap(_.completionTime).isDefined
      _ <- ZIO.never.unless(isCompleted)
    } yield ()

  val watchForCompletion =
    jobs.watchForever(Some(K8sNamespace.default))
      .collect {
        // Only look for MODIFIED events for the job given by name
        case Modified(item) if item.metadata.flatMap(_.name).contains(jobName) =>
          // We need its status only
          item.status
      }
      // Dropping updates until completionTime is defined
      .dropWhile {
        case None => true
        case Some(status) => status.completionTime.isEmpty
      }
      // Run until the first such update
      .runHead
      .unit

  checkIfAlreadyCompleted race watchForCompletion
}

This is a good example of being able to take advantage of ZIO features when working with a ZIO-native Kubernetes client. We define two effects: one that gets the resource and checks if it has already been completed and another that starts watching the changes of Job resources to detect when the currently running Job becomes completed. Then we can race the two checks to guarantee that we detect when the job’s completionTime gets set.

The watch functionality is built on ZIO Streams. For a given resource type, watchForever provides an infinite stream of TypedWatchEvents. With the stream combinators, we can simply express the logic to wait until the Job with a given name has been modified in a way that it’s completionTime is no longer undefined.

Under the Hood

The code generator takes the Open API definition of the Kubernetes API, processes it, and generates Scala source code by building ASTs with Scalameta. For the data models, these are case classes with the already mentioned getter methods, with implicit JSON codecs and support for resource metadata such as kind and apiVersion.

In addition, for each resource, it generates a package with a type alias representing the set of ZIO layers required for accessing the given resource. Let’s see how it looks like for Pod resources:

type Pods = Has[NamespacedResource[Pod]]
  with Has[NamespacedResourceStatus[PodStatus, Pod]]
  with Has[NamespacedLogSubresource[Pod]] 
  with Has[NamespacedEvictionSubresource[Pod]]
  with Has[NamespacedBindingSubresource[Pod]]

Each resource has either a NamespacedResource or a ClusterResource interface and optionally a set of subresource interfaces. The code generator also generates accessor functions to the package for each operation provided by these interfaces. This combination lets us use the syntax shown above to access concrete resources, such as jobs.create(), but also to write polymorphic functions usable to any resource or subresource.

Custom Resource Support

The zio-k8s-crd sbt plugin extends the client to support custom resources. The idea is to put the Custom Resource Definition (CRD) YAMLs to the project’s repository and refer to them from the build definition:

lazy val root = Project("demo", file("."))
  .settings(
      // ...
      externalCustomResourceDefinitions := Seq(
        file("crds/crd-coralogix-rule-group-set.yaml"),
        file("crds/crd-coralogix-loggers.yaml"),
        file("crds/crd-coralogix-alert-set.yaml")
      ),
  )
  .enablePlugins(K8sCustomResourceCodegenPlugin)

The plugin works very similar to the code generation step of zio-k8s-client itself, generating model classes and client modules for each referenced CRD. The primary difference is that for custom resources the data models are generated with guardrail – a Scala code generator for OpenAPI. This supports a wide set of features so it should be good enough to process arbitrary custom resource definitions.

Operator Framework

The zio-k8s-operator library builds on top of the client providing higher-level constructs that help to implement operators. One of these features performs the registration of a CRD. By simply calling the following effect:

registerIfMissing[AlertSet](alertsets.customResourceDefinition)

We can guarantee that the custom resource AlertSet, with the definition alertsets.customResourceDefinition, both generated by the zio-k8s-crd plugin is registered within the Kubernetes cluster during the operator’s startup.

Another feature that is useful for operators is to guarantee that only a single instance runs at the same time. There are several ways to implement this, the operator library currently provides one such implementation that is based on creating a resource tied to the pod’s life. For the library’s user, it is as simple as wrapping the ZIO program in a Leader.leaderForLife block or using a ZManaged resource around the application provided by Leader.lease.

Defining an operator for a given resource with this library is simply done by defining an event processor function with the type:

type EventProcessor[R, E, T] = 
  (OperatorContext, TypedWatchEvent[T]) => ZIO[R, OperatorFailure[E], Unit]

Then, create an operator with Operator.namespaced. To keep the primary operator logic separated from other concerns we also define operator aspects, modifiers that wrap the operator and can provide things like logging and metrics. A logging aspect is provided with the library out of the box, with the following signature:

def logEvents[T: K8sObject, E]: Aspect[Logging, E, T]

It is based on zio-logging and can be simply applied to an event processor with the @@ operator:

def eventProcessor(): EventProcessor[
    Logging with alertsets.AlertSets with AlertServiceClient,
    CoralogixOperatorFailure,
    AlertSet
  ] = ???

Operator.namespaced(
    eventProcessor() @@ logEvents @@ metered(metrics)
)(Some(namespace), buffer)

Summary

Coralogix users can already take advantage of tighter integration with their infrastructure and application provisioning processes by using the Coralogix Operator. Check out the tutorial on our website to get started.

As for zio-k8s, everything we’ve described in this post is already implemented, available under the friendly Apache 2.0 open-source license. There are some remaining tasks to make it as easy to use as possible and cover most of the functionalities before an official 1.0 release, but it’s very close. PRs and feedback are definitely welcome! And as mentioned, this is just the beginning; we have many ideas in store about how to make the Kubernetes APIs easily accessible and ergonomic for ZIO users. Stay tuned!

Both the library and the Coralogix Operator can be found on GitHub.