The new standard of observability is here. Discover Olly, the industry’s first
In this article, we are going to explore the process of ingesting and monitoring logs into your data lake, and the value of importing your firewall logs into Coralogix. To understand the value of the firewall logs, we must first understand what data is being exported.
A typical layer 3 firewall will export the source IP address, destination IP address, ports, and the action for example allow or deny. A layer 7 firewall will add more metadata to the logs including application, user, location, and more.
This data, when placed into an aggregator like Coralogix and visualized, allows greater visibility into the traffic traversing your network. This allows you to detect anomalies and potential problems. A great example of this is detecting malware or data exfiltration to unknown destinations (more on this later).
Configuring Logstash
The first and most critical part of extracting the value of firewall logs is ingesting the correct data. When exporting logs from firewalls, Logstash is one method of ingestion. Coralogix also provides an agent for other Syslog services. This article assumes that you already have Logstash deployed and working. First, we will cover how to set up a configuration for ingestion.
The recommended way to export firewall logs for ingestion into Logstash is using Syslog. Inside your Logstash conf.d folder, we are going to create our ingestion configuration files.
To start with we are going to enable Syslog with the following config:
01-syslog.conf
Note: We are using port 5140 rather than 514 for Syslog. This is because Logstash is run as a user, meaning it does not have the privileges to run on port 514.
# TCP Syslog Ingestion (Port 5140)

input {

  tcp {

    type => "syslog"

    port => 5140

  }

}

# UDP Syslog Ingestion (Port 5140)

input {

  udp {

    type => "syslog"

    port => 5140

  }

}
At this point, we need to apply a filter to configure what happens with the data passed via Syslog. You can find several pre-made filters for Logstash online as it’s a popular solution. The following example is a configuration that would be used with a PFsense firewall.
In this configuration, we are filtering Syslogs from two PFsense firewalls. The first is 10.10.10.1 & the second is 10.10.10.2. You will see that we match Syslog information and add fields that will be used to index the data in Coralogix. We will cover GROK filters in more detail in the next section.
filter {

  if [type] == "syslog" {

    if [host] =~ /10.10.10.1/ {

      mutate {

        add_tag => ["pfsense-primary", "Ready"]

      }

    }

    if [host] =~ /10.10.10.2/ {

      mutate {

        add_tag => ["pfsense-backup", "Ready"]

      }

    }


    if "Ready" not in [tags] {

      mutate {

        add_tag => [ "syslog" ]

      }

    }

  }

}

filter {

  if [type] == "syslog" {

    mutate {

      remove_tag => "Ready"

    }

  }

}

filter {

  if "syslog" in [tags] {

    grok {

      match => { "message" => "%{SYSLOGTIMESTAMP:syslog_timestamp} %{SYSLOGHOST:syslog_hostname} %{DATA:syslog_program}(?:[%{POSINT:syslog_pid}])?: %{GREEDYDATA:syslog_message}" }

      add_field => [ "received_at", "%{@timestamp}" ]

      add_field => [ "received_from", "%{host}" ]

    }

    syslog_pri { }

    date {

      match => [ "syslog_timestamp", "MMM  d HH:mm:ss", "MMM  dd HH:mm:ss" ]

      locale => "en"

    }

    if !("_grokparsefailure" in [tags]) {

      mutate {

        replace => [ "@source_host", "%{syslog_hostname}" ]

        replace => [ "@message", "%{syslog_message}" ]

      }

    }

    mutate {

      remove_field => [ "syslog_hostname", "syslog_message", "syslog_timestamp" ]

    }

  }

}
Next, we create an output. The output defines where Logstash should export the ingested logs. In this case, we are shipping them to Coralogix.
100-output.conf
output {

    coralogix {

        config_params => {

            "PRIVATE_KEY" => "YOUR_PRIVATE_KEY"

            "APP_NAME" => "APP_NAME"

            "SUB_SYSTEM" => "SUB_NAME"

        }

        log_key_name => "message"

        timestamp_key_name => "@timestamp"

        is_json => true

    }

}
Configuring Your Firewall for Syslog
Each firewall interface has a slightly different way to configure log forwarding. However, they all follow a similar pattern. We are going to run through configuring log forwarding on a PFsense firewall as an example of what to expect. Log forwarding is extremely common and most firewall vendors will provide details for the configuration of log forwarding in their manuals.
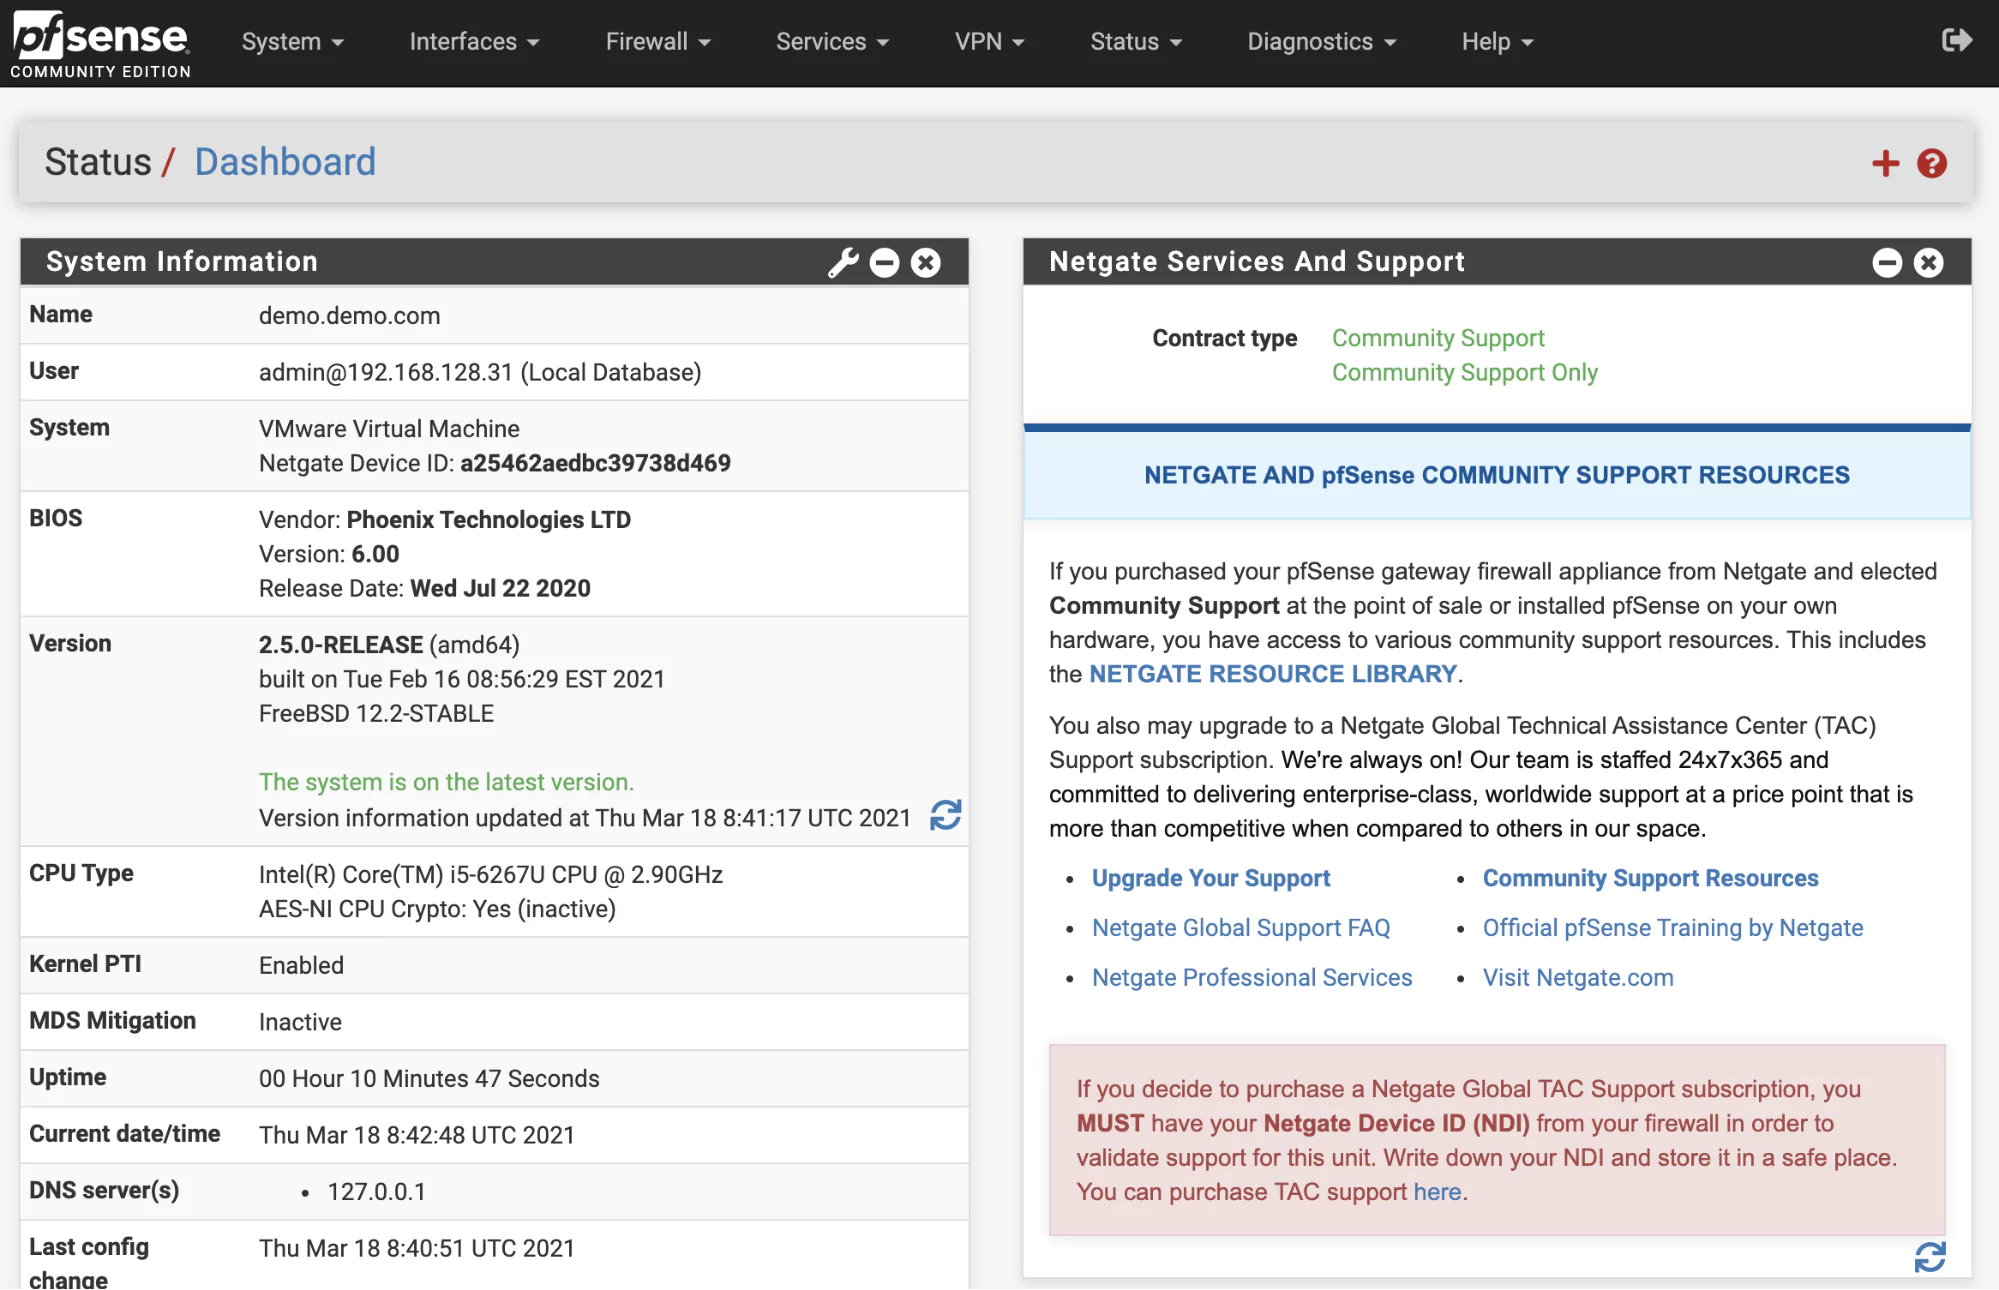
On a PFsense firewall, the first step is to get logged into the firewall management interface. PFsense has a web interface that is accessible on the LAN interface. Once logged in your screen should look like this:
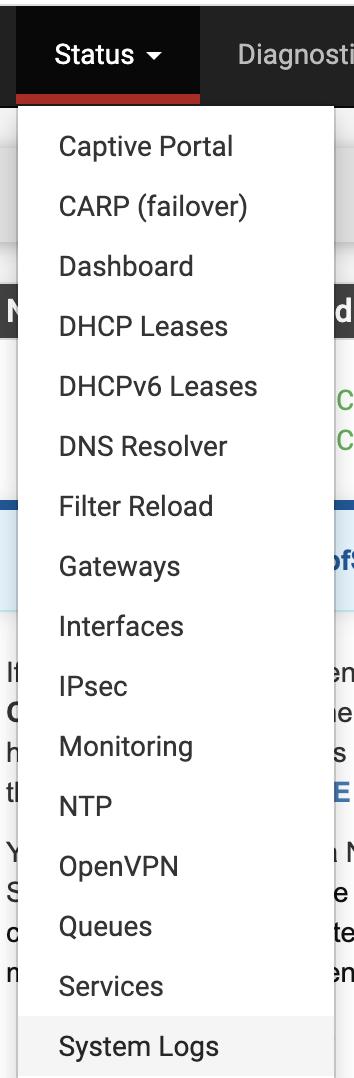
To set up log forwarding select status and then system logs:
On the system logs page go to “Settings”. On the “Settings” page scroll to the bottom and enable “Enable Remote Logging”:

Here we can configure how logs will be shipped to Logstash:
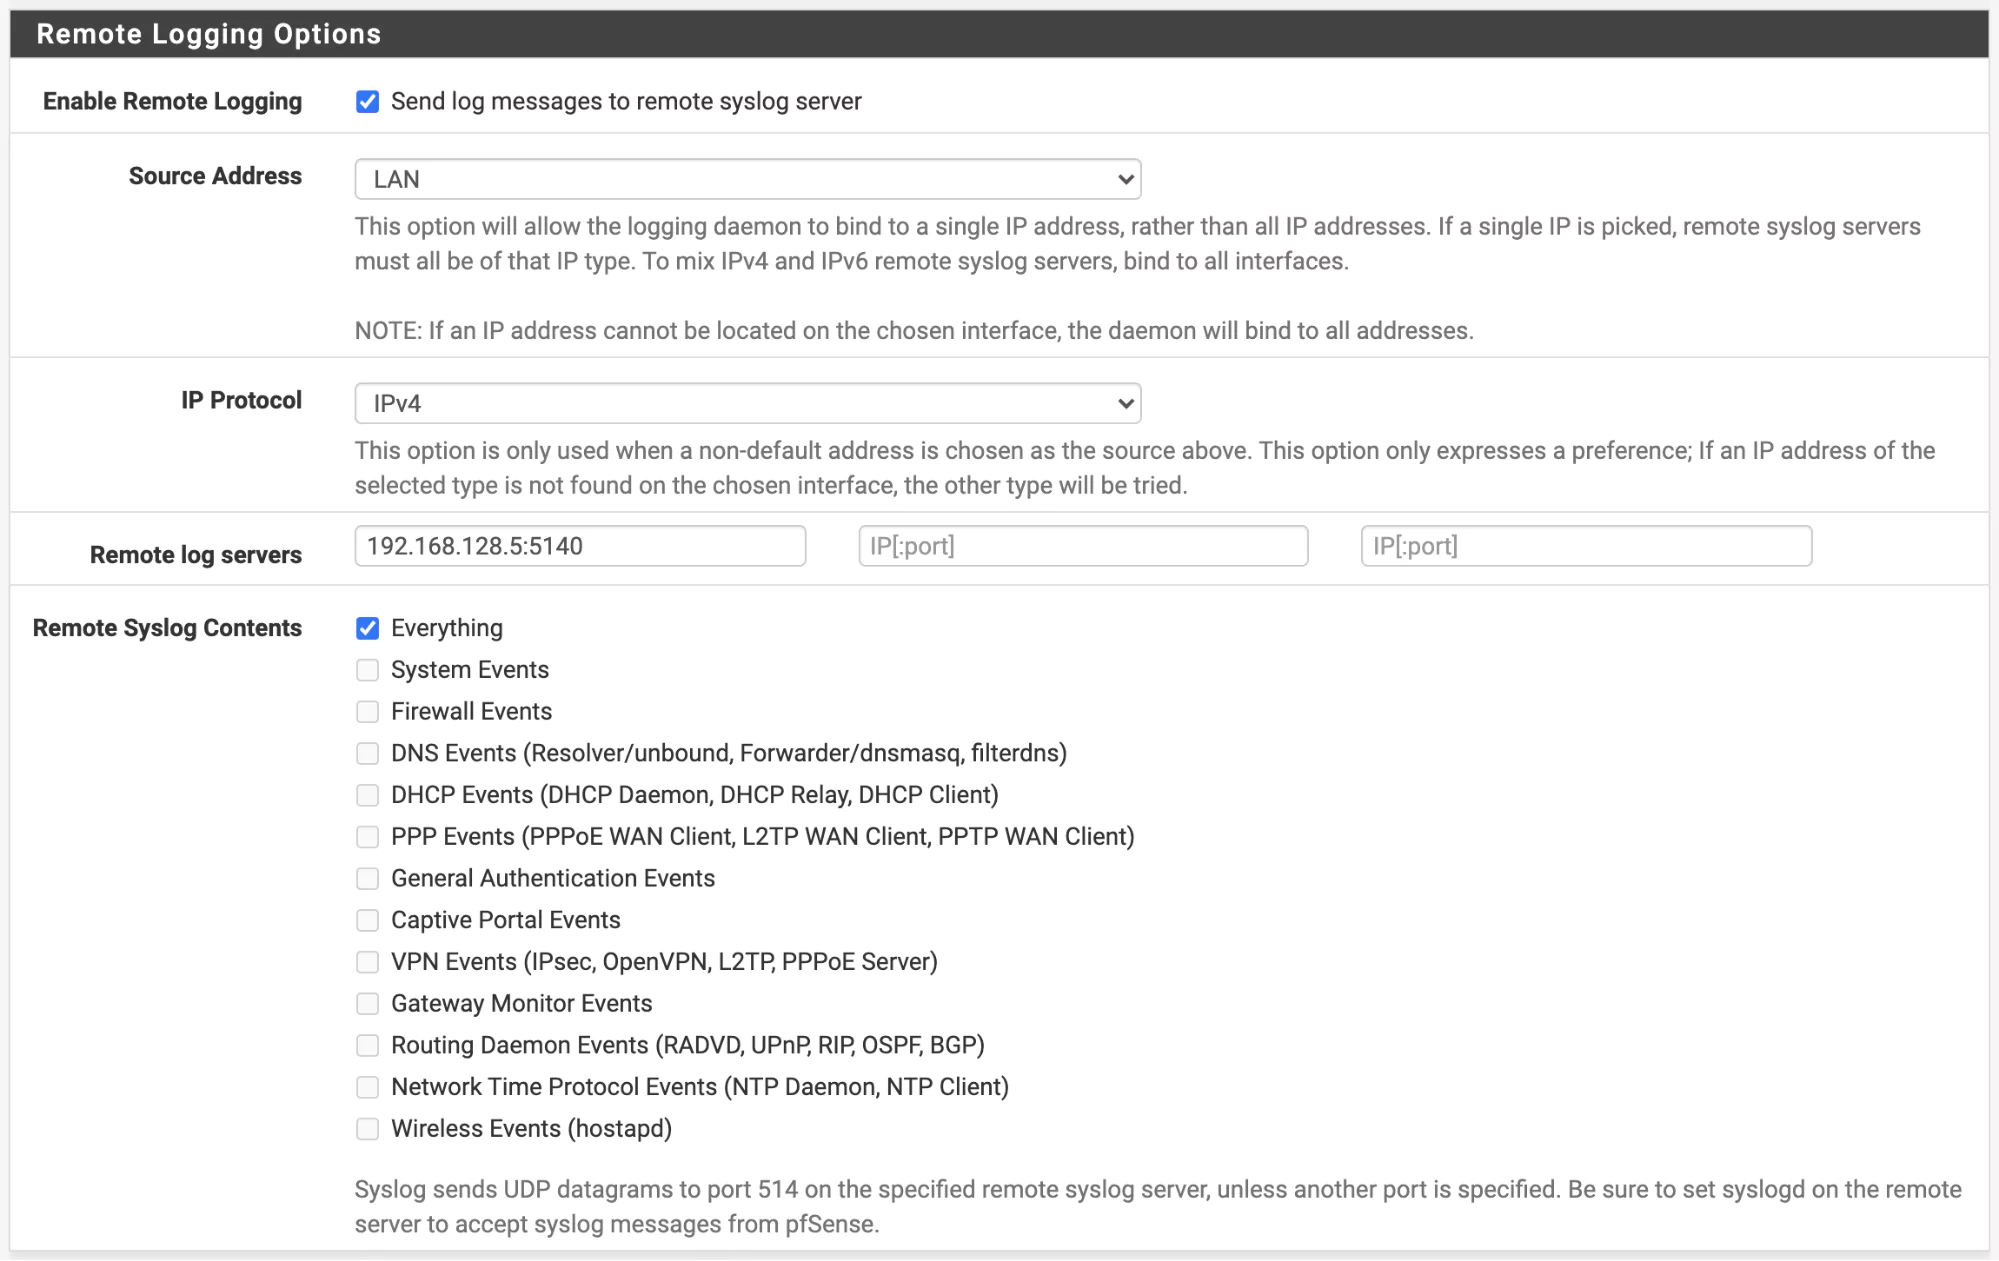
In the above configuration, we are shipping all logs to the server 192.168.128.5 on port 5140. This is the same as the configuration we deployed to our Logstash server. Once this has been enabled, save and your logs should start shipping to Logstash.
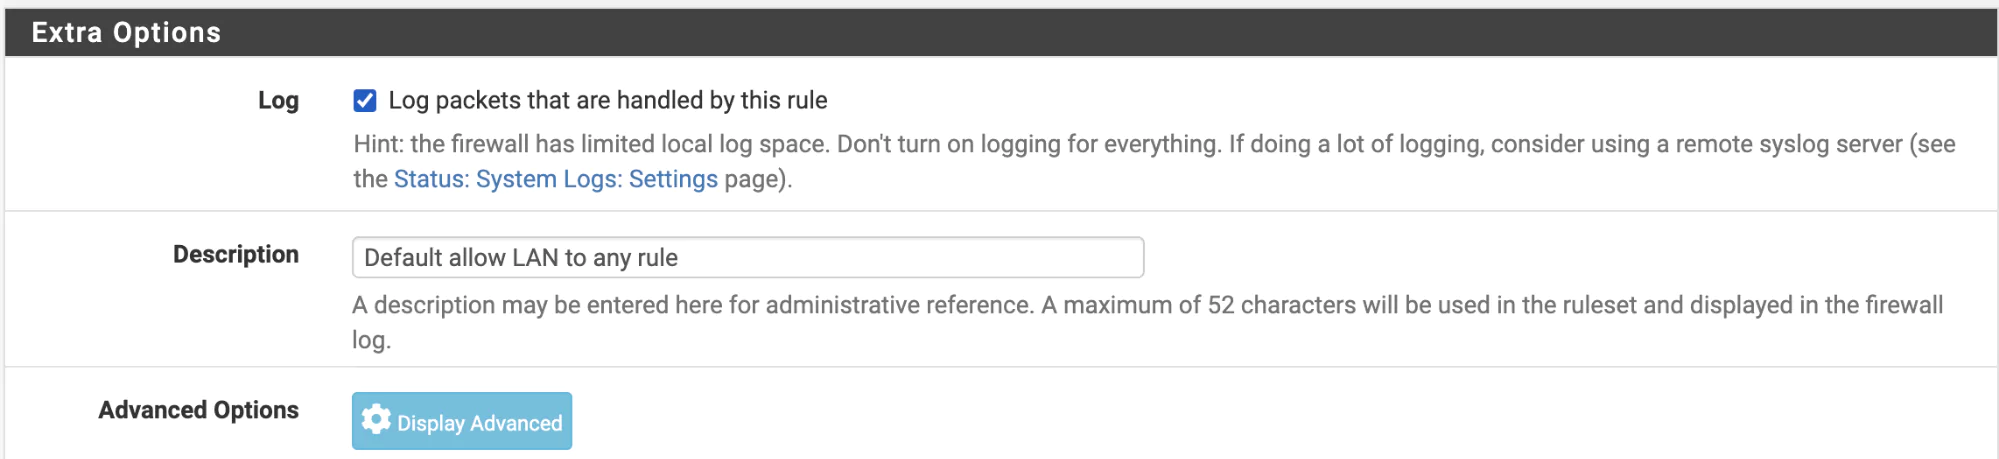
You may need to configure what happens with firewall rules. For instance, do you wish to ship all firewall rule events or just block events? On a PFsense firewall these are configured on each rule as below ‘Log – Log packets that are handled by this rule’:
Visualize Your Data in Kibana
Now that we have data flowing from our firewall to Logstash and into Coralogix, it’s time to add some filters that enable us to transform data so that we can visualize and create patterns in Kibana.
Our first step is to address log parsing and then we can create some Kibana patterns to visualize the data. Filters can be made with GROK, however, Coralogix has a log parsing feature which enables you to much more quickly and easily create filters to manipulate the data you ingest.
Log Parsing
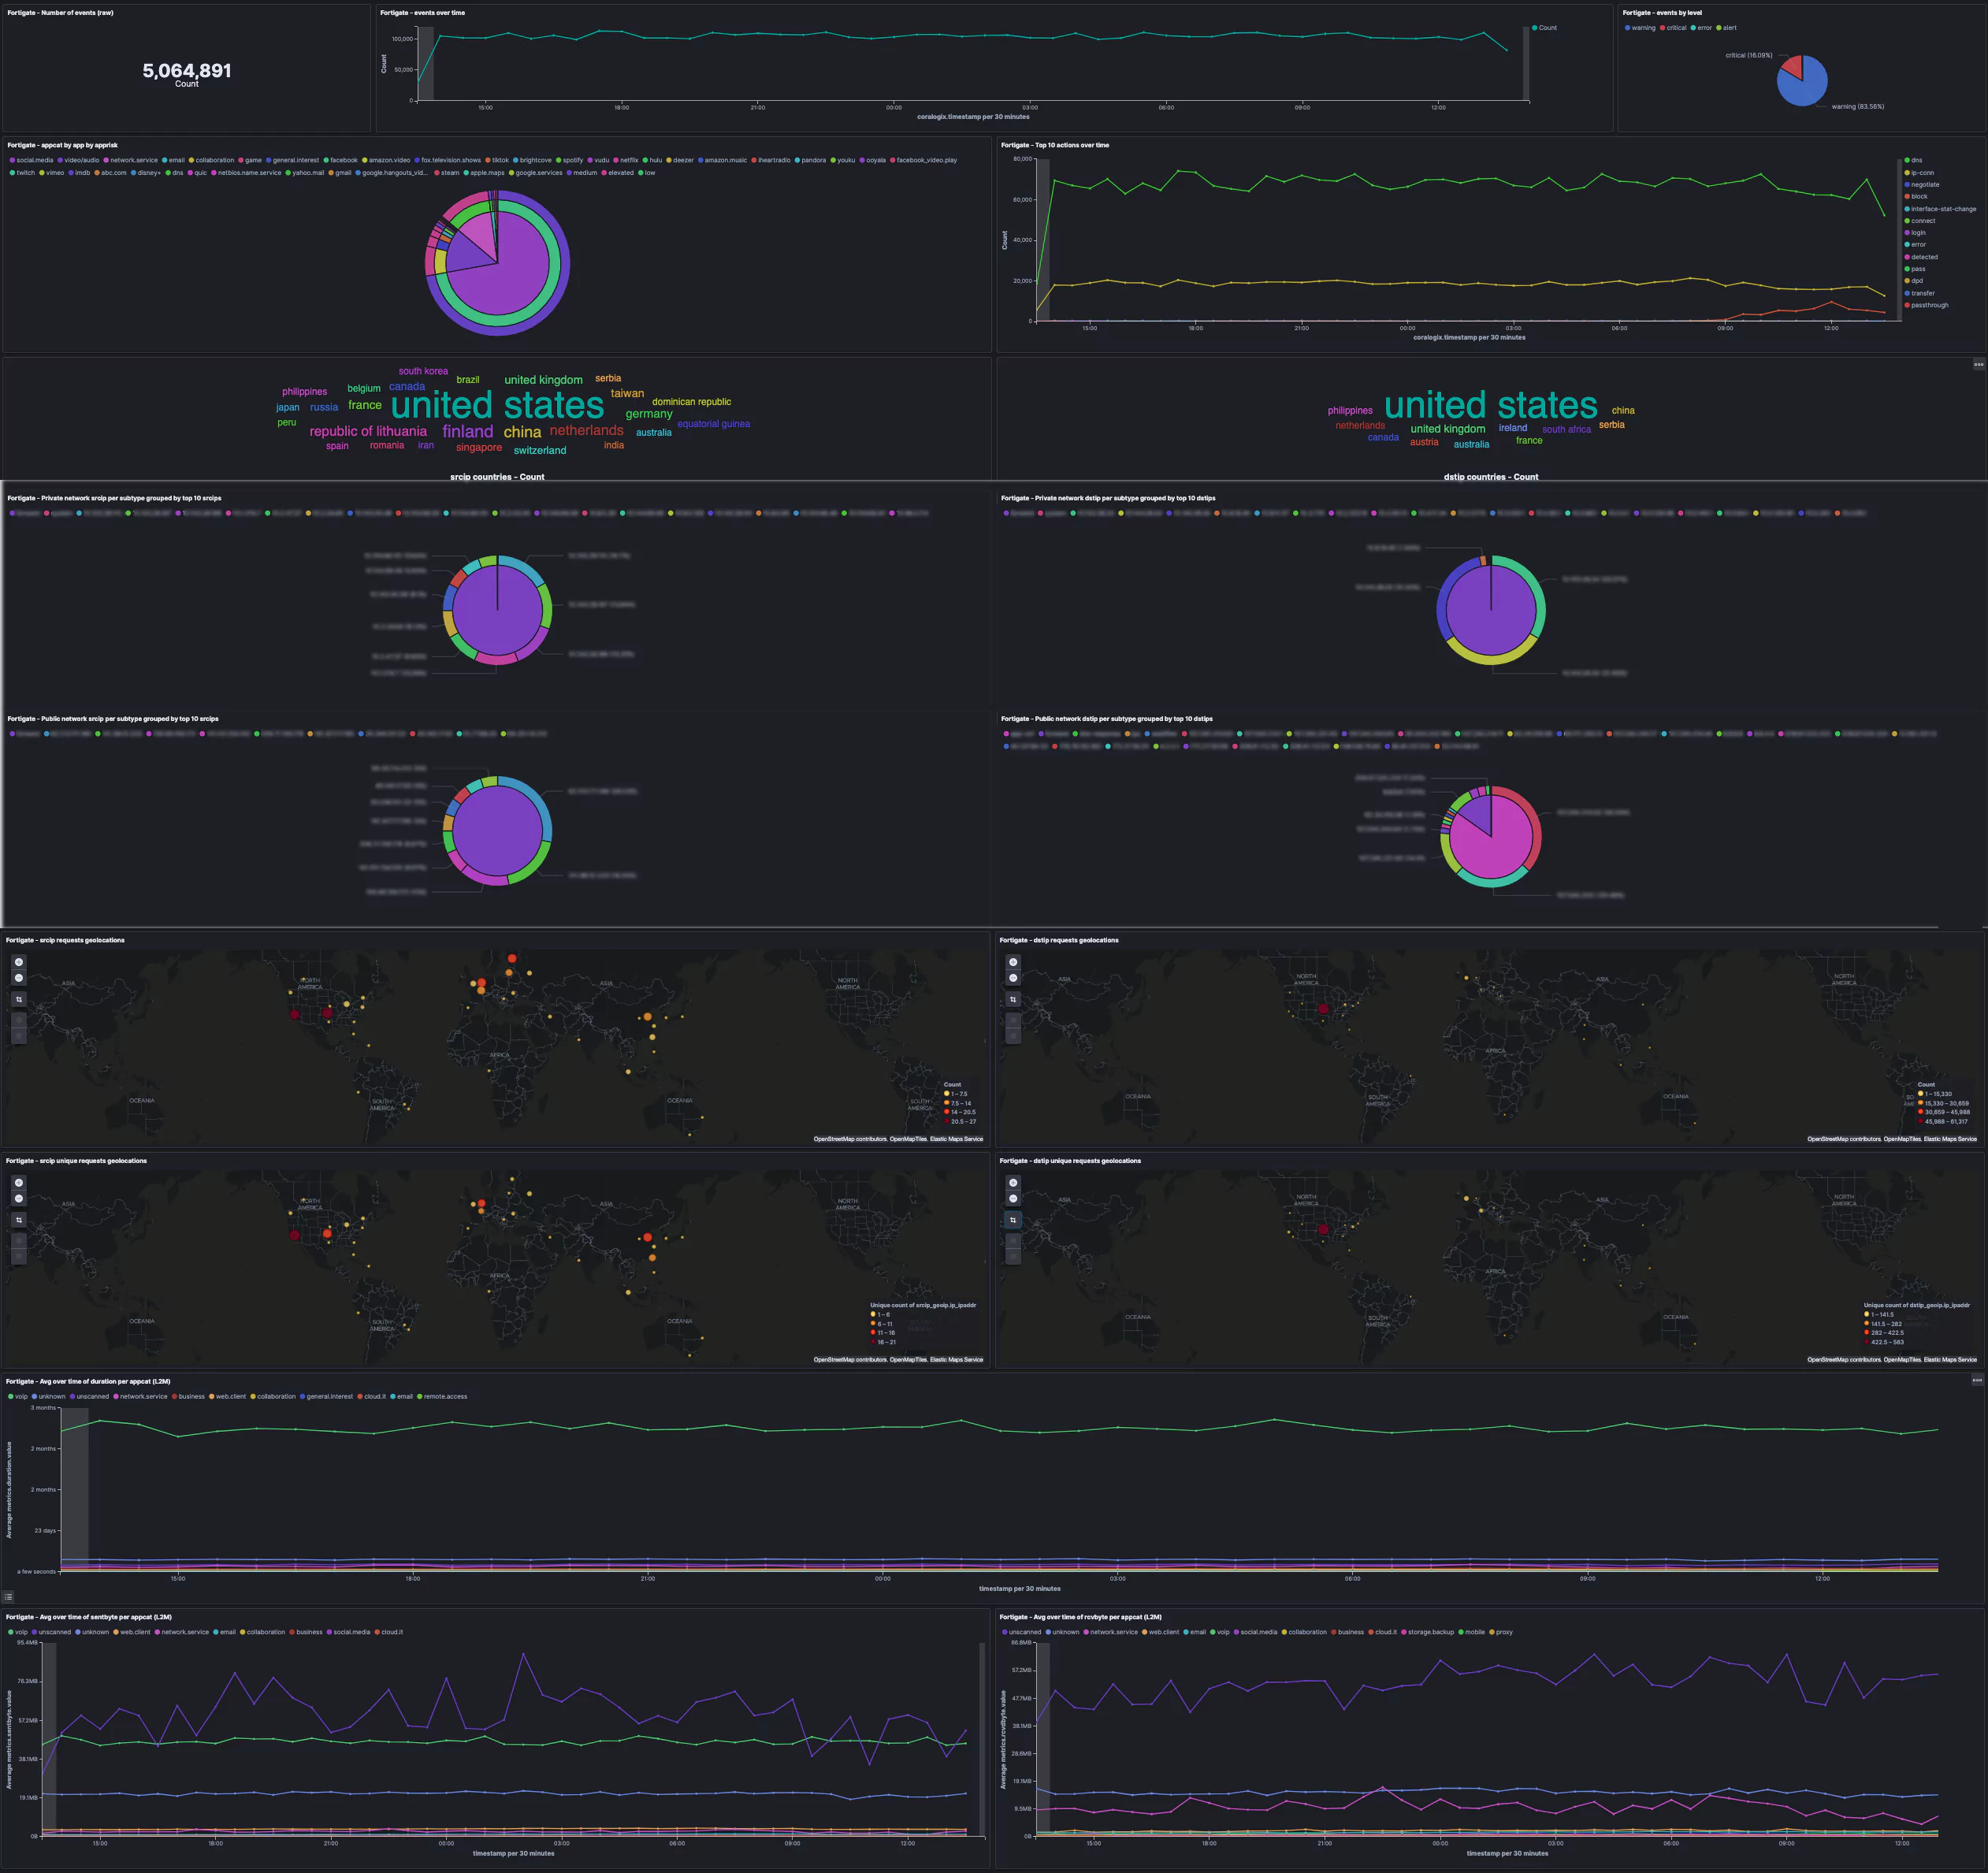
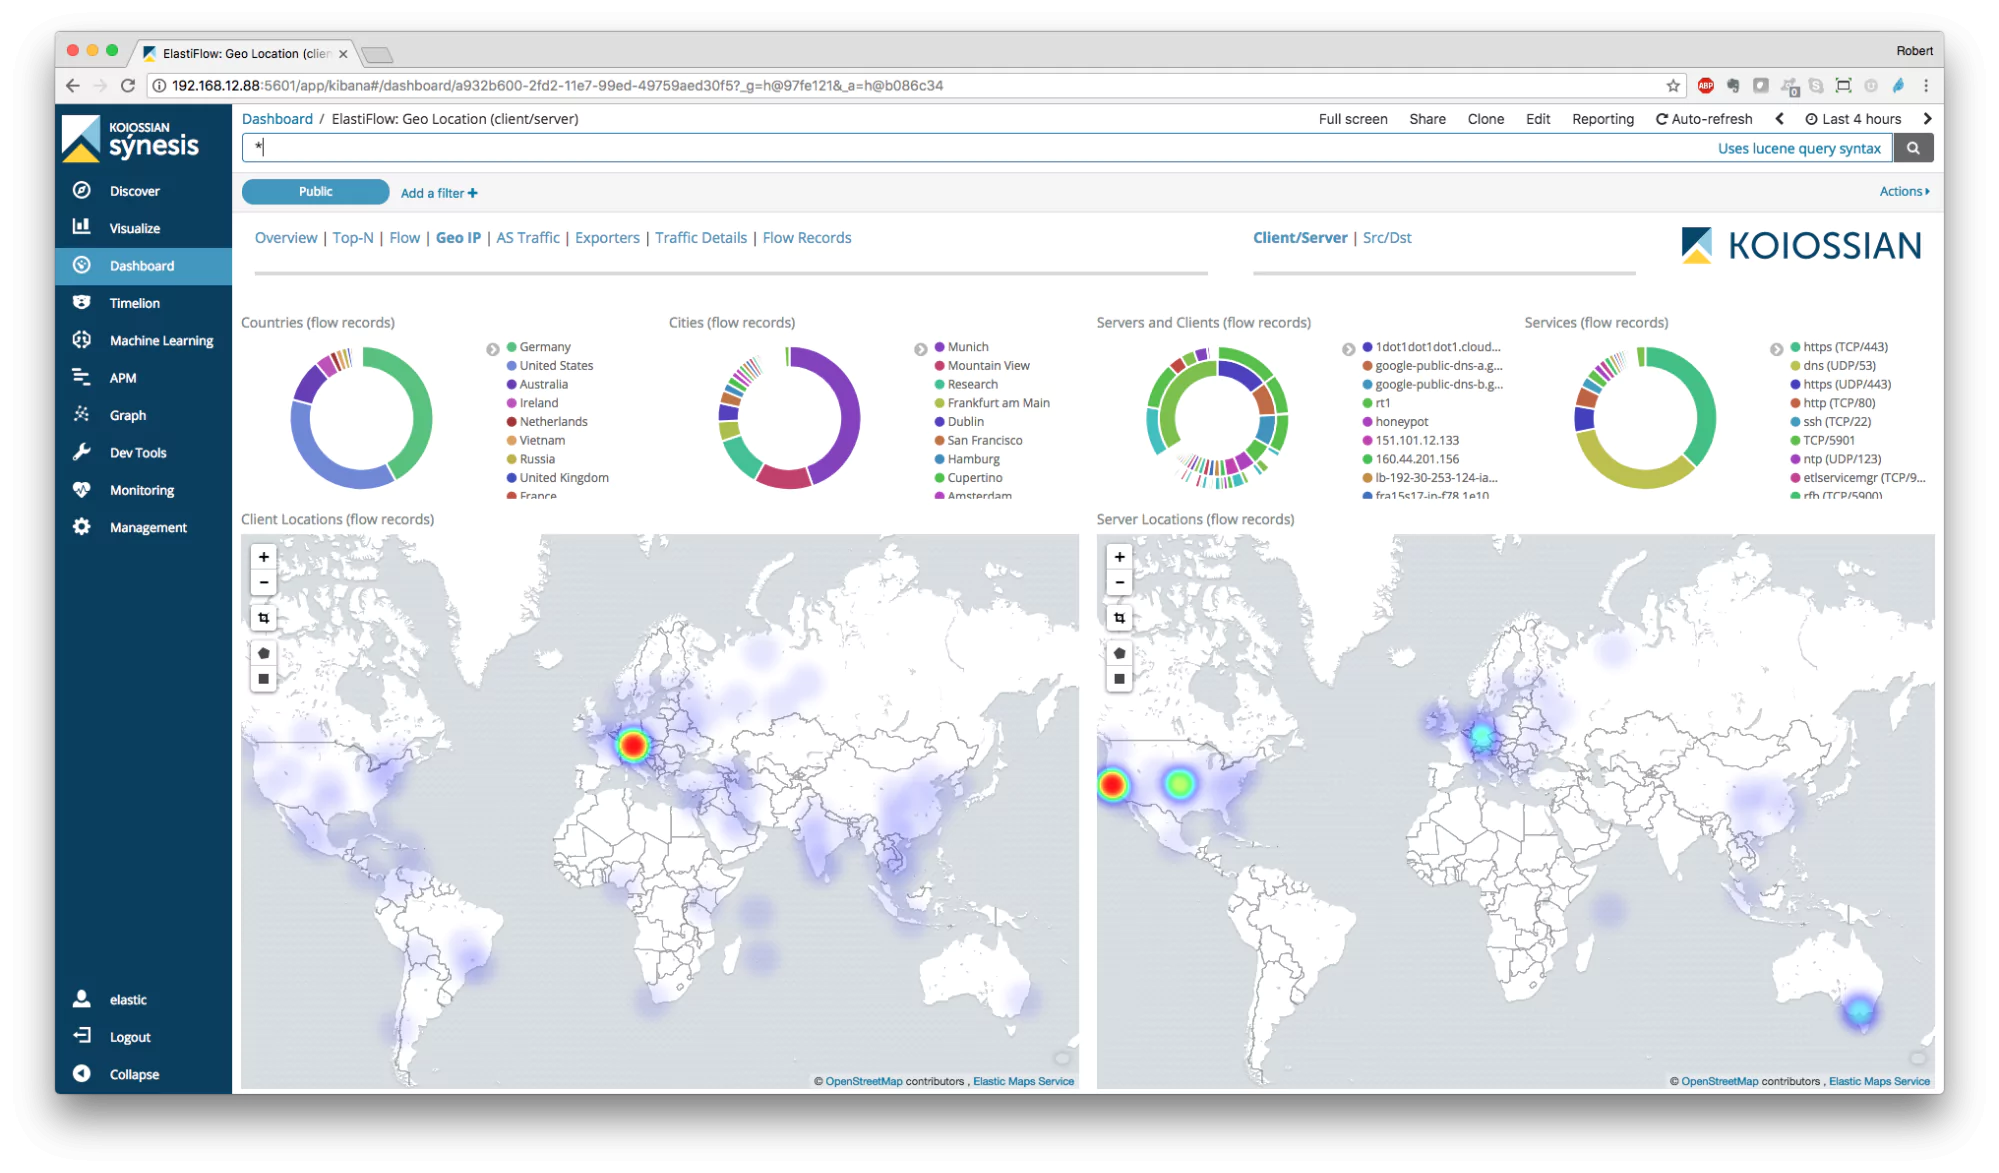
Firstly, let’s uncover what log parsing rules are. A log parsing rule enables Coralogix to take unstructured text and structure it. When we complete this conversion, we are then able to assign how the data is structured. For example, we can extract source IP addresses, destination IP addresses, the time, and the action. With this data we can then create dashboards like the below:
The value of being able to process, parse, and restructure log data for firewalls is that you can design data structures that are completely customized to your requirements and business processes. Firewalls generate a large number of logs that contain a wealth of data. However, the sheer volume of data means that it’s impossible to manually review your logs.
Using a platform like Coralogix enables security engineers to quickly visualize data and ascertain what is happening on their network. Also, it’s important to keep this data retained so that in the event of a security event, the security team has the data required to review what happened and remediate any concerns.
Let’s quickly explore how easy it is to create a rule in Coralogix. Once inside Coralogix, click on Settings, and then Rules:

You will be presented with the different rule types that can be designed:
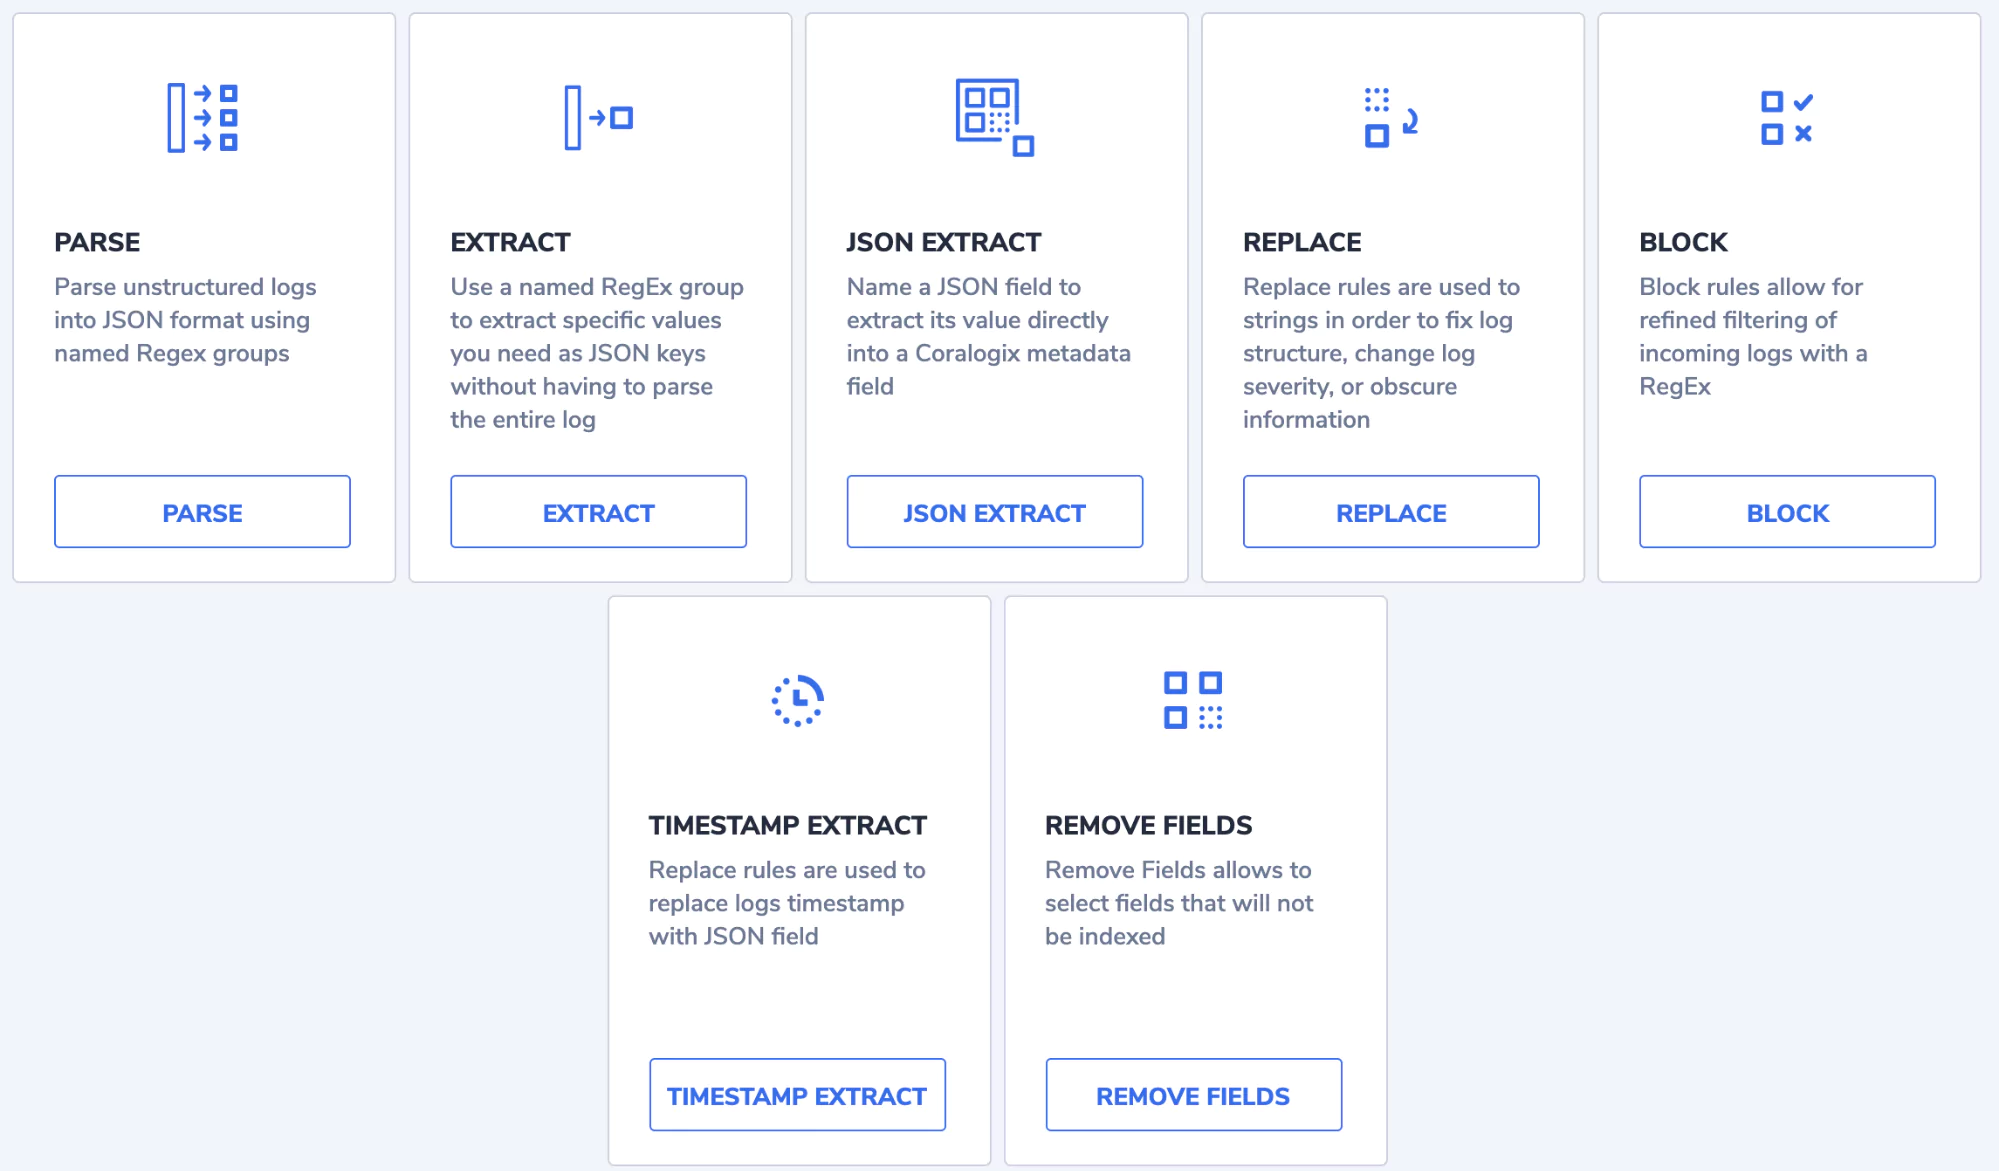
You will note it’s easy to select the right rule type for whatever manipulation you are looking to apply. A common rule is to replace an incoming log. You might want to match a pattern that then sets the severity of the log to critical or similar. If we take a look at the replace rule we can see just how easy it is to create.
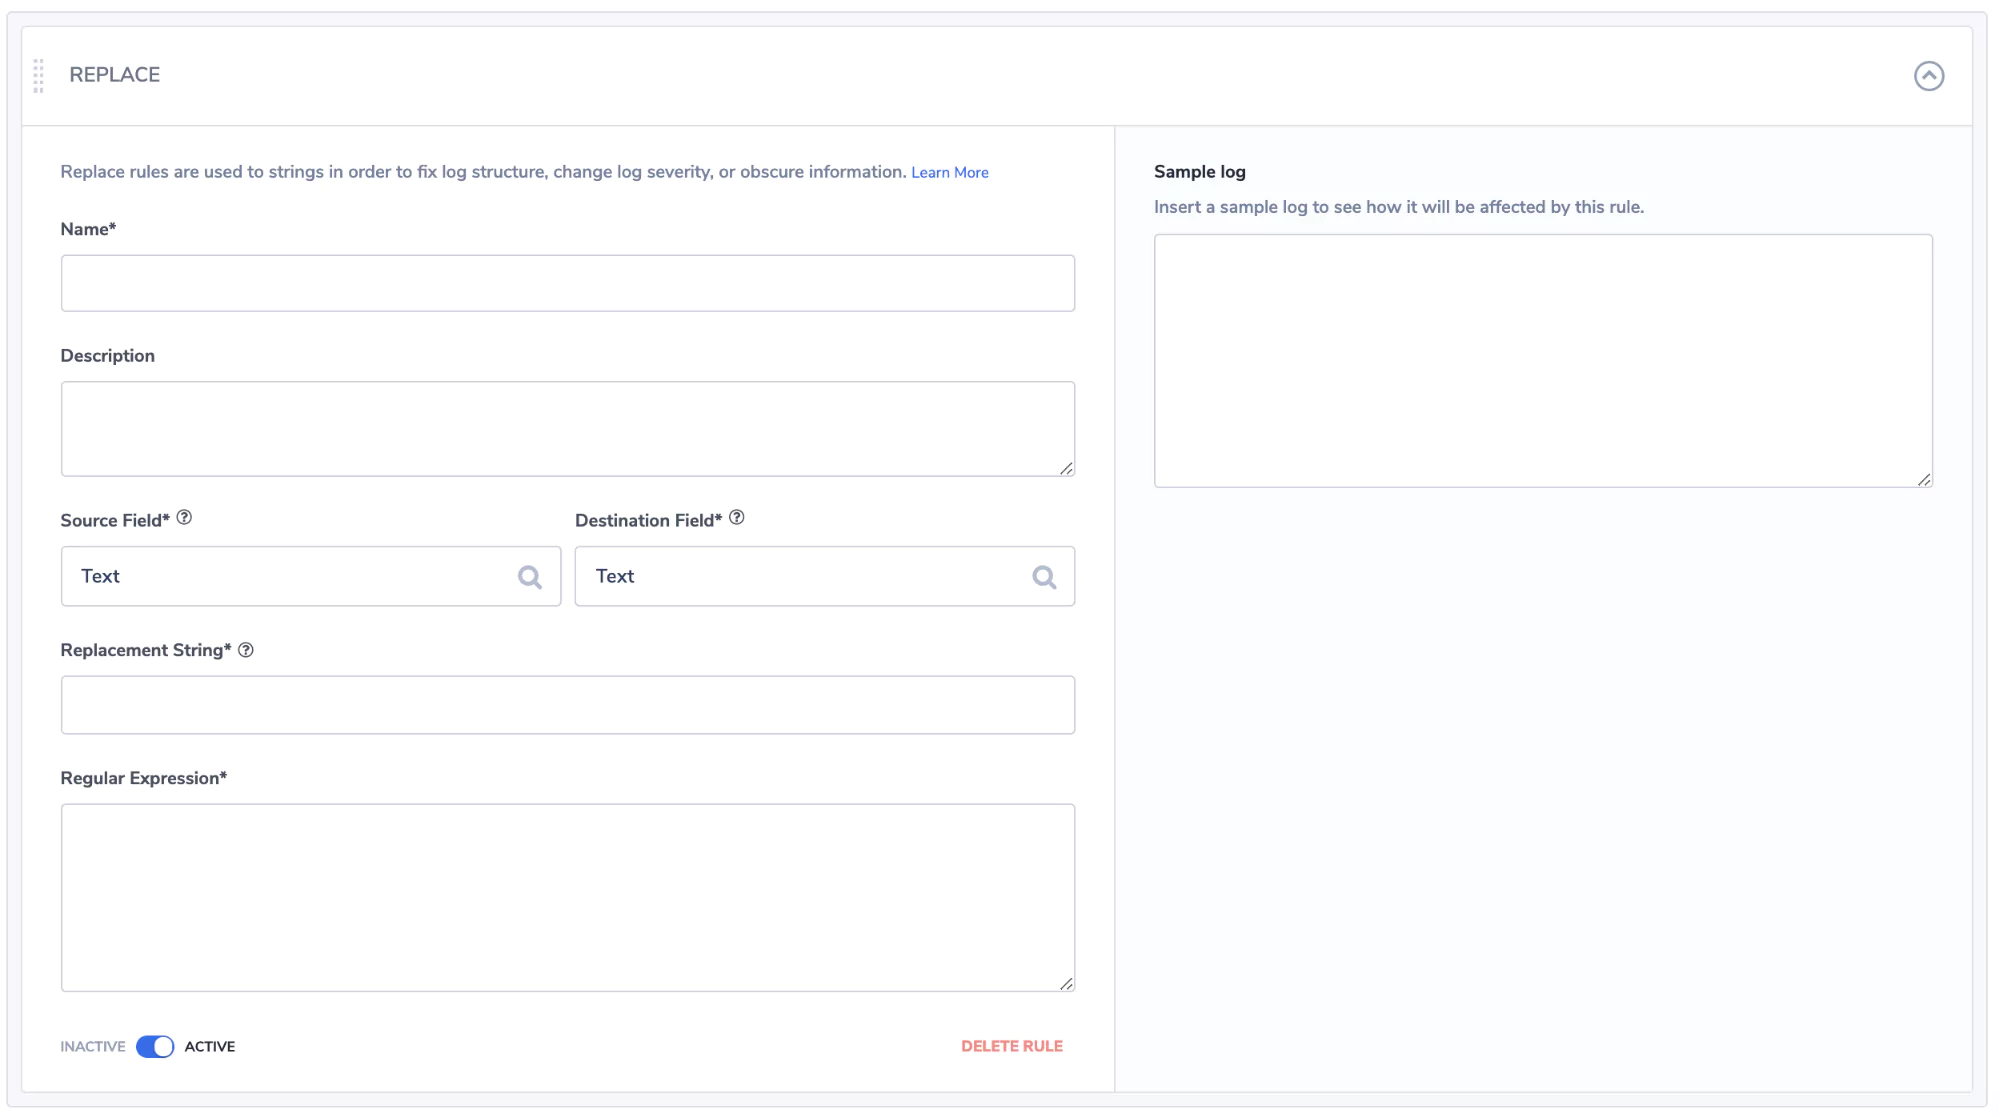
We give the rule a name:

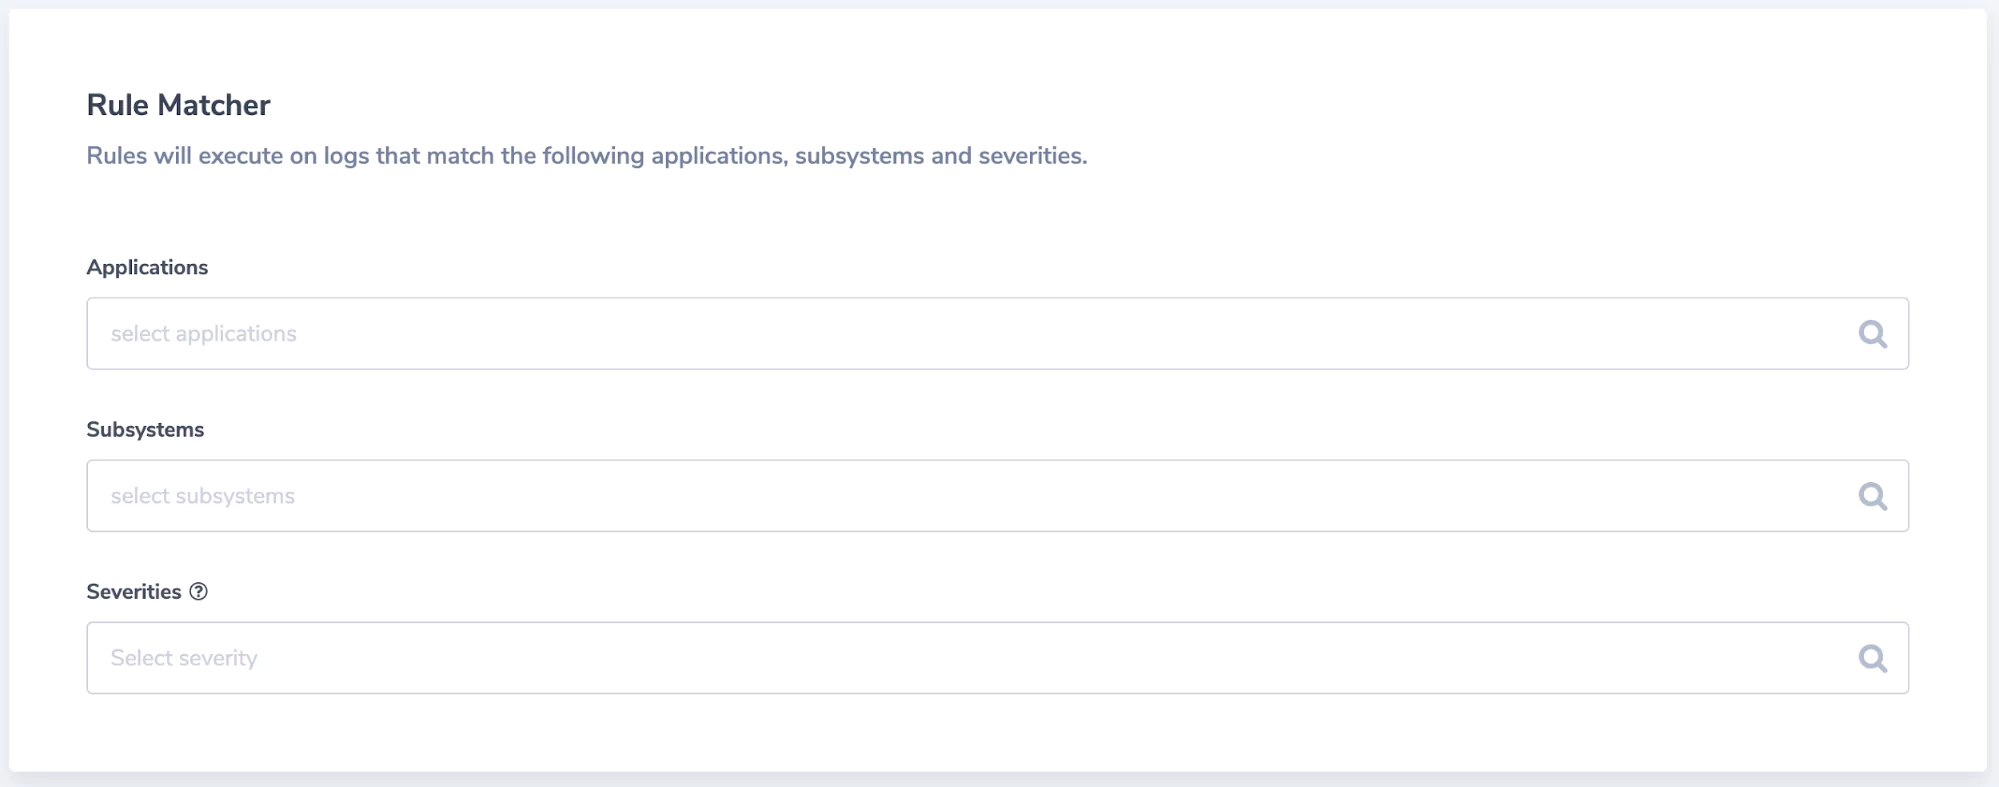
We create a matching rule, to locate the logs we wish to manipulate:
Finally, we design what is going to be manipulated:
You can see just how easy Coralogix makes it to extract and manipulate your firewalls logs. This enables you to create a robust data visualization and security alerting solution using the Coralogix platform.
It’s worth noting GROK patterns are also used in Logstash before the data hits Coralogix. Coralogix has a tutorial that runs through GROK patterns in more detail. It makes sense to just forward all of your logs to Coralogix and create rules using the log parsing rules, it’s much faster and far easier to maintain.
Creating Index Patterns In Kibana
Now that we have manipulated our data, we can start to visualize it in Kibana. An index pattern tells Kibana what Elasticsearch index to analyze.
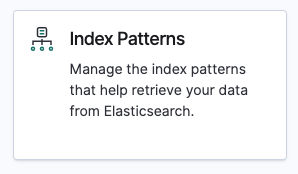
To create a pattern you will need to jump over to the Coralogix portal and load up Kibana. In there click on Index Patterns:
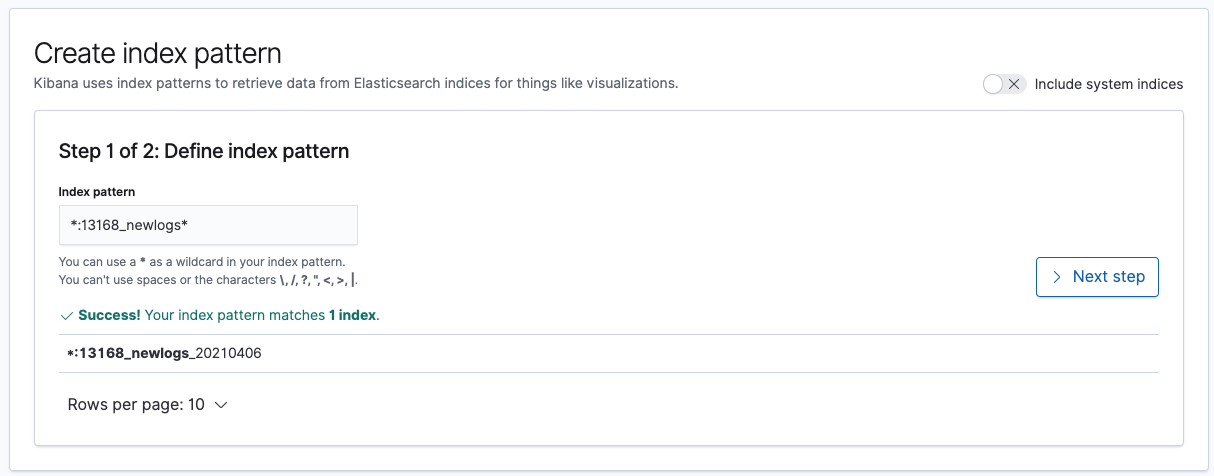
An index pattern is created by typing the name of the index you wish to match, a wild card can be used to specify multiple indexes for querying. An example *:13168_newlogs* will catch any indices that contain 13168_newlogs. Click next once you have matched your pattern.
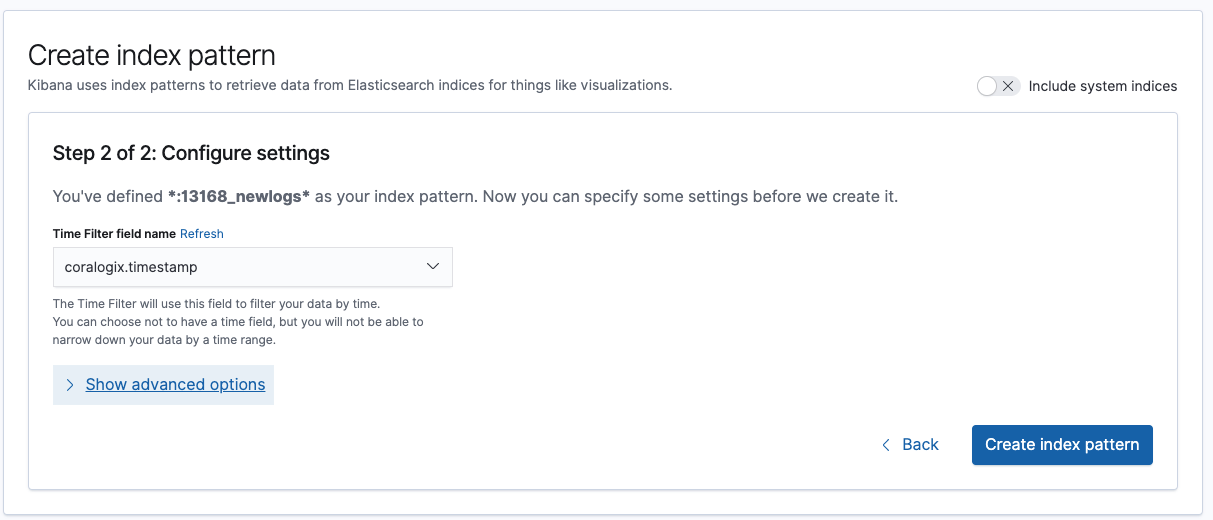
Finally, we need to configure where Kibana will identify the time stamp for filtering records. This can be useful if you want to use metadata created by the firewall:
Now you have the data all configured, you can start to visualize your firewall logs in Kibana. We would recommend checking out the Kibana Dashboarding tutorial to explore what is possible with Kibana.
Conclusion
In this article, we have explored the value of ingesting firewall logs, we have uncovered the large wealth of data these logs contain, and how they can be used to visualize what activities are taking place on our networks.
Building on what we have explored in this article it should be clear that the more logs you consume and correlate the greater the visibility. This can assist in identifying security breaches, incorrectly configured applications, bad user behavior, and badly configured networks – to name just a few of the benefits.
Coralogix’s tooling, like log parsing, enables you to ingest logs and transform them into meaningful data simply. Now you are armed with the knowledge, start ingesting your firewall logs! You will be amazed by just how much you learn about your network!